Archive for the ‘My Time Made Easy’ Category
With Love: Preview 1
Jan 4, 2013 Author: mytime | Filed under: Cards, Home decor/3-D items, My Time Made EasyHappy New Year everyone!
Everyone at My Time Made Easy would like wish you a happy, healthy, creative and prosperous year to come. I’d like to thank you for your business, as I truly appreciate each of you. I also want to thank my entire team for their hard work, sharing their time and talents as well as their dedication over the last year. They really inspire me personally, with their ideas for use of our new products, and I hope you feel the same.
I look forward to this upcoming year of creativity!
Our previews for the January release will begin today, on the 5th, with our release being on the 7th. Hope you will join us as we kick off the new year with some inspiring ideas!
Today you can find the latest ideas using our *NEW* products by visiting the following designers:
Just a Gift
- Lauren Meader <—you are here
With All My Heart
Clam-ped Shut
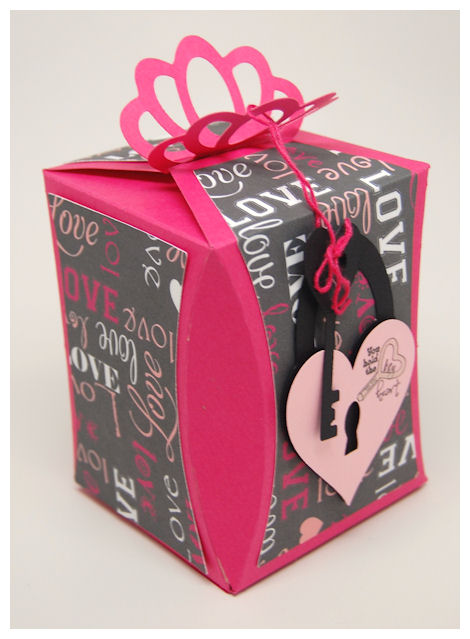
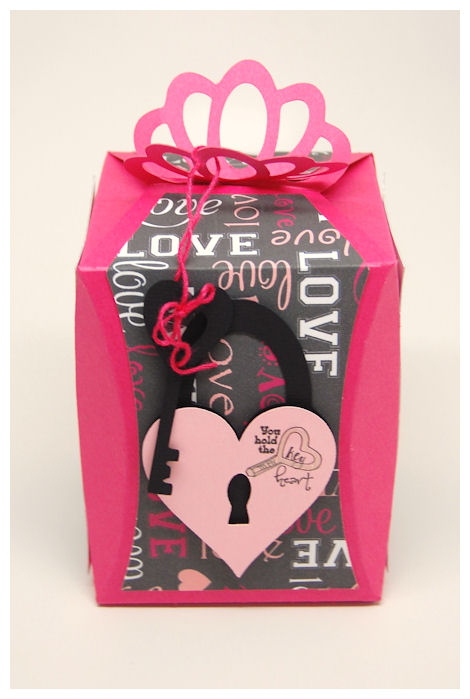
SO today I personally am sharing a new gift box called Just a Gift!
Available in PDF, SVG, GSD, DXF, WPC
Completed Project Size:
4 1/4 Inches Tall
3 1/4 X 3 1/4 Inches Wide
Sometimes we just need a box for that special gift. Look no further! This is literally the perfect gift box, as it takes the ordinary box, and makes it extraordinary!
I created this box quite some time ago, so while the Just a Gift! is NEW the items I used to decorate are available NOW!
Here is used the perfectly pretty printed sheet from the Amour © paper collection to decorate the box.
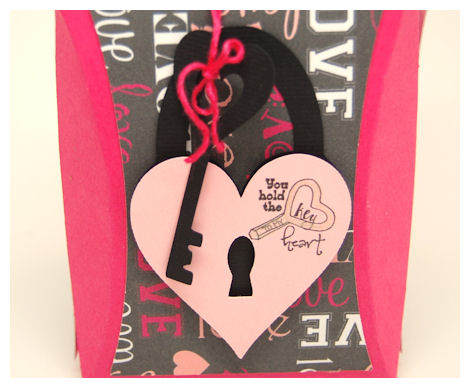
I added a lock & key from the Under Lock & Key © cut file. Printed onto the lock I used the sentiment from the super cute Wound Sentiments © set.
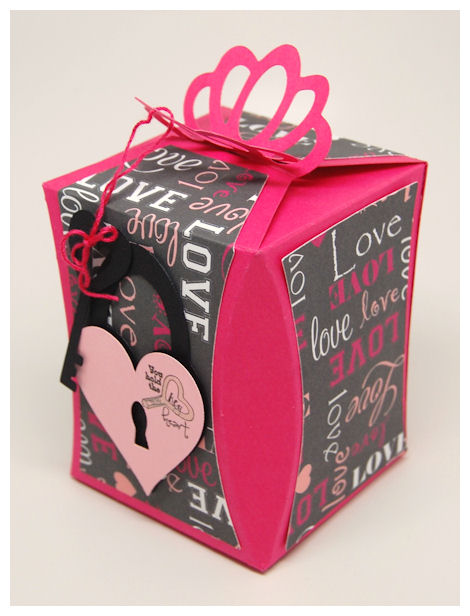
This gift box has some fun folds, and unique angles that are easy to assemble, and make it the perfect gift it itself.
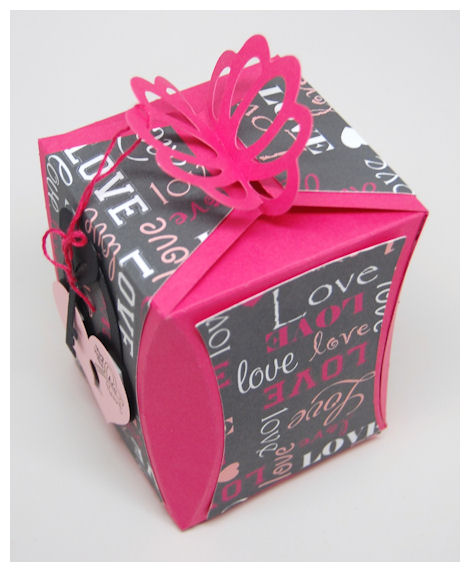
Want to know what makes it even MORE perfect? It comes complete, topped with a bow!
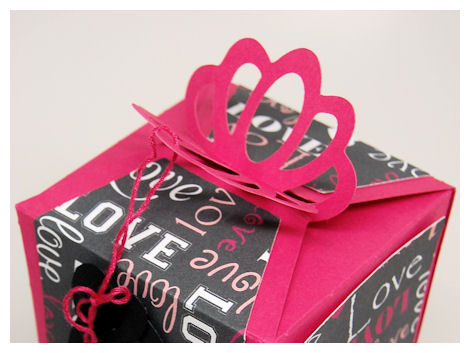
I love how perfectly simple it is to make but yet quite different.
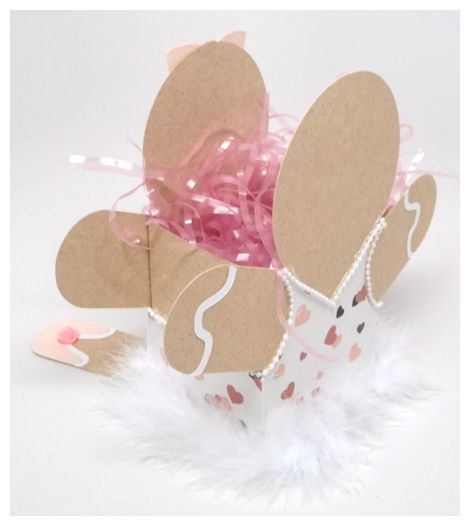
This is how it opens up…
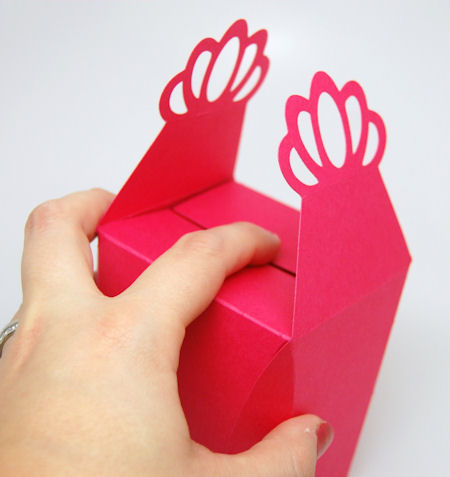
Easy peasy!
You could put a variety of items in here for any occasion. Perfect to celebrating any time of year when you want to give a GIFT! Don’t forget super cute table centerpieces! You can tier balloons to it, use them as party favors…whatever you want.
Speaking of celebrating…we aren’t done yet! We have several days left of creative ideas and new projects with our latest NEW items for our January 2013 Release, so come back tomorrow!
NEW! Gingerbread Box
Dec 12, 2012 Author: mytime | Filed under: Home decor/3-D items, My Time Made EasyHappy Holidays everyone!
I’m excited today because I get to feel filled with the spirit of the holidays, as I pass on the amazing feeling of giving! To all of you who stop by to visit my blog, and shop in my store at My Time Made Easy ™ LLC, I am offering a NEW! template called Gingerbread Box ©.
This new template will be FREE until December 25th using coupon code: GINGERBOXGIFT
This coupon code is only redeemable for the Gingerbread Box ©, and is only valid until December 25th. This template will be available after Christmas for $5.
I think you will fall in love it, and it will really help you make those holiday gifts this year. If you’ve never made anything before then this is the time to give it a try.
So without further delay, here are the details!
Gingerbread Box
Available in PDF, SVG, GSD, DXF, WPC
Completed Project Size:
Box Portion Only
2 3/4 Inch Deep
3 Inches Wide
3 3/4 Inch Tall
Looking for something simply sweet to package up your gifts this holiday season? Then this adorable Gingerbread Box is about to spice up your holidays! Fashioned after our Gingersnap’s Pretty Impressions Stamp Set, Comes complete with all the pieces you need to make this into your own Gingerbread “cookie”.
I’m certain this gingerbread box will become the perfect holder for any treat you want to package!
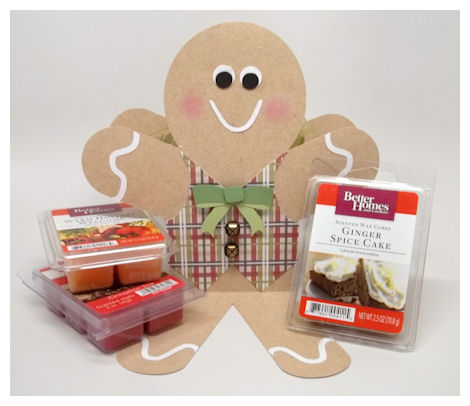
Here I used some scented candle wax cubes ($1.88 each in store) for those Scentsy like candle warmers!
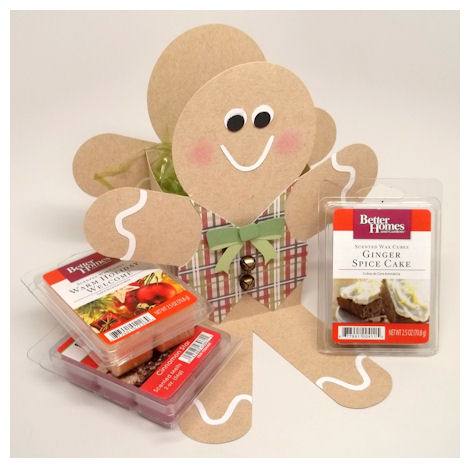
I have Ginger Spice Cake, Cinnamon Stick and Warm Holiday Welcome.

All 3 packages fit perfectly inside here and make a “scent-sational” gift any time of year.
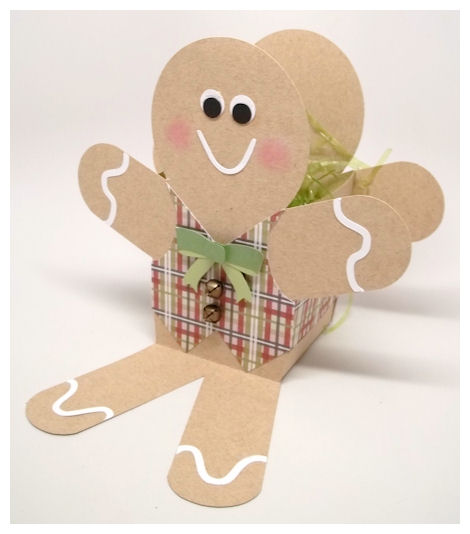
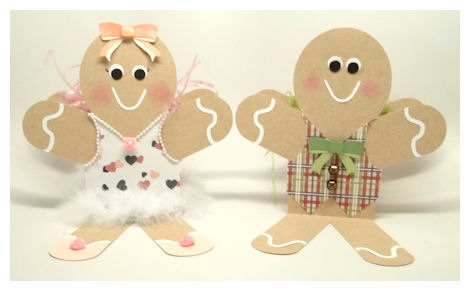
I used all the “frosting” pieces to decorate my gingerbread man. The vest from the template, was cut using the Timeless Tradition © paper collection. It is perfectly complete with the paper bow, which also comes with the template.
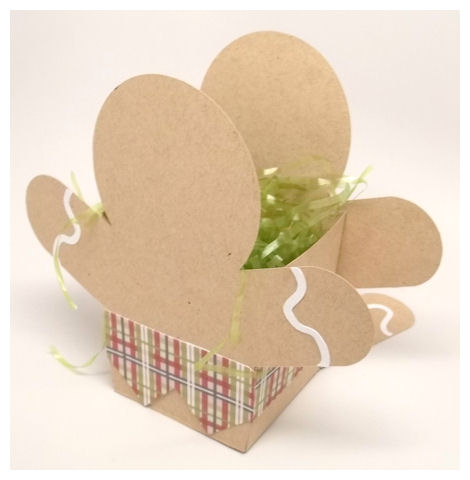
For the back I re-cut another vest, then just cut off the top of it to look like it wrapped around.
Now if you like something a little more “girly”, then look at this:

Ginger-ballerina
Is she not adorable?! Don’t you love the ballet slippers? Another layer option included with this template.
Instead of cutting the VV on the vest bottom, I left it plain and made a full tank top.
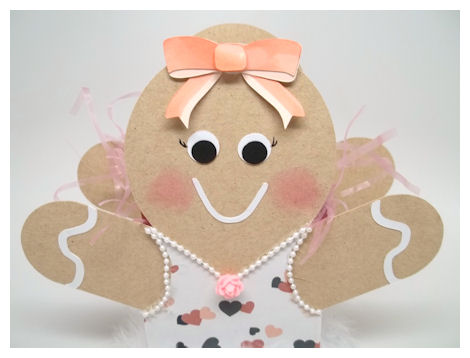
The bow that was on the vest V neck, was created and placed onto the top of her head. I added some eyelashes with a marker.
I placed some pearl trim around the top, and some marabou around the bottom to create the tutu.
The heart paper you see is from an upcoming paper collection called BFF Valentine, releasing on January 7th.
I had made this for my daughter Alexa’s friend at Dance. She takes Hip Hop & Jazz. They each need to bring a gift that costs $5 for a Secret Santa Swap. We picked out this super cool set of 3 nail polishes that come with nail stencils.
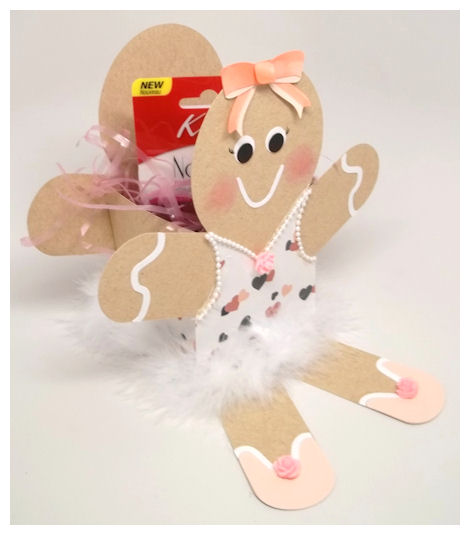
Plain on their own, but added to the Ginger-ballerina, much more exciting!
You can use any of our digital images as well to further transform this box into almost any character/animal you want.
Will a few embellishments, and a little creativity this adorable box can also become a Snowman, Santa, Elf, Penguin, Bunny, Teddy Bear, Monkey, Dog, Cat, Raccoon, Skunk, Gnome, Boy or Girl Doll, Witch, Mummy, Frankenstein, Dracula…you get the idea!
So Happy Holidays from all of us at My Time Made Easy ™ LLC and thank you for your business!
From Coffee to Candles…
Dec 9, 2012 Author: mytime | Filed under: Home decor/3-D items, My Time Made EasyHappy Holidays!
Yes, I am posting during a non-release week. Shocking I know! I do miss blogging and wish I had MORE time but owning my own company, designing the products, creating the samples, taking photos, writing up descriptions, managing a team etc is just a few of the work related “to do’s” that I have to do on a daily basis, on top of running a home and family (which will always be my #1 priority) keeps me busier than I ever imagined. But, I had a moment today and thought I’d share another project I have yet to show you all.
I’m really enjoying the holiday season this year, as the most “stressful” part of the holidays for me is over-my shopping and gift making!
I was done this year before Thanksgiving and it felt SO good to get ahead. I now get to sit back and enjoy my family. We have several traditions each year that I look forward to like getting hot cocoa and going to see the Festival of Lights, Breakfast with Santa, the annual Make A Wish Holiday Party, baking cookies for Santa, Cookie Swap amongst friends, making new holiday ornaments (my trees is ALL homemade ornaments from the kids, or special ornaments from family) to name a few!
I always make as many handmade gifts as I possibly can, and this year is NO different. I usually start in August 😀 and finish the first week of December depending on what I’m doing. This year I’ve made ton’s of stuff, all in which you’ve seen here, and some you have yet to see because they are TOP SECRET yet to be released items, but all ready to be gifted to someone NOW 😀
One of my favorite gifts in a snap uses the Oh-K Dokey © cut file!
Pepprmint Mocha K-Cup Gift
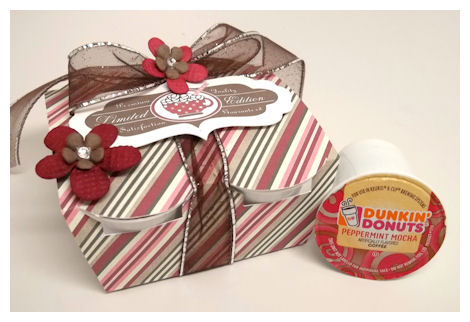
(For some teacher’s who I KNOW love this coffee/flavor)
Gift Cost $3.68 (K-cups cost $0.92 each)
Who doesn’t LOVE coffee, tea, or cocoa? Most people DO have a Keurig Coffee Maker by now, and if they don’t they need one! LOL! With its popularity I had designed a wrapper is the perfect gift when you want to simply “wrap” and share a little of something that you love!
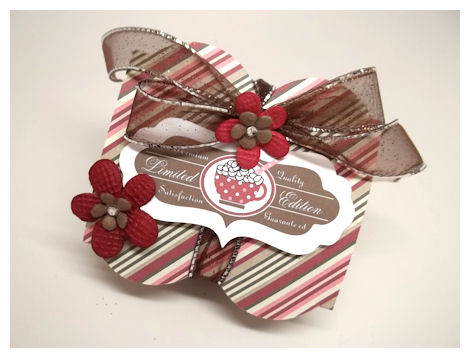
My label is from the Apothecary Labels © set, and I also combined it with the marshmallows, & stripe straw from the Grab a Cup © set, to create my cup as you see it.
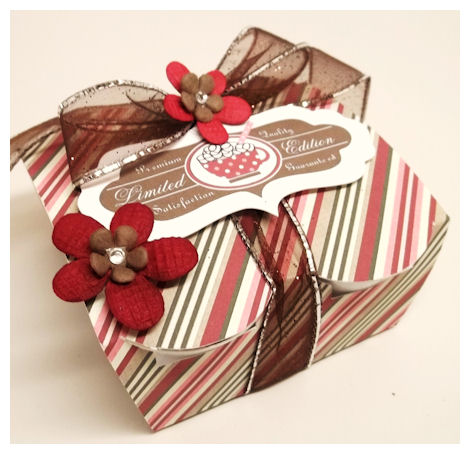
I used the pretty chocolate candy cane printed paper pattern from the Mrs. Candy Claus © paper collection.
This wrap is sweet and simple, and easy to whip up.
The best part is when you DO use digital images you can print/cut as many tags as you want, only taking the time to create the tag ONCE! I love that.
This is an adorable “wrapper” that was designed for wrapping up 4 of those simply sweet K Cups that are sold for use with the Keurig © brand coffee machines. The K cups come in a variety of beverages like coffee, tea, mocha, cocoa’s, lattes and chai!
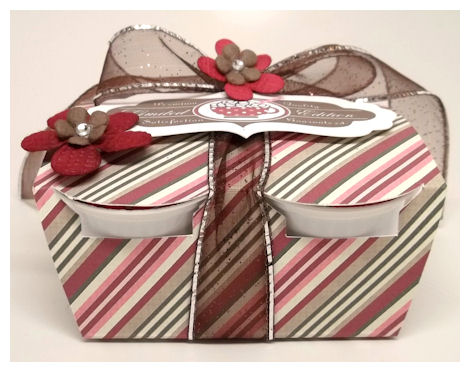
OR another FUN idea-when you are done using a K Cup, recycle it! Simply peel off the top, remove the filter (if there is one), wash and dry thoroughly, add adhesive to the edges, and fill with something else that is wonderful!!
Not a hot beverage lover? Well then this wrapper can also be used with a set of 4 Votive candles, tart warmers, Crystal Light drink mix cups (2 oz), 2 oz condiment cups, and even a set of 4 mini flower pots.
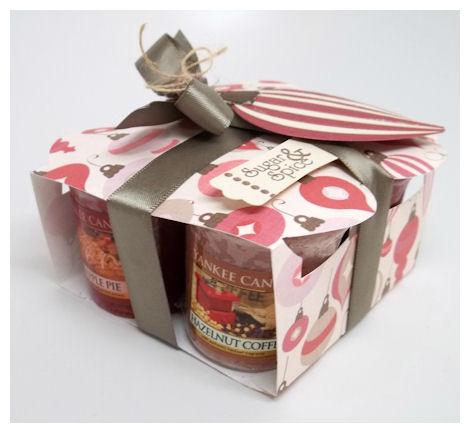
Yankee Votive Candle Mixer
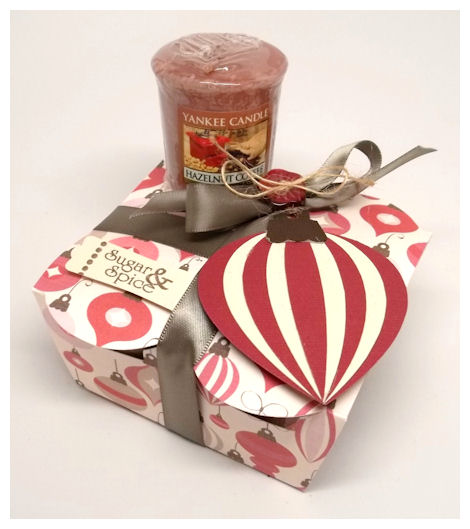
Gift Cost: $7.96 (or UNDER)
Yankee Votive Candles cost about $1.99 each (not on sale). You can also easily exchange a scent if you don’t like/prefer it, without hassle! You can also use other store variations of votive candles, which are just as “scent-sational” but far more cost effective.
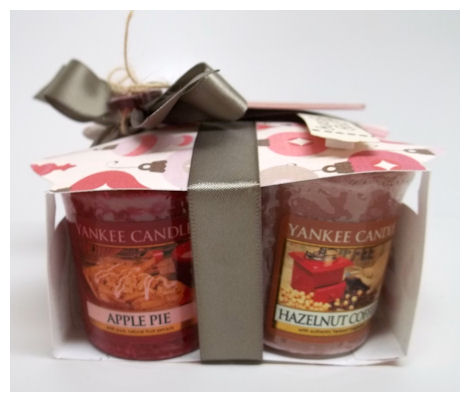
I packaged up 4 different candles in this one, all which match the colors in my project too 😀
If you are using votive candles you will want to increase the size of this cut file to 102%. The votives are a little bit taller, and this will allow you to easily wrap them up, no problem!
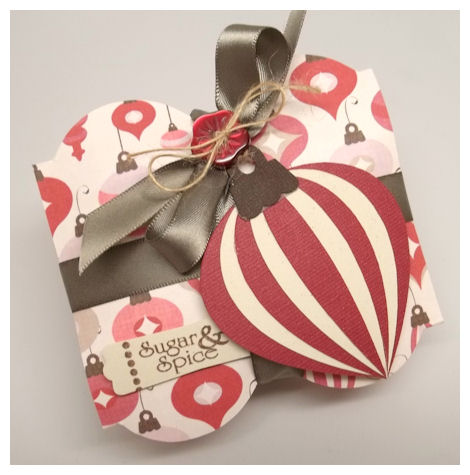
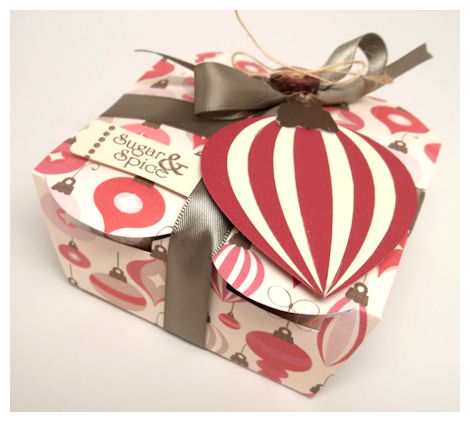
Use a pretty patterned paper and you don’t need to go over the top decorating it. Here is used the ornament pattern in the Mrs. Candy Claus © paper collection. Given the Sugar & Spice scents of my candles, I used the The Gingersnap’s with Sugar & Spice © set for the tag on my gift.
Visions of Sugarplums
Dec 4, 2012 Author: mytime | Filed under: Home decor/3-D items, My Time Made EasyIt’s time for the second annual Visions of Sugarplums – a week long event which began December 3rd!
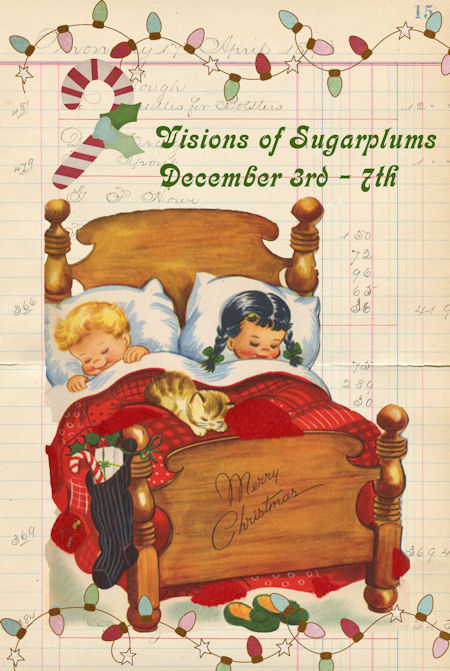
Over 17 blogs will be showcasing Christmas projects, recipes, and giveaways!
I’m excited to be participating with both the projects, and a Giveaway!
My Time Made Easy is giving away a $20 Gift Certificate, so be sure you visit Lori at the Visions of Sugarplums event for details on how to win that 😀
So, after you check our my projects, hop along to see what the following people have whipped up!
I want to encourage all my readers to comment on each blog posting today – each comment counts as an entry into the giveaways. Winner will be announced the tomorrow on Lori and Lisa’s Blog!
Here is what you have a chance to win:
Giveaways: $20 gift certificate – My Time Made Easy ™ LLC
1 set of choice – Digital Paper
1 set of choice – Moonlighting by Mary
1 set of choice – Paper Sweeties
I’ve got so many great gift ideas here on my blog, since I am the owner/creator of My Time Made Easy ™ LLC, where the focus is all about creative gift packaging. My Time Made Easy ™ LLC provides you with the basics for creating your own coordinating handmade cards, tags, and gift packaging in no time. It is fun, affordable, and we made it easier than ever! I have always said that it really is all about the TOTAL package. Now you can afford to create and dress up the simplest of gifts on your own, and make them appear to be that much more special. Nothing says love like something handmade.
Today I created a sample using one of our amazing templates called Tri-It. It was something I have wanted to create for some time. I think you can make many cute themed gift items with a triangle/pyramid style box 😀 I had seen some cute triangle pillows that were designed to look like garden gnomes, and I thought a box, designed to look like an elf would be pretty cool!
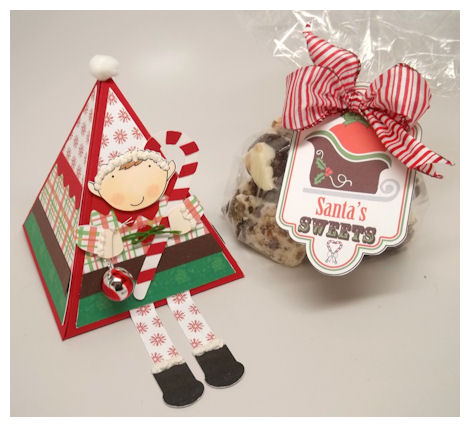
So this is kind of like my little version of Elf on a Shelf!
This is made for one of the counselors at Alexa’s youth group she goes to after school. I wrapped up some salty pretzel caramel bark!
You may recognize the tag…it was first seen here.

Tag Details: I colored, printed my tag from the Homemade Holiday Labels set, which was cut out using the Homemade Holiday Labels cut file. The sleigh, Santa sack, and candy cane image are from the Homemade Holiday set. Santa’s Sweets sentiment are from the Homemade Holiday Sentiments set.
That is the beauty of creating with digital images. I had saved this from my past project, and now when I needed a tag in a pinch I was all set. You create once,then you can easily re-use it again. I resized it to suit my project. I could even change the colors with just a click. Fast, easy, and fun!
Here is the screenshot from my computer to show you all the pieces before they were cut.
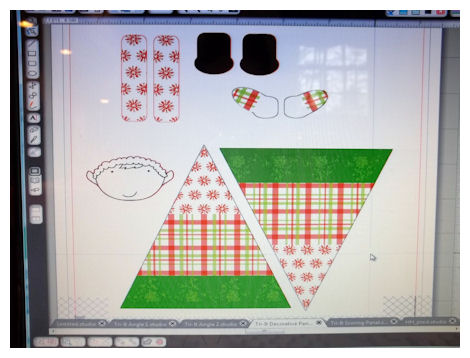
Can you believe those pieces quickly turned into this?!
Fill this with Homemade Cake Balls, Cookies, Hershey Kisses, Truffles, Peppermint Ghirardelli chocolates…whatever you choose really, and you are good to go!
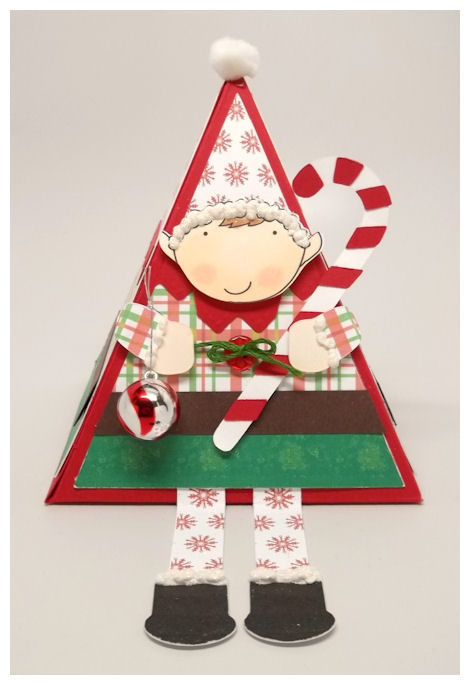
Now back to my lil’ elf on a shelf box….
I used the boy elf from the Holly Jolly © set to create the face on my little elf box!
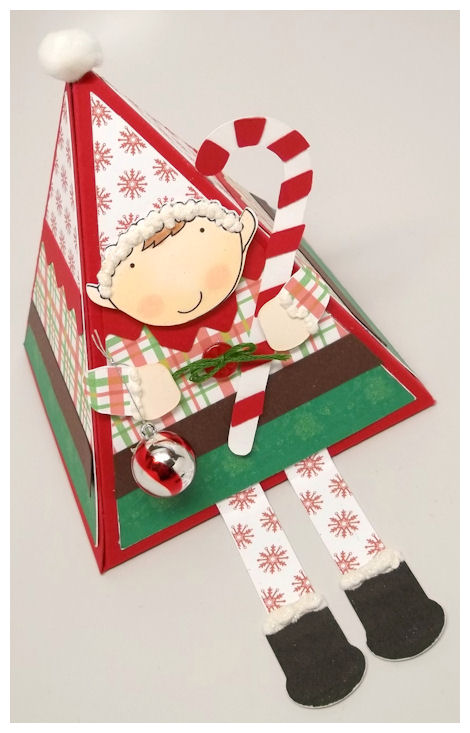
I printed then cut it out, and colored it in. I used the Homemeade Holiday Paper for my little elf suit. I clipped the snowflake pattern to the top for my elf hat. I added a little white pom pom to the top of the hat.

I then clipped the plaid version for the elf shirt. His hands were created using the hands from the Bouncing Bunny © cut file, resized to be smaller to suit my project. The plaid paper was clipped to that as well 😀
I added some zig zag trim from the Border Builders Zig Zag © cut file, along the bottom of the layer to create a elf collar. The little button tied on was the perfect touch.
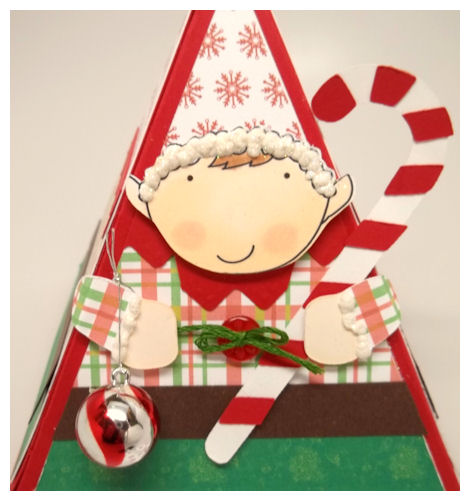
I used the Candy Striper © cut file to create a paper candy cane for him to hold in one hand, and a real little Christmas ornament in the other.
For the skirt of the elf I used the tree pattern in the Homemade Holiday Paper collection.
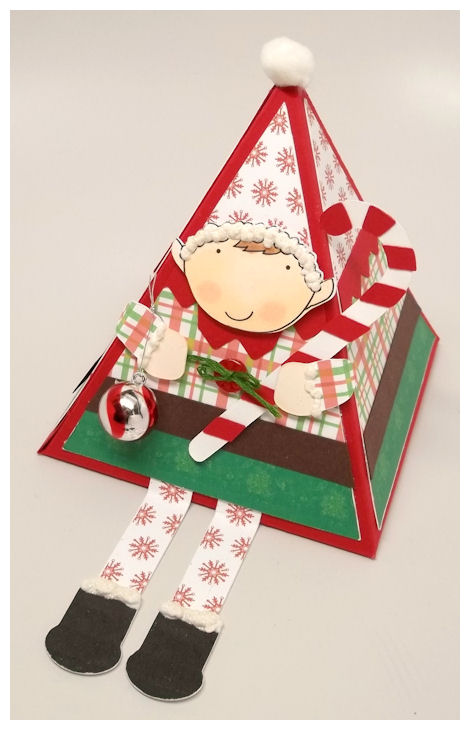
For the legs I just had my machine create the legs from the snowflake pattern, and the boots which was just a oval and a rectangle welded.
I added some white liquid applique, with glitter, and heat set it for my “furry” trim on the hat, sleeves, and boots.
Now that I have all these pieces created I can make as many of these little elves I want, any time I want, without too much work! The Tri-It goes together quick, so I can have a completed project in a matter of about 15 minutes each!
That does it for me today!
Good luck with the contest, and have a happy, healthy, and creative holiday!
Celebrate You-A Year in Review
Dec 3, 2012 Author: mytime | Filed under: Home decor/3-D items, My Time Made EasyYou will NOT want to miss what our design team has created for our monthly Year in Review group post because we are making *NEW* projects using *OLD* products!
Check it out
- Lauren Meader
- Debbie Marcinkiewicz
- Farida Rone
- Kimberly Morrow
- Lisa Kind
- Lori Hairston
- Lori Kalus
- Pattie Goldman
- Tangii Crain
- Tina Hale
I want to finally share a project idea I’ve had for the last year! Yup, a whole year, and had yet to find the the time to make it until now 😀 That is one reason why I love the “year in review” because it makes me make the time to go back to older products and make my ideas in the present! Its not good to always only focus on new stuff. It’s great to have new ways to use stuff we already have and may have forgotten, or maybe you are new to our products and you never noticed the older stuff 😀
Warm your ♥
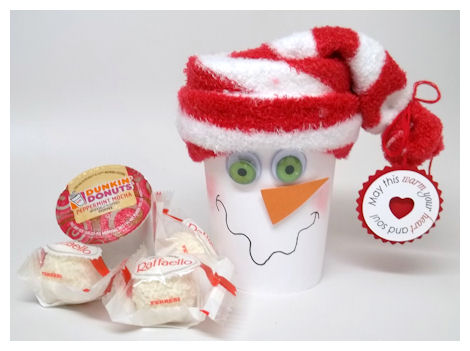
How seriously cute is this?
I took the To Go! cup template, made from palin white cardstock, and made it into a “snowman” cup.
I just used some Googlie eyes I got ager Halloween for just a few cents for the package, cut my nose using the Topped Off © template (but you can free hand your own), and then I drew on a cute/goofy smile using a fine line marker, sponged on some pearlescent chalks for my rosey cheeks!


Over the top is a pair of super warm socks, used as a hat!
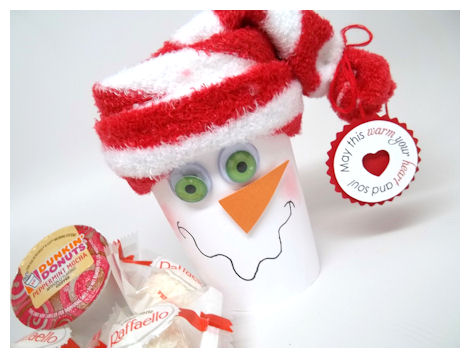
I tied the end with some embroidery floss, and tied a tag (cut using the Homemade Holiday Labels-resized) that I made using the sentiment from the Fancy a Cuppa? © set. I cut a heart into the center using the heart from the Flag ‘Em Down © cut file (resized).
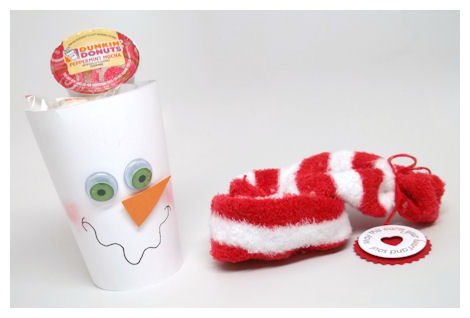
It’s a super simple gift that costs about $0.09 cents to make. It’s cheaper than purchasing disposabThen add your cost for your socks (you can find some cute one’s in the $1 section, and choice of “filler”. You can put cocoa packets in here, and make snowman “soup” and any holiday treat you wish. Also makes a great gift card holder too.
We have all had such a great time working with all the new products, and we each hope our samples have inspired you in some way.
We hope these projects will allow you to look at ANY of our Pretty Packaging Templates, and try to see the uses and possibilities in each one.
Remember: If you are “stuck” for ideas most times the descriptions list the many possible ideas for filling them or creating things with them, and don’t forget we have an amazing gallery of already made projects to help you SEE what you too can create. You will find the direct gallery link to projects made for the product of your
Also if you haven’t already, you can follow us on Pinterest, as we have 16 pinboards full of ideas, we are also on Facebook-so LIKE US there, and follow us on Twitter!
Lastly we wish you all a very Merry Christmas, Happy Hanukkah and a happy, healthy, and safe New Year!
Un-Wined for the Holidays
Dec 2, 2012 Author: mytime | Filed under: Cards, Home decor/3-D items, My Time Made EasyI am so enjoying all the ideas the team has conjurred up in me after viewing everything they’ve been making! My head is literally ready to bust with new projects I want to try!
We have MORE to share today, and then if that wasn’t enough a great group post tomorrow!
Take a peek:
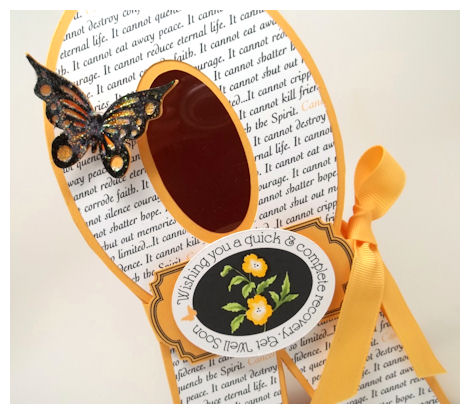
Bring someone some REAL holiday cheer this season!
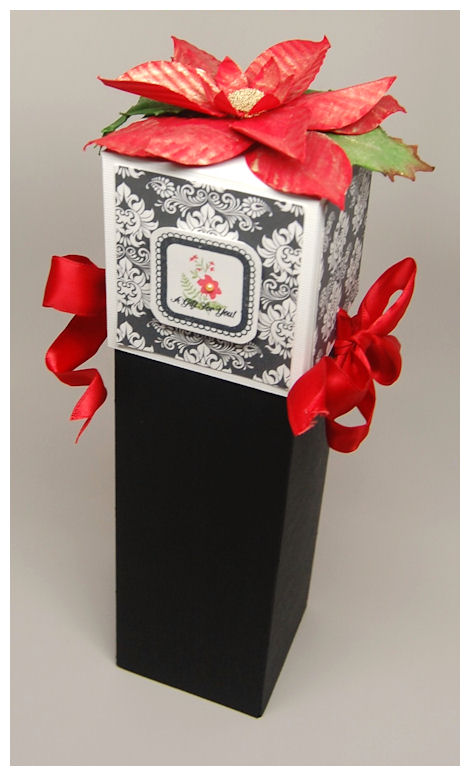
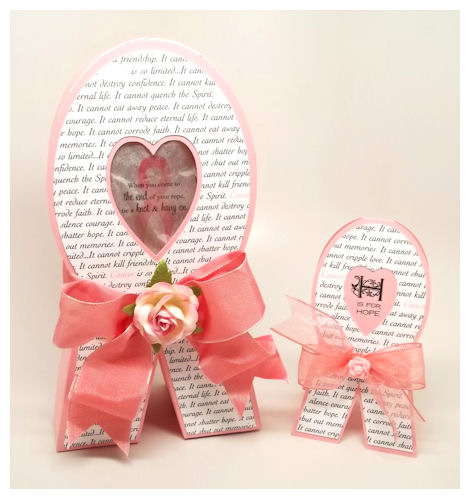
A gift for you
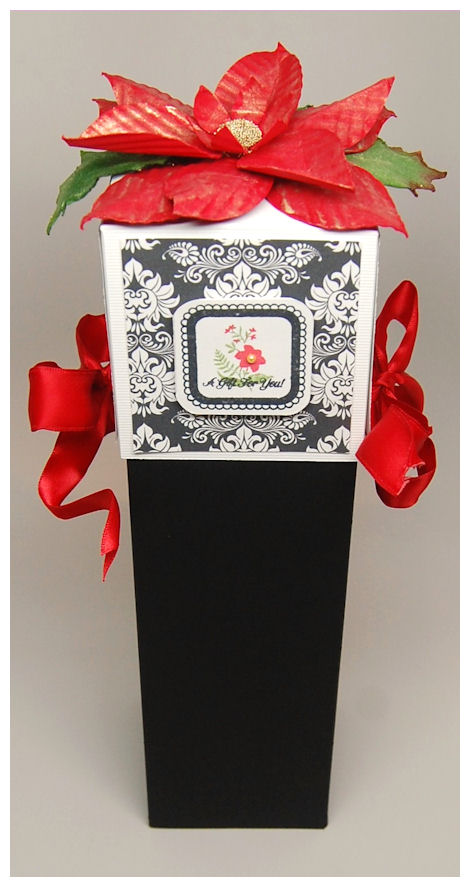
Design Details: The tag was made using the scalloped window from the Lovely Labels 1 © set, the flower is from the Sentimental Occasions Labels © and the sentiment from Timed Write © set.
This could be filled with just about anything! Hence my post tite Un-Wined. I chose to create a tall gift box using the new Wine & Dine template, that was inspired by my card set I posted yesterday (scroll down to view). I think there are MANY times we can use a tall box, and NOT just for giving wine, as the name suggests!
I was thinking about packaging up some homemade chocolate dipped biscotti, with some gourmet cocoa packets from Starbucks in here, or I could use this to stack a vareity of homemade cookies, or raspberry linzer squares (my fave), blonde brownies….etc instead of the using the standard rectangle box, why not stack them up?!

Maybe some bath salts on the bottom, and lotion. body spray on top? Some chocolate dipped pretzels, Candy canes, Pirouette sticks…you get the idea.
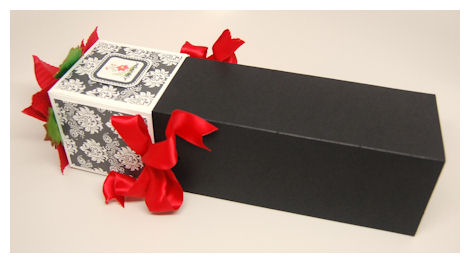
I made the base from black cardstock, and the top from whtie cardstock. I layred on some Dainty Damask © paper, recolored to black.
To adorn the top and ring the the holday’s with a little elegance I used the Perfect Poinsettia © cut file, ran it through my crimper and them brushed on some gold Shimmerz. I had some holly leaves that I also brushed with the Shimmerz.
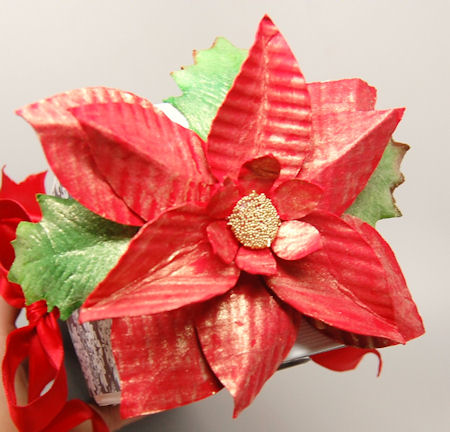
For the Perfect Poinsettia © cetner I used a large dimensional glue dot, and I added some gold seed beads.
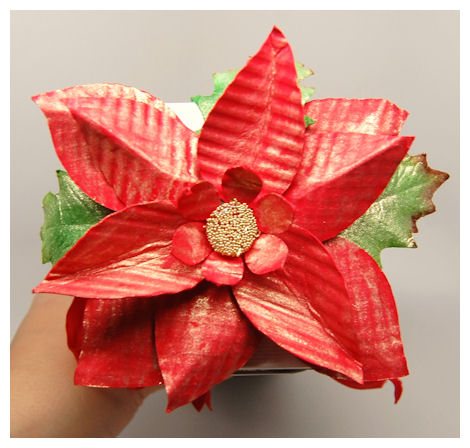
I think it turned out really pretty, but it is far better loking in real life!
The bottom line of today’s post is to look at ANY of our Pretty Packaging Templates, and try to see the uses and possibilities in each one. If you are “stuck” for ideas most times the descriptions list the many possible ideas for filling them or creating things with them, and don’t forget we have an amazing gallery of already made projects to help you SEE what you too can create. You will find the direct galler link to projects made for the product of your
Customized Gifts for Under $1
Dec 1, 2012 Author: mytime | Filed under: Cards, Home decor/3-D items, My Time Made EasySo here we all are, and I am still in disbelief that it is DECEMBER?!
Even though Christmas is coming soon, I know many of us are literally wrapping up our holiday gift making/shopping, sometimes up till the last minute. Well if that is you, we aren’t ever done providing you all with more and more gift ideas each month.
No matter what time of year, I am sure you can find the ideas useful and inspiring.
Check out the following designers today:
Thankfully I did get all my holiday shopping done, and am almost done all my gift making for those special people in our lives, such as my children’s teachers.
I used the Card Wrapper template to keep costs down and limit the time it would take for me to create all of them.
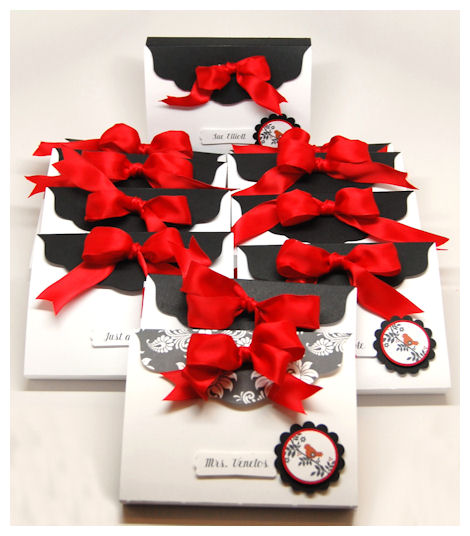
Group 1 (Set of 12)
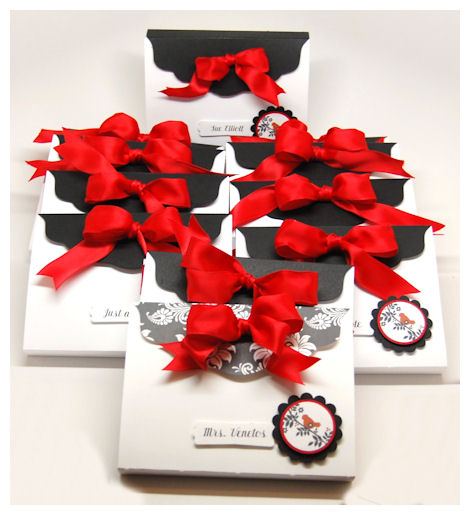
I made each of my children’s teachers a set of 8 customized cards/envelope, complete with their name, and then wrapped to perfection! Teachers can never have too many cards!
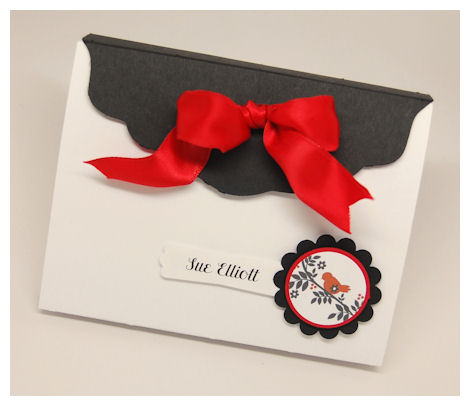
The circled layerd in the lower right hand corner was cut/layered using the Well Rounded Tag ©.
I love using black, white and a pop of red!
Each card set only cost about 0.65 CENTS (not including the cost of the ribbon)!
I made 19 gift sets (featured here) for a whopping $12.35!! Then add 2 rolls of ribbon at $1.99 each (on sale), that is still ONLY $16.33!
What can you BUY for under a $1 that looks better than this, AND is customized? Not much!
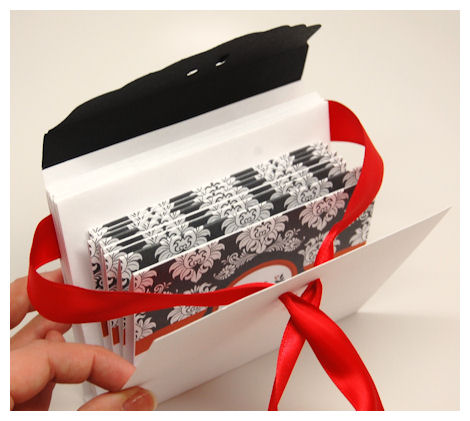
Super quick, and simple because I created the actual card design ONCE then changed one minor detail. My printer did far more work than I did 😀
Wonder if printing your own paper/images is afforadable? READ THIS!

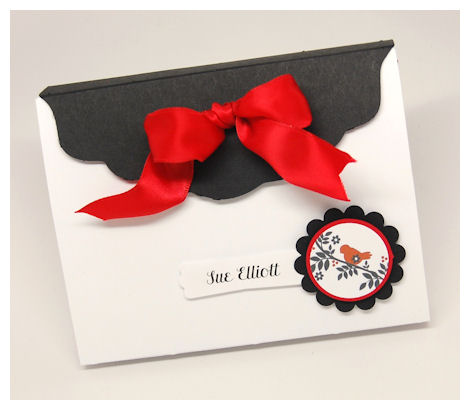
These are single layer cards that I created digitally. By doing this I could easily whip up a bunch, and just change the teacher’s name along the bottom! I used the Dainty Damask Paper Collection, and recolored a pattern to be black, for the top layer of the cards I created.
I added a strip of red along the cropped edge of the card.

The frame on the cards is from the Framed Elegance ©set , then my bird and branch images used on both the Card Wrapper template and the cards, are from the Singing Silhouette © set. Each set has the specific name of the teacher along the bottom, and they can use them at their discretion.
A truly personal gift, made with lots of ♥
Group 2 (set of 7)
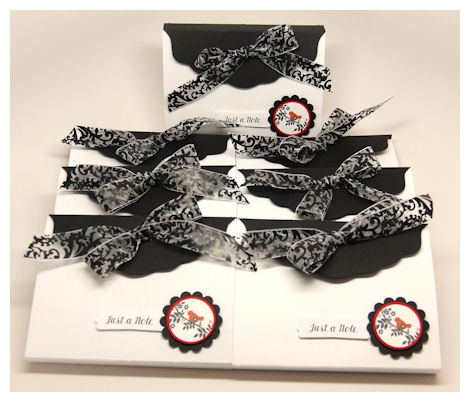
This group is similar, I just used a damask patterned ribbon instead and in this group the design is the same, but instead of having personalized cards, I did some “general” cards for other people who may be on my list, and to have on hand. I titled these “Just a Note” hence the bird 😀
I kept the cards general putting in (2) With Appreciation (2) Just a Note (2) Just Because (2) For Your Kindness.
Not too shabby huh?!
Thank you again for stopping by, and your continued support, which allows me to share what I love with all of you!
Return for more ideas tomorrow from myself and our amazingly talented design team.
See you then!
December Release-Let’s Celebrate!
Nov 30, 2012 Author: mytime | Filed under: Cards, Home decor/3-D items, My Time Made EasyIt’s December 1st and that means two things!
1) All our NEW! Products are available for you to purchase! Be sure you check out our NEW! Products <—HERE!
2) We have another amazing group post that shares many ideas using those NEW! Products
Today you will want to visit the team to check out our ideas for Crazy for Creativity:
- Lauren Meader Card Wrapper
- Debbie Marcinkiewicz Wine
- Farida Rone Wine
- Kimberly Morrow Chair-ish
- Lisa Kind Chair-ish
- Lori Hairston Chair-ish
- Lori Kalus Card Wrapper
- Pattie Goldman Card Wrapper
- Tangii Crain Wine & Dine
- Tina Hale Wine & Dine
We have released:
3 NEW! Pretty Packaging Templates
5 NEW! Pretty Impressions Stamp Sets
3 NEW! Pretty Printable Digital Paper Collections
4 NEW! Pretty Pieces Cut Files
This month we released 3 *NEW* Pretty Package Collections, where you will save 25%!
Please view our Gallery for project samples, and alternative ways to use all our amazing coordinating products!
You may also want to check out our blog for weekly challenges, and even more amazing ideas.
Also if you haven’t already, you can follow us on Pinterest, as we have 16 pinboards full of ideas, we are also on Facebook-so LIKE US there, and follow us on Twitter!
As you may have come to know my company focuses on the “complete package”. We work hard to offer coordinating products that are easily interchangeable with previously released products. We really enjoy being able to share the ideas and versatility each product holds.
Today we are each sharing some creative ways to use the *NEW* product for December.
My project today will show you some ways to use the Card Wrapper!
The *obvious* would be for it to hold a set of cards, but my gift today holds something a little more…..yummy!
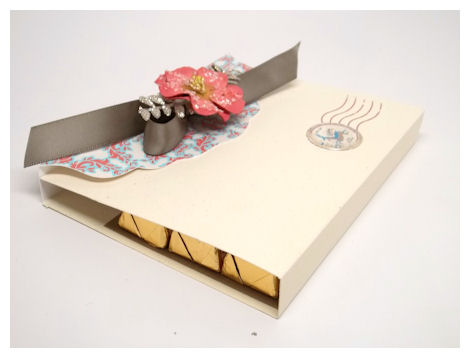
Can you guess what it is?
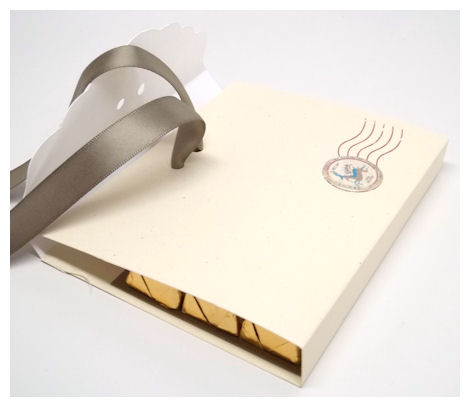
Let’s unwrap it and take a peek!
Do you know now?
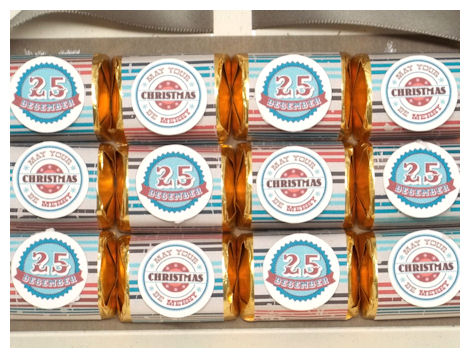
Yes, that’s right! Hershey’s Nuggets! These are the milk chocolate & toffee kind.
This idea came about because one of our designers, Tina Hale had asked me to consider a fun new way to wrap up the ever popular Hershey Nuggets, for those who like the “nugget tins”, but feel like those can end up being a more expensive option, when trying to keep costs DOWN in a tough economy, but still want to give something special.
Now you can put these candies in just about *any* template we sell, but we DO have several viable options that would work that are in similar fashion to a tin.
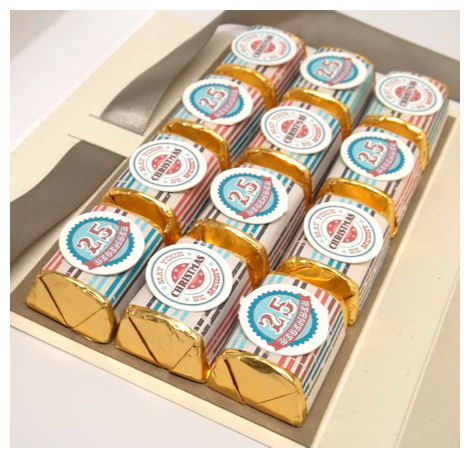
You can use ie:
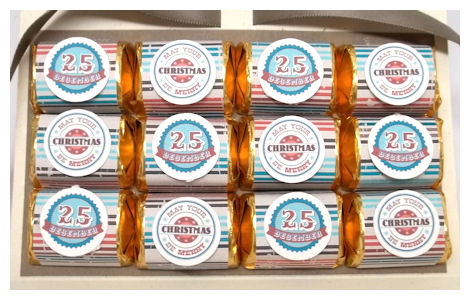
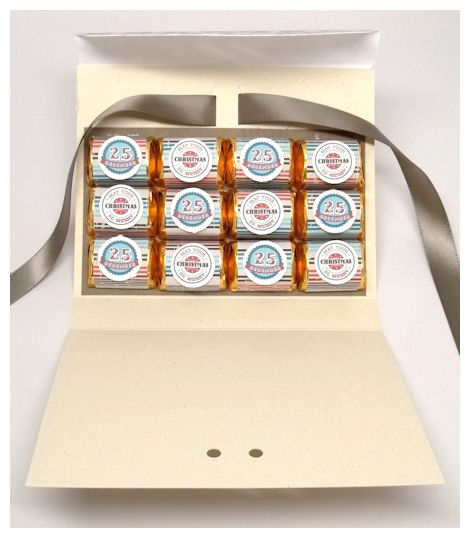
I printed the coordinating stripe pattern paper from the Christmas Patina Papers onto my sheet of my 8160 Avery Mailing Labels. I then wrapped the nuggets in the labels. They are adhered to a piece of cardstock using removable adhesive so they don’t fall out or slide around.
I used the images in the Christmas Swagset to create two different labels to adorn my nuggets. I resized them, then cut them out using my Cameo Silhouette.
Then they are wrapped up to perfection!
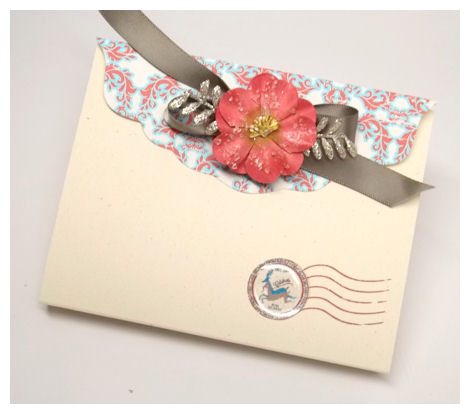
I had to use the *new* Christmas Patina Papers for the lid. I loved the postal mark from the Christmas Swagset. I put the reindeer, which were resized, into the center of the post mark.

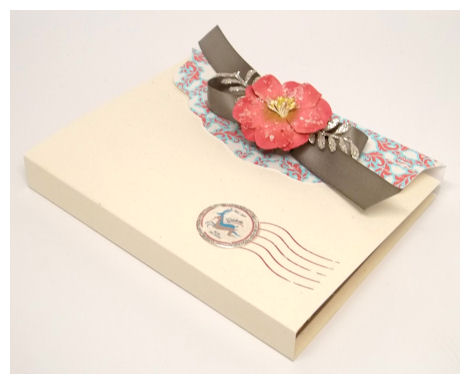
This is the back of my gift

Seriously SO quick and simple, and the cost of the wrapper itself is about 0.16 cents!! That is an INSANELY inexpensive way to wrap ANYTHING!
This would make a great gift to send off with guests at your holiday event, or just because, any time of year. A great standby to keep on hand in case you get a gift from someone you weren’t expecting and you want to be able to reciprocate!
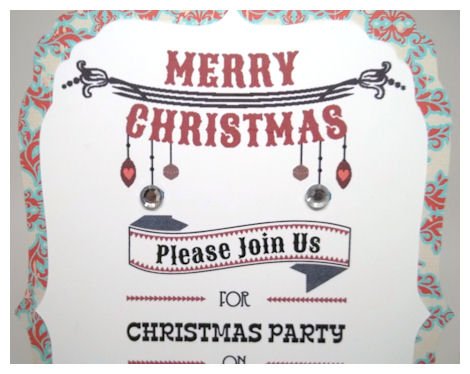
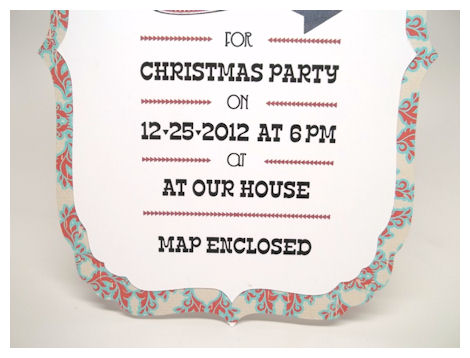
Lastly let me share with you an Christmas party invite 😀
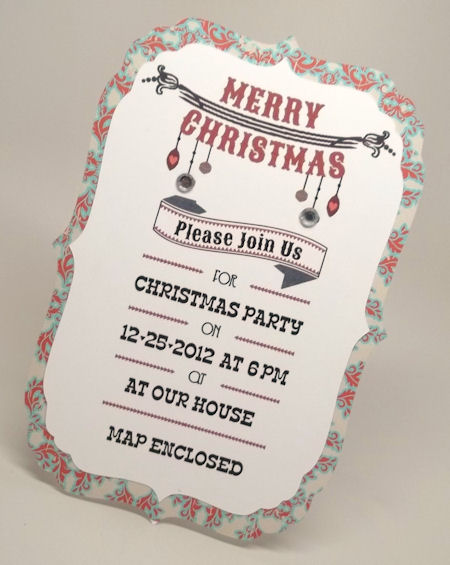
This was created using the You’re Invited cut file.
December Preview Day 2
Nov 29, 2012 Author: mytime | Filed under: Home decor/3-D items, My Time Made EasyWelcome back everyone!
The plethora of great gift ideas is just getting started as we prepare for our release tomorrow (December 1st).
You will not want to miss the many idea from our design team!
Wine & Dine
Lauren Meader (duplicate of this post)
Chair-ish You
Card Wrapper
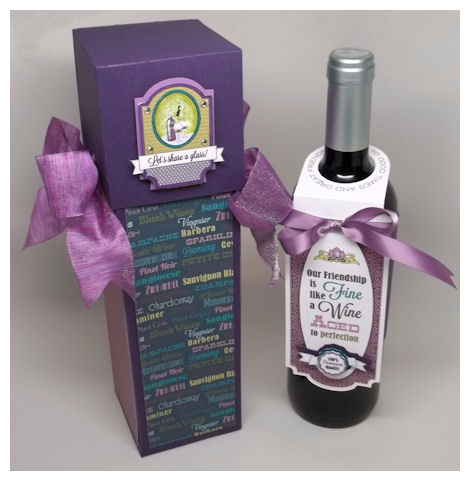
I have longed for a simple, easy, and elegant way to quickly and easily wrap up the ever-large bottle of bubbly. Be it wine, champagne, or something tall and slender! I know I can BUY boxes, but that isn’t as heartfelt as making, and personalizing my own. I love making my own packaging and now I can finally dress up any bottle I buy for that someone special!
So let me share this great new template called Wine & Dine
Available in PDF, SVG, GSD, DXF, WPC
Completed Project Size:
12 Inches Tall
3 X 3 Inches Wide
(Yes this template is made only using 8 1/2 X 11 Cardstock)
Want to bring the gift of “wine” when you “dine” at someones home, or for that special occasion? No need to buy an expensive box or even an expensive bottle, because this will dress up that bottle to perfection for any occasion.
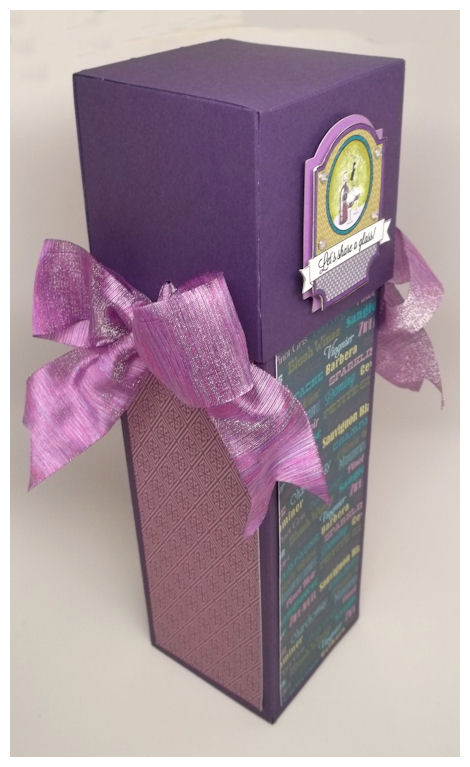
This lid can tie to the box bottom making it an elegant presentation. You can of course omit the ribbon and design this to suit the person/family you are presenting it to. Dress it up for the holidays too!
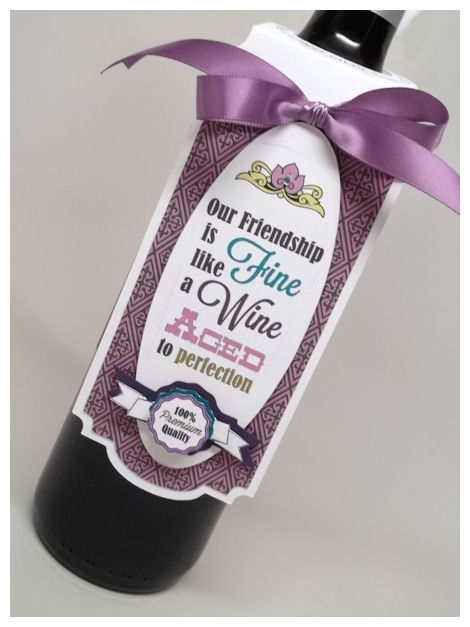
I customized my label on my Wine & Dine box using the Vintage Vineyard set, cut out using the Un-Wined Labels cut file. You can easily mix and match the labels, images and sentiments, as I did here! You can also coordinate them with other sets too. More about the set later in this post.
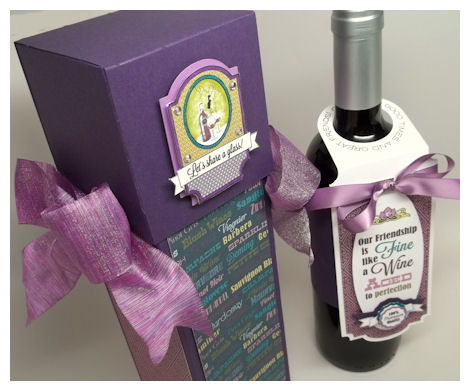
The paper on the front and sides of my box are from the Un-Wined Paper Collection. I also used the same pattern that is on the sides of my wine box on my Over the Top Tag (which is on the actual wine bottle-sold separately) .
I think you will agree this is a much more stunning presentation than something you ran into a store to buy! With our amazing set of Merriest Monograms there are limitless possibilities for customizing your own gifts!
This can become a snowman, Santa, reindeer, or elf! You can also use this to package up a plethora of other gift items. Just use your imagination!
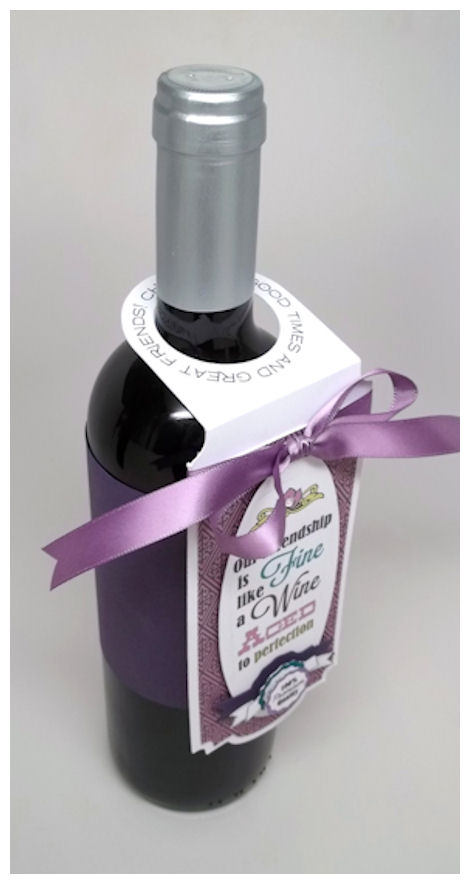
You will want to check out the Vintage Vineyard, Merriest Monograms, and the Two for Dinner set to use in coordination with this template. We also have a Over the Top cut file that can accentuate your bottle of merriment to perfection. That is actually what we used to dress up the bottle of wine featured in today’s project.
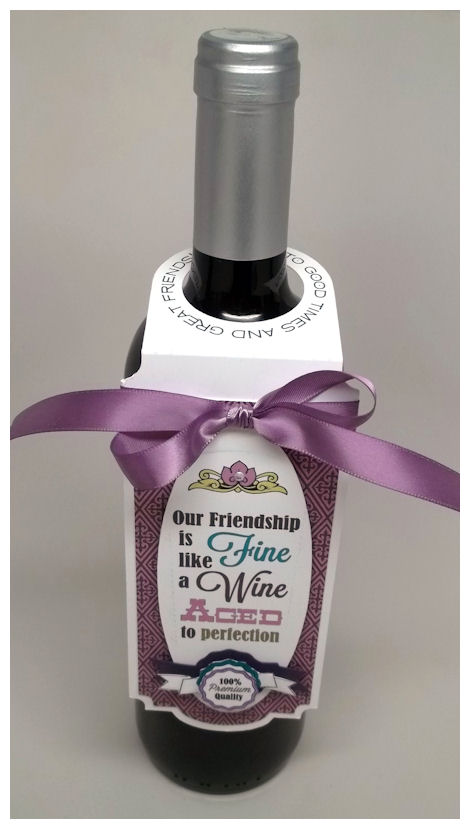
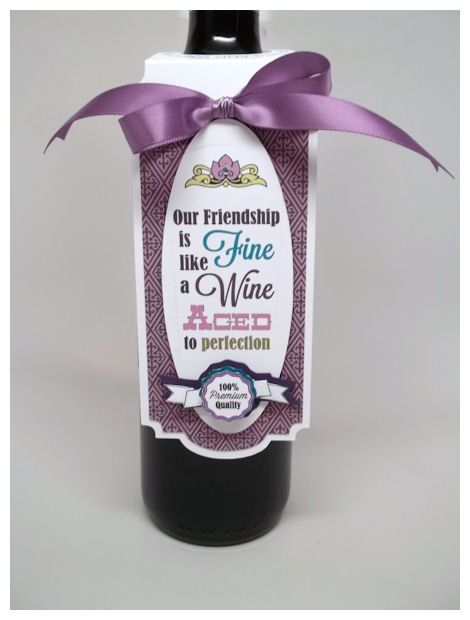
I used the new Vintage Vineyard set to create a customized tag called Over the Top . This is a fabulous cut file that slips right over the top of any bottle!
About Vintage Vineyard $12
Designed By Sara Williams
This set has a coordinating label cut file called Un-Wined.
Raise your glass and CELEBRATE! Now you can dress up that fabulous bottle of cheer, and give it with style, and a personalized flair, like no other. This is a elegant, vintage style set of wine themed labels was created to help you spread the CHEER all year ’round. Now THAT in itself is reason to celebrate!
The circle sentiments within this set were designed to fit around the top circle of the Over the Top Tag. The many images and sentiments help you spread the most sentimental of messages in a way that is beyond compare.
There are 8 pre-designed labels, which you can alter, and several images to allow you to create your very own labels too.
Now about the tag-Over the Top Tag
Available in PDF, SVG, GSD, DXF, WPC
Completed Project Size:
2 3/4 Inch Wide
6 1/4 Inch Tall (Folded)
This is a great tag that goes “over the top” of any bottle, allowing you to create an customize a personalized label for any event! Now you can give gifts in a bottle, with style, even if you are tight on time.
The circle sentiments within the Vintage Vineyard set were designed to fit around the top circle of the Over the Top Tag!
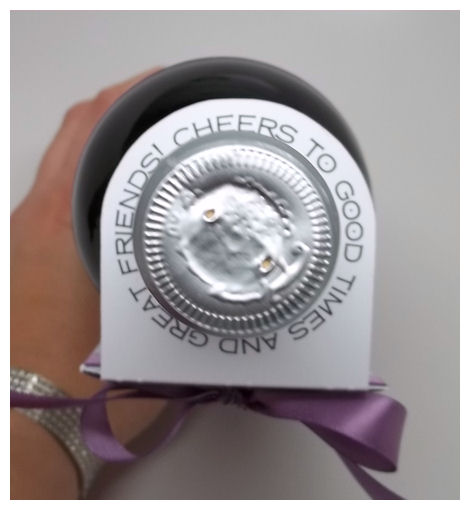
I chose the “Cheer to good times and great friends!”for this project! I printed it directly on my tag using my Cameo Silhouette. Easy peasy.
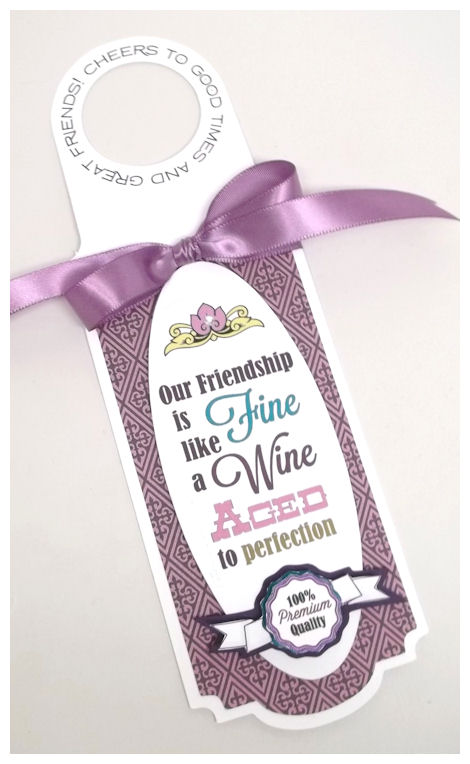
This is the flat version of my decorated tag.
This is the best way to go when in a SUPER hurry! The best part about using digital project is you create ONCE then save, print and cut as many as you need, over and over again!
Simply change up the colors and you have a new gift each and every time.
Thanks for taking the time to visit!
See you back here tomorrow as we share our December Release ♥
December Preview Day 1!
Nov 28, 2012 Author: mytime | Filed under: family stuff, Home decor/3-D items, My Time Made EasyWell I think its appropriate to say Happy Holidays!
I am really feeling the holiday spirit this year.
I hope you and your family had a wonderful Thanksgiving, and have stayed healthy through the holidays. I truly enjoyed the spirit of the holidays as my children, husband, and I celebrated our many blessings by feeding the homeless on Thanksgiving. It was the most enjoyable holiday I’ve had in a long time. It really felt like the holidays use to feel when I was a child. Pure joy! More on that further down!
First let me share with you what we have planned for the release on Decemeber first! We have some amazing new products that will allow you to whip up some holiday gifts in a jiffy! They are some really great products for hosting or attending that holiday party, or any event all year round. Sometimes we aren’t sure how to dress up that table, thank a hostess, welcome a guest, or set the tone for the event. This will really help you through those times, and in the most stylish way possible!
So here is what we have for you today, as we release 3 AMAZING New Pretty Packaging Templates, 5 New Pretty Impressions Stamp Sets, 4 New Pretty Pieces Cut Files, and 3 New Pretty Printable Paper Collections!
Card Wrapper
Wine & Dine
Chair-ish You
I’m quite excited about today’s project I’m sharing.
Available in PDF, SVG, GSD, DXF, WPC
Completed Project Size:
Chair Seat Box
3 X 3 Inches Wide
1 1/4 Inch Deep
Chair
9 Inches Tall
3 X 3 Inches Around
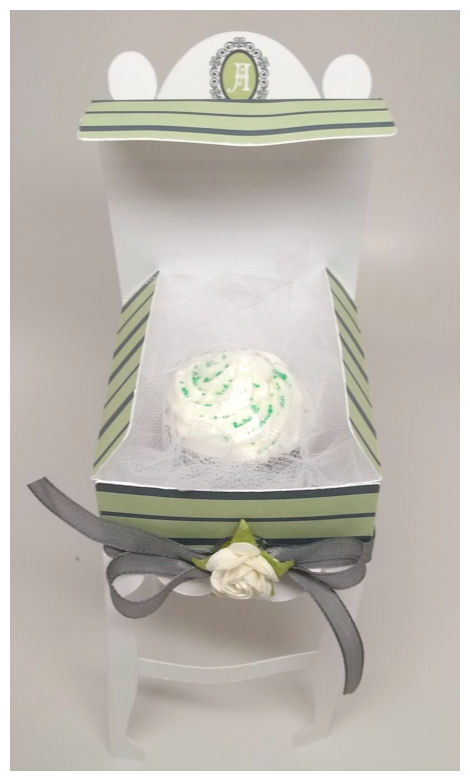
Who’d of thought a three dimensional chair could be so whimsical, fun and functional!

It is certain to make the perfect table setting, seating card, and favor for any party, wedding, or gifts for the hostess. You will find it especially fun for gifts from the kitchen like home baked goods, spices, recipes, and gift cards for a new home.
I chose the stripe pattern in the Table for Two paper collection. It is a great neutral color, and it matches the Hostess’ dining room 😀 I think that type of attention to detail is always appreciated and never goes unnoticed.
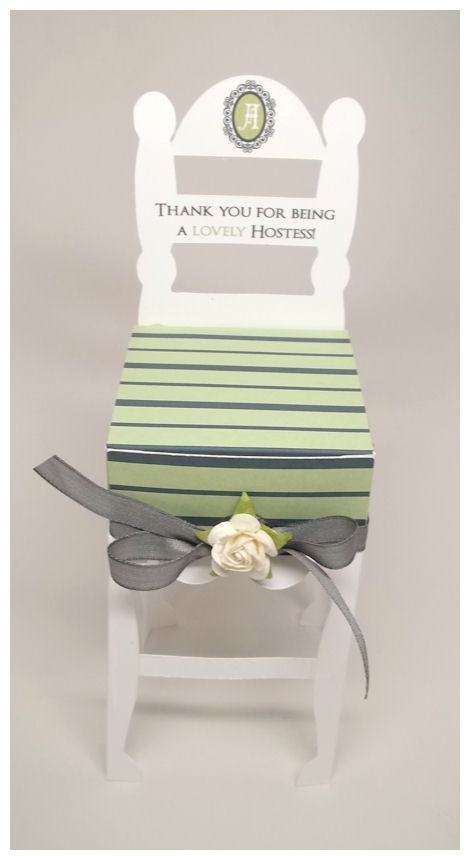
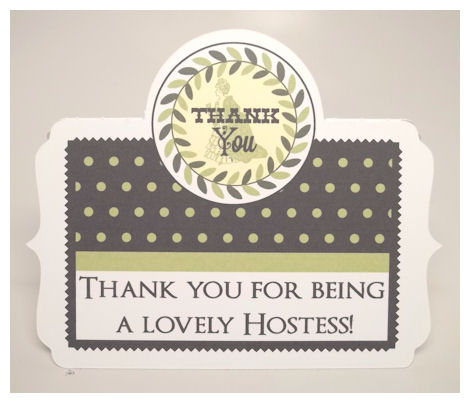
I used mine for a hostess gift. We often get invited to numerous holiday parties, so I made this one for my brother’s mother in law Annis, hence the framed monogram A on the chair back, which was printed direct onto my template.

The frame and monogram A is from the *NEW* Merriest Monograms set. I think this set is beyond fabulous! I colored the frame to match the grey in the Table for Two paper, and I colored in the center of the frame in the same color green as in the Table for Two paper collection. The A is colored in white.
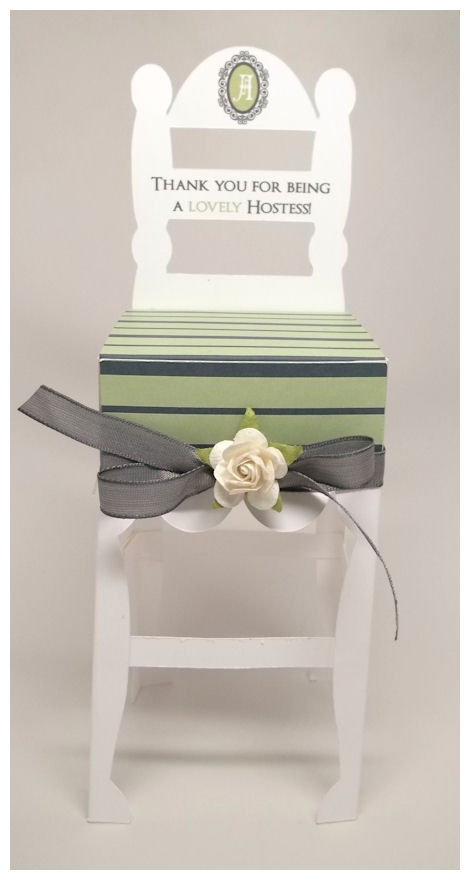
The Thank you for being a lovely hostess sentiment is from the *NEW* Table for Two Sentiments Set . I simply tied around a grey ribbon and added a white Prima flower. So simple and understated, but so pretty too!

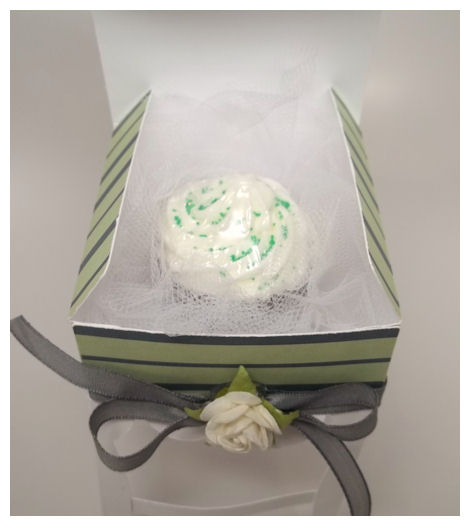
Now, what to put inside? There are SO MANY options! I know that Annis has an amazing jet tub and loves organic Bath Bombs! I found this one themed as a cupcake 😀
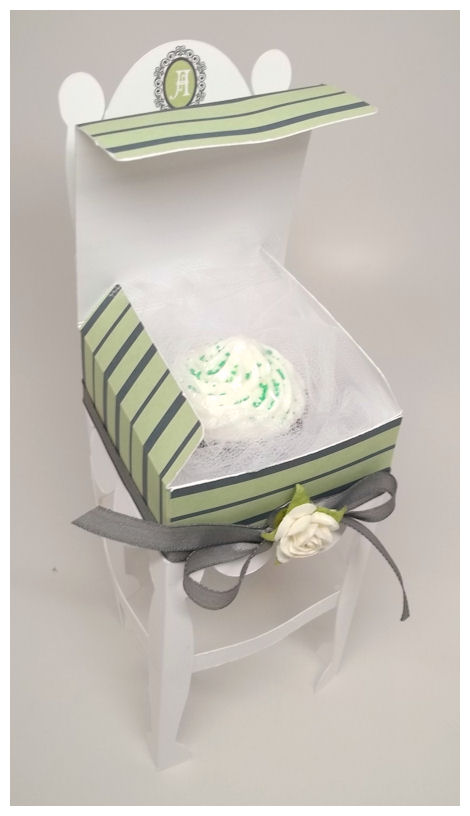
Whomever you gift this to, for whatever reason, it is certain to be chair-ished!
These tall chairs would be perfect for any shower, or especially on a table for a Wedding! Great for sending your guests home with a little treat. Wrap up some homemade cookies, truffles, brownies, maybe some drink mixers…..truly endless possibilities.
You will want to check out the Two for Dinner, Two for Dinner Sentiments, Homemade Holidays/Sentiments, Hauntingly Homemade Labels and the Apothecary Labels set for some great additions to this template!
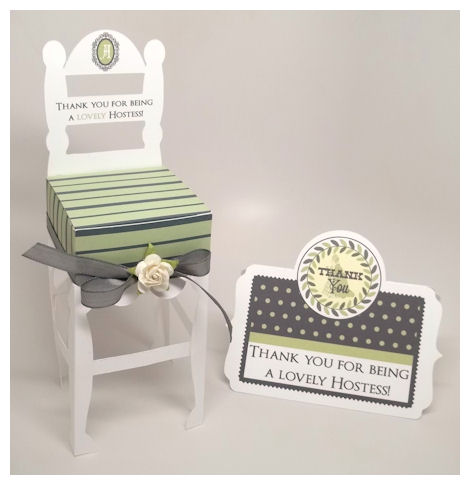
Now onto the thank you note I created to match 😀 I love matchy, matchy stuff.

I used the Perfect Place Card cut file for my thank you note. This is a elegant letter style invitation card, with a coordinating mat layer, so you can quickly and easily create your own customized invitation for any event, or compose a letter of gratitude in style!
Available in PDF, SVG, GSD, DXF, WPC
Completed Project Size:
4 3/4 Inch Tall
5 3/4 Inch Wide
If you are looking for the perfect place card to dress up any table, be it for that special dinner, the holiday’s, a wedding, shower, or other event, then this is the card file for you. You can easily make any table look stunning and elegant for any event with our amazing coordinating products.
The leaf “plate” print is from the Table for Two Set and the sentiment is the same one from the Chair-ish You project.
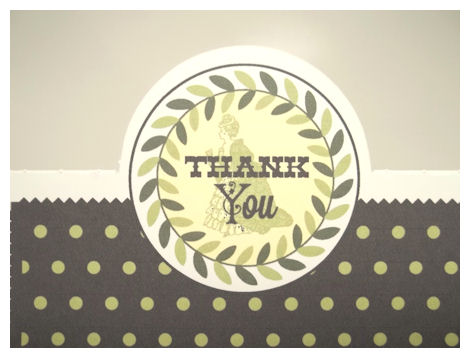
The Thank you sentiment is from the Merriest Monograms set. The vintage woman is so pretty, and she is from the *NEW* Vintage Vineyard set.
I decorated the bottom part of the card digitally by clipping the polka dot pattern, that matches the chair from the Table for Two paper collection.
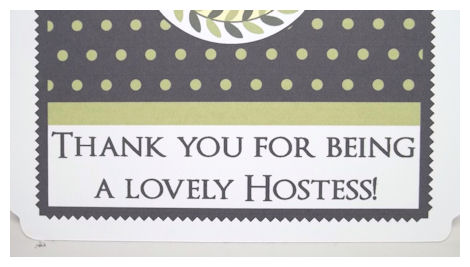
The sentiment on teh bottom of the card is the same sentiment I used in the *NEW* Table for Two Sentiments Set
 You can create this to become a thank you card, or an invitation too!
Place the persons name, initials or table number at the top.
This is just the start of the MANY ideas for uses of our latest products! So keep checking in and see what our team has in store!
Now onto our Thanksgiving adventure!
We were all excited to help out with our new endevour to help feed the local homeless families, and ended up serving over 200 people! We know we are truly blessed to have our health, love of family, and friends, and a warm place to live.
Here the kids are getting ready to head out to the Fire Station where we were going to serve the meals.

Noah was especially social while serving his items. He smiled ear to ear, greeted people, and made sure to ask everyone “So are you having a great Thanksgiving, because I am so glad you’re here!”
While Alexa just served pie, and a shy smile. She didn’t understand WHY some people DIDN’T want pie!…
Amber took it ALL in emotionall, and immediately after all was said and done, she noted that it was sad these people were going back to no home, and not even having a way to heat up the extra food they were given to take with them.
It was by far the best thing I have experienced in a long time. Pure joy. It actually felt so amazing that I have to say that last time it “felt” like Thanksgiving like that and what life is all about I was probably a child.
The kids were beyond my expectations. They sat with everyone while they ate, and made conversation. They really enjoyed it too and immediately asked if we could do it again next year. That was so great to hear. I was just so happy that they “got it”! They got how good it feels to help others and give back. They felt the joy of bringing a smile to someones face. They saw how much we actually have and were genuinely grateful. I am thankful that they let us all help and participate as a family because everyone there left with something more than a full tummy and a plate of food 😀
I felt so humbled I couldn’t even bare to go out on Black Friday (as I usually do) and fight crowds for the latest and greatest “things”. It seems so hypocritical. Plus I want the feelings of this day to last as long as possible because this feeling CANNOT be bought for any price 😀
My Etsy

Who I Designed For
Blogroll
- Alicia
- Alli Miles
- Ally Blankenship
- Amber
- Andi @ crafts on a whim
- Angel R
- Angie Z
- Anne Kranitz
- Becky O
- Bee
- Beth Silaka
- Bethany Paull
- Beverly Nash
- Bobbie
- Cambria
- Cammie
- Card of the Week
- Card Positioning System (CPS)
- Cards for Cancer
- Catherine Doucette
- Charmaine
- Cheryl Sims
- Chriss Rollins
- Christina
- Christine Ewing
- Christine Wooden
- Colleen Schaan
- Craft Critique
- Craft Gossip
- Crystal
- Dawn Easton
- Emily Giovanni
- Geny
- Holly
- Igne Groot
- Inspirational Craft Blogs
- Irene
- Jami Sibley
- Jeanne Streiff
- Jen del Muro
- Jeni Bond
- JenMarie
- Jenn Balcer
- Jenn Diercks
- Jenn O
- Jennifer E
- Jennifer Mick
- Jennifer Pereda
- Jennifer-Sweet Treat
- Joanne Basile
- Jodi Collins
- Julia Stainton
- Julie Masse
- Karen
- Kathryn Berthiaume
- Katie Cotton
- Kelley Holland
- Kendra
- Kim Scholfield
- Kris’s Color Stripes! Get inspired here
- Kristen Dubosque
- Kristin Eberline
- Kristine
- Laura @ Sunshine Stamper
- Laura Turnmire
- Laurie Schmidlin
- Lesa Rapp
- Linda Duke
- Linda-LSN
- Lindsey Botkin
- Lisa (lakind scs)
- Lisa Kind
- Lori Craig
- Maggie
- Mara Campbell
- Maria
- Maria Levine
- Mary
- MaryJo
- Melanie M
- Monique Hansen
- Moxie Fab World
- Pam Imholz
- PaperCrafts Connection
- Peppers and Pollywogs Kids party site
- Rebecca Grohall
- Rita
- Robyn
- Rose Ann
- Sarah Vrolyk
- Sharon Harnist
- Sharon Johnson
- Sharon Rivera (a chemisrty with paper)
- Sherrie
- Sophia Landry
- Storage Units, Ink, & More Blog
- Sue Berker
- Susan (Rainy)
- Tangii Crane
- Tracy
- Tricia Traxler
- Trudee
- Velta
- VivLyn
- Zena
MTME Pretty Palette Color Team
MTME Pretty Patterns Sketch Team
My Time Made Easy TM LLC
Shop till you drop!
Lauren Meader
About Me
Copyrighted material
Subscribe To My Blog
Pages
- About me
- Alexa’s Story!
- My Crafty Corner!
- My Time Made Easy™ LLC
- Our Make A Wish Trip to Disney!
- Resume/Publication List
Calendar
| M | T | W | T | F | S | S |
|---|---|---|---|---|---|---|
| 1 | 2 | 3 | 4 | 5 | 6 | 7 |
| 8 | 9 | 10 | 11 | 12 | 13 | 14 |
| 15 | 16 | 17 | 18 | 19 | 20 | 21 |
| 22 | 23 | 24 | 25 | 26 | 27 | 28 |
| 29 | 30 | |||||
Archives
- August 2013
- July 2013
- June 2013
- May 2013
- April 2013
- March 2013
- February 2013
- January 2013
- December 2012
- November 2012
- October 2012
- September 2012
- August 2012
- July 2012
- June 2012
- May 2012
- April 2012
- March 2012
- February 2012
- January 2012
- December 2011
- November 2011
- October 2011
- September 2011
- August 2011
- July 2011
- June 2011
- May 2011
- April 2011
- March 2011
- February 2011
- January 2011
- December 2010
- November 2010
- October 2010
- September 2010
- August 2010
- July 2010
- June 2010
- May 2010
- April 2010
- March 2010
- February 2010
- January 2010
- December 2009
- November 2009
- October 2009
- September 2009
- August 2009
- July 2009
- June 2009
- May 2009
- April 2009
- March 2009
- February 2009
- January 2009
- December 2008
- November 2008
- October 2008
- September 2008
- August 2008
- July 2008
- June 2008
- May 2008
- April 2008
- March 2008
- February 2008
- January 2008
- December 2007
- November 2007
- October 2007
- September 2007
- August 2007
- July 2007
- June 2007
- May 2007
- April 2007
- March 2007
- January 2007
Categories
- About Me
- All That Scraps
- blogger challenge
- camera/photo play
- Cards
- Contests
- family stuff
- FOR SALE
- Home decor/3-D items
- How to FAKE it!
- Introduction
- JUGS Challenge
- JustRite Stampers
- Lizzie Anne Designs
- My family stuff
- My Stamping Space
- My Time Made Easy
- My Time To Color Challenge
- My Time to Create Challenge
- My Timeless Template Challenge
- My Timeless Templates
- Mytime Mail
- MYTIME MOVIE/VIDEOs
- Papertrey Newsletter
- Pink Cat Studio
- Pretty Palette Challenge
- Pretty Patterns Sketch
- Product Opinions and Must haves
- Recipe's
- Saturday Sketch
- Smilebox Creations
- Stampavie
- Tutorials
- Uncategorized
- videos
Most Popular
- Create your own Onesie Card Tutorial-and important NOTE! PLEASE READ (2529)
- Saturday Sketch-Boxed bag holder (2333)
- Going GREEN! Fancy Flower Flourish-Closure Video (1478)
- Fabulous Favorite - Giveaway! (1336)
- a Prayer Request (1232)
- QUICK-Easter Baskets from Nestabilities-PTI style-and blog challenge (1063)
- Teaser Sketch (999)
- February Release Giveway! (and a little peek) (996)
- Group Post and Rambling Rose Video Tutorial (985)
- GIVEAWAY! Who wants it all?! (895)
Recent Comments (RSS)
- 첫충사이트: 완전히 흥미로운 블로그 게시입니다. 저는
- sarah: Wow, Lauren, what a stunning
- hedie: خرید راهبند
- 야동: Love to read it,Waiting For
- 야동: This seller is in a
- 바카라사이트: 여기 처음 왔어요. 나는이 게시판을
- 야동티비: I was surfing the Internet
- 바카라사이트: 비슷한 주제에 대한 흥미로운 정보를
- 바카라사이트: "여기에 제공해 주신 귀중한 정보와
- 온라인홀덤: 유익한 웹 사이트를 게시하는 데
Copyright © 2007 - My Time, My Creations, My Stampendence - is proudly powered by WordPress
This blog has been Tweaked and Designed by Sara Williams