Archive for the ‘Home decor/3-D items’ Category
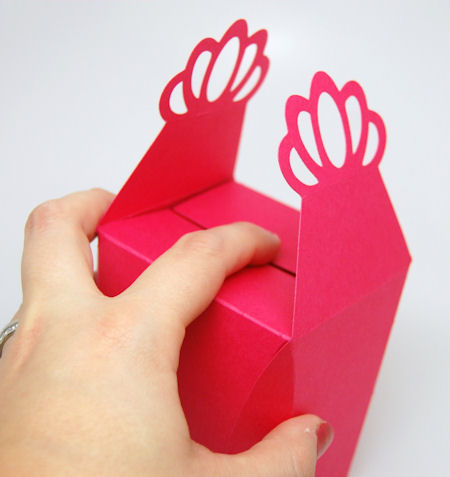
Fit for a Princess
Feb 1, 2013 Author: mytime | Filed under: Home decor/3-D items, My Time Made EasyNow today I am going to share a simply sweet party idea to add to the FUN of your Princess Party!
Yesterday I showed you the Castle of Dreams Cut File used as a party favor. No party favor is complete with a party hat to match!
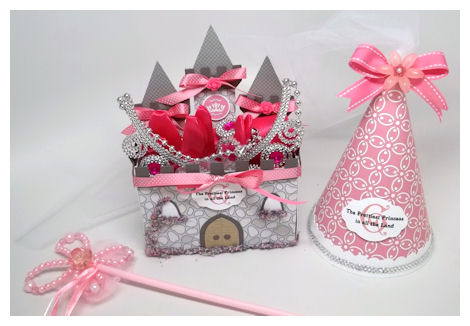
With our new Party Like a Princess cut file you can create the perfect party hat for any occasion.
Available in PDF, SVG, GSD, DXF, WPC
Completed Project Size:
4 1/2 Inches Around
7 Inches Tall
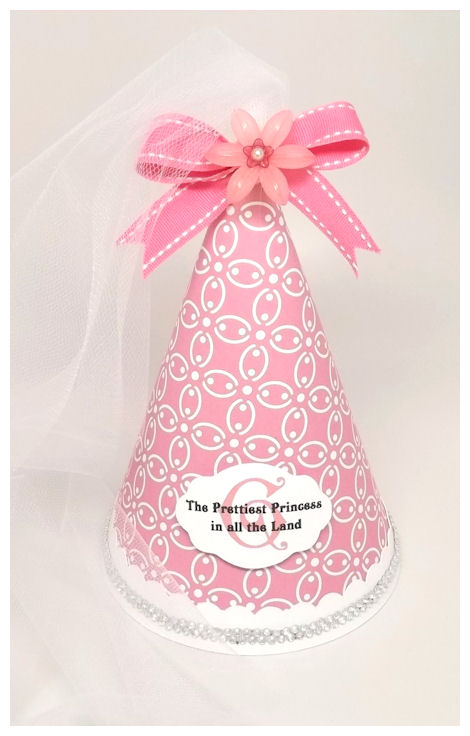
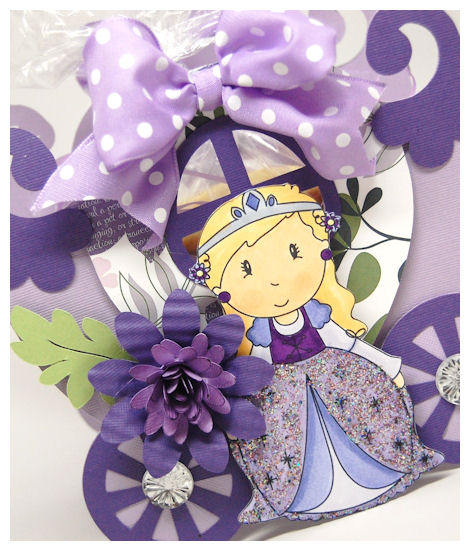
Now she can party in style with our version which comes complete with a perfectly pretty scalloped trim!
This also just makes an awesome party hat-PERIOD!
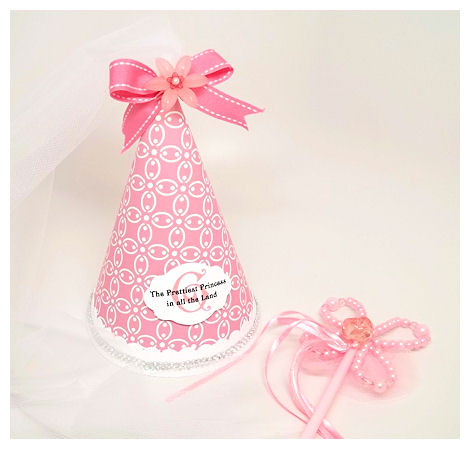
I created the hat using the Vintage Flourishes – Bright © paper (re-colored pink to suit my project needs!).
I also added some bling around the edge.

Through the top I added some tulle, and added a pretty ribbon with an acrylic flower to top it off.
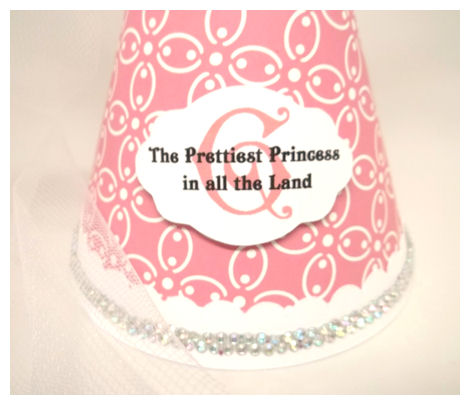
The tag was created using Fine Finish © cut file. My sentiment is from the Simply Enchanting set, and the “G” is from the Merriest Monograms © set.
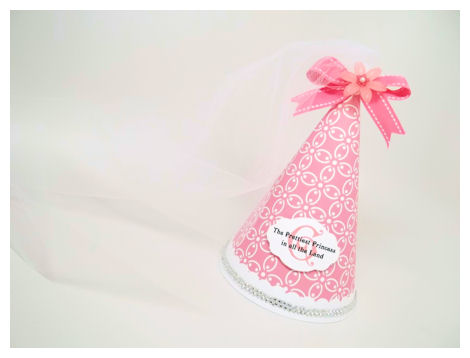
This party hat isn’t just for the prettiest of princesses, but her Royal Court, or any time you just want to party!
I know today was short and sweet. I’m juggling being back at school, and trying to juggle work and family as well. I have a great project for you tomorrow, so come back then, and don’t forget to check out the team.
See you tomorrow.
February 2013 Release
Jan 31, 2013 Author: mytime | Filed under: Cards, Home decor/3-D items, My Time Made EasyWOW! It’s actually February already! Not sure where the time goes, but it certainly does FLY by!
This February Release is finally here. We have an amazing collection of coordinating items with a Fairy Tale Theme.
My company focuses on the “complete package”. We work hard to offer coordinating products that are easily interchangeable with previously released products. We really enjoy being able to share the ideas and versatility each product holds.
We have released:
2 NEW! Pretty Packaging Templates
2 NEW! Pretty Impressions Stamp Sets
1 NEW! Pretty Printable Digital Paper Collection
2 NEW! Pretty Pieces Cut Files
Also be sure you check out our Pretty Package Collection, where you will save 25%!
Check out our entire team today,as we are each sharing some creative ways to use the *NEW* products for February!
Riding in Coach
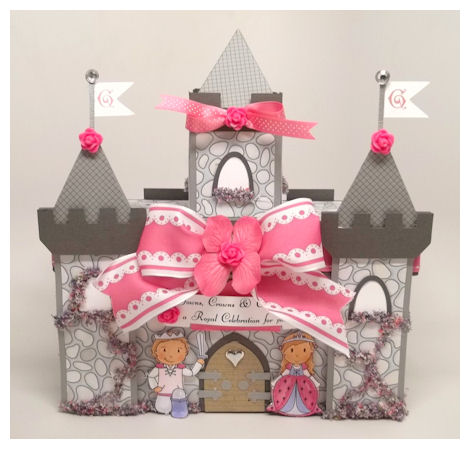
Castle in the Clouds
So it’s my turn to create something “magical”!
I showed you the amazing Castle in the Clouds template, which is a FABULOUS gift box, of table centerpiece, but now let us focus on the invitation and a party favor for the guests!
(two for the price of one!)
Available in PDF, SVG, GSD, DXF, WPC
Completed Project Size:
Card

7 Inches Tall
Favor Box (with panel)
Completed Project Size:
2 1/2 Inches Deep
5 1/4 Inch Wide
7 Inches Tall
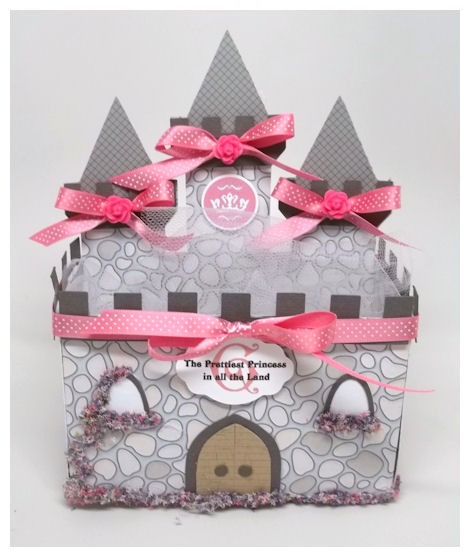
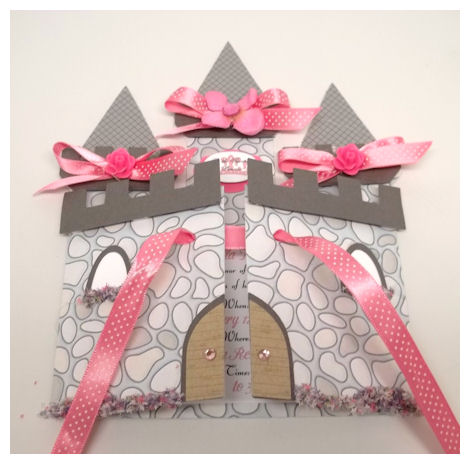
Every Princess dreams of the perfect party invitation that will enchant her Royal Court into attending her big event! This Castle themed card is perfect for such an occasion, and serves not only as an invitation, but a card for a birthday, or thank you too.
This invitation is for my niece Gabriella.
Created to match the Castle in the Clouds template I made the other day, I used the Custom Construction Materials Digital Paper on the front and back of the invitation, and added my flowersoft, bows, and acrylic flowers.
Simply untie the invitation to reveal the details for the party!
The party invitation script, in black ink, is from the Simply Enchanting set.

I simply typed in the party detail information to suit my occasion!
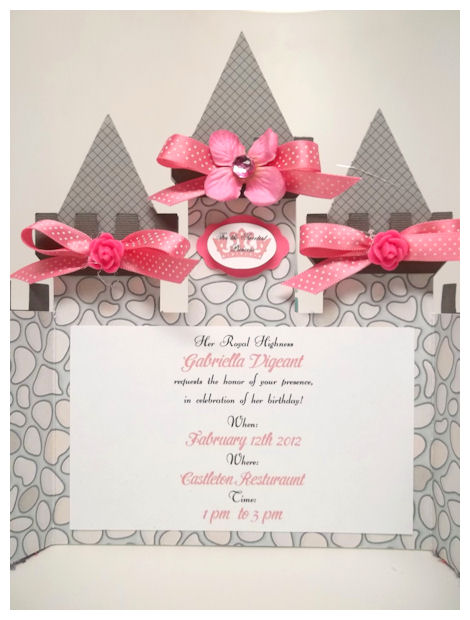
Isn’t it SO pretty?!
Imagine what it would cost to BUY invitations like this. EASILY $5 each, at best.
The best is yet to come…
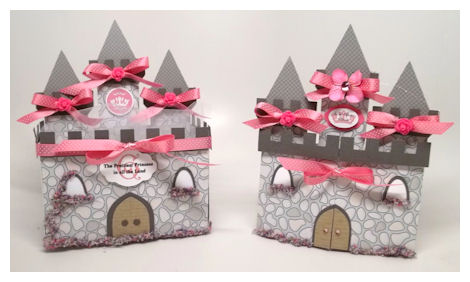
We have also included an additional panel with this card cut file, to allow you to turn this from an invitation to a party favor box with one additional step!
Look at this!

Just by using the additional panel, it becomes are castle themed party favor.
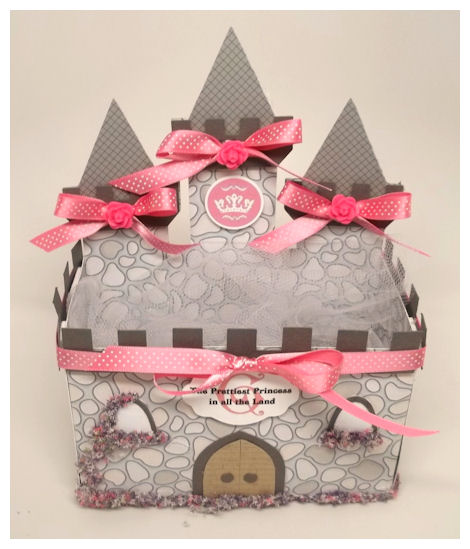
This can hold so many amazing gits/favor items that any princess will cheer over!
I love the label on the front of the castle. It was cut using the Fine Finish © cut file.
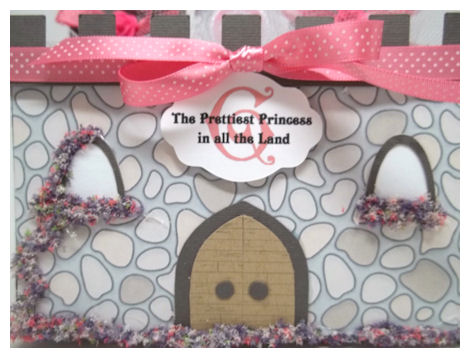
The sentiment is from the Simply Enchanting set, and the monogram “G” is from the Merriest Monograms © set.
You could change the monogram initial for each guest!
Another great detail…
The round castle image is also from the Simply Enchanting set. It’s a really simple, but pretty detail.
So there you have it. Pretty, simple and perfect for any Prince or Princess in your life. I know my niece is going to love everything I’ve designed for her big 4th Birthday this year. It’s great to be able to MAKE your own gifts! You can customize them for any event and give it that personal touch that store bought items will NEVER have.
Please view our Gallery for project samples, and alternative ways to use all our amazing coordinating products!
You may also want to check out our blog for weekly challenges, and even more amazing ideas.
Also if you haven’t already, you can follow us on Pinterest, as we have over 16 pinboards full of ideas, we are also on Facebook-so LIKE US there, and follow us on Twitter!
I hope you are enjoying this release!
We will return tomorrow for more great gift ideas.
February Preview Day 2 Riding in Coach
Jan 30, 2013 Author: mytime | Filed under: Home decor/3-D items, My Time Made EasyToday I’m sharing another fun template we are releasing this month!
If you are liking princesses, you will love today’s template too.
Available in PDF, SVG, GSD, DXF, WPC
Completed Project Size:
6 Inches Wide
5 1/2 Inches Tall
3 1/4 Inch Deep
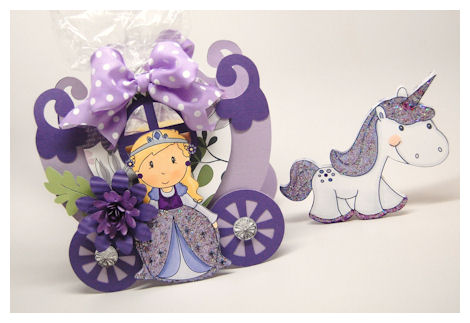
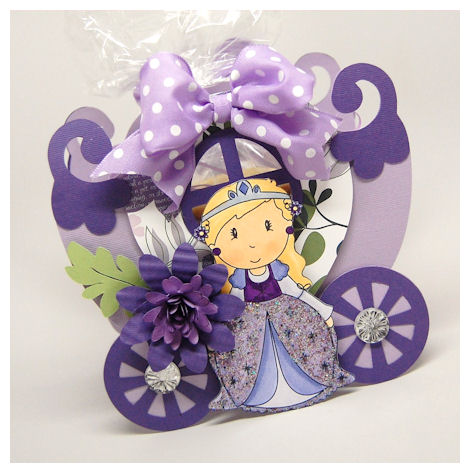
Fit for a Princess, this “Coach” is the perfect gift bag, or party favor for any Royal event! This stunning “coach” will really set the stage for any amazing party or gift!
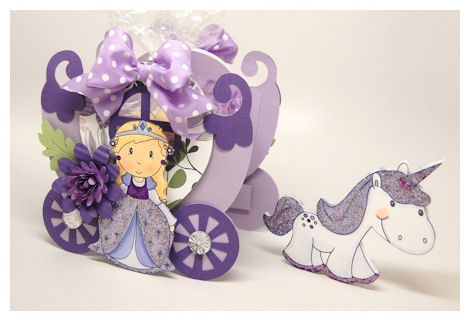
This is simply stunning and so easy to put it together you will be in love!
My pretty purple princess is from the Something Magical Set, as is her trusty unicorn, who pulls her coach to the ball! I added some stickles to the unicorn for some added bling.
I made my coach in contrasting purple colors, and the Fresh Cut Expressions © Collection 1 paper.
I added a flower I created using the Bloom Builders © flower cut file, layered with a smaller version of the Rolled Bloom Daisy ©.
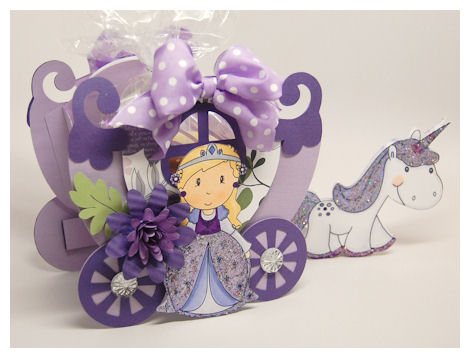
I have some homemade Madeleine cookies wrapped up in here for a special treat.
This can also become a Genie Lamp, or Circus Stagecoach for a “circus” or animal themed party too!
You will also want to view the astonishing Castle in the Clouds template too, as it will help you make the most amazing three dimensional castle gift box or table centerpiece!
Whatever the occasion this is sure to bring the biggest smile.
Return tomorrow because we have our official release of new products, and our team will all have some great ideas for fun uses for everything we have to release.
See you then!
Castle in the Clouds:February Preview 1
Jan 29, 2013 Author: mytime | Filed under: Home decor/3-D items, My Time Made EasyWelcome back everyone!
How’s your winter going? It’s been a very chilly winter here in New Hampshire, I can tell you that much!
Today we hope to warm your heart with some amazing previews from the upcoming February Release on the 1st. Our projects today will be using a stunning template called Castle in the Clouds.
Having two daughters myself it seems the Princess theme has been an ever going favorite theme for YEARS! We’ve had many Princess parties in our home, and finding the perfect princess themed items were ALWAYS a challenge. Now years later, I have created a line of what I felt were the perfect items for any princess.
That being said I now have young nieces, so the need for Princess themed items continue. My niece Gabriella will be 4 on February 12th, so the items you see over the next few days, are made especially for her.
Available in PDF, SVG, GSD, DXF, WPC
Completed Project Size:
4 Inches Wide
7 1/2 Inches Long
8 3/4 Inch Tall

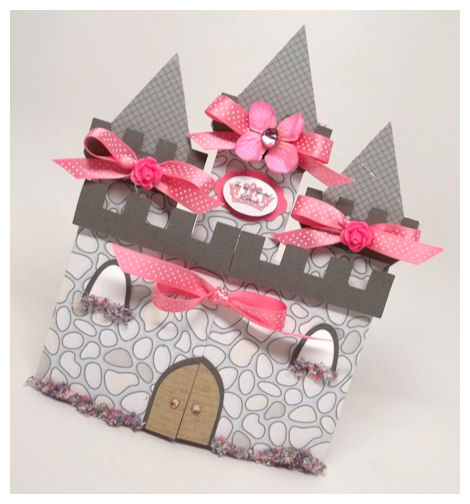
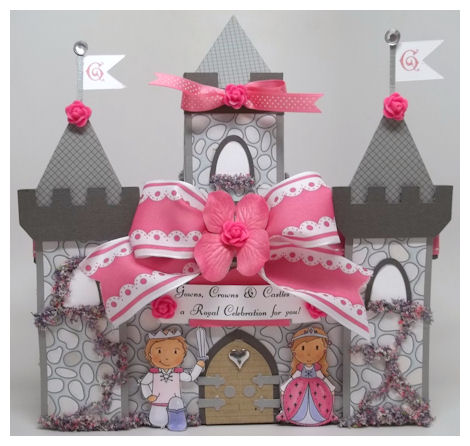
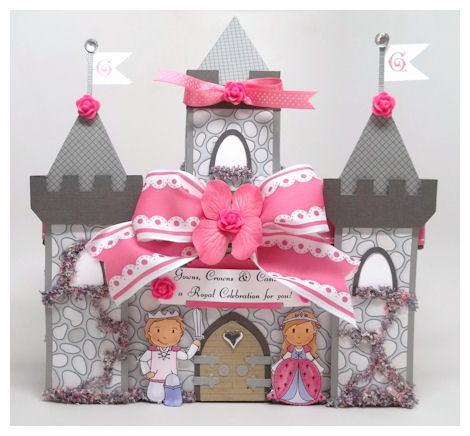
This Castle in the Clouds is an astonishing three dimensional castle template that is any Princess dream come true!
We have several sets that will really dress up this castle: The Something Magical and the Simply Enchanting Set. The Construction Materials or Custom Construction Materials Digital Paper will help make this castle look like a “real” fairy tale castle with it’s realistic patterns.
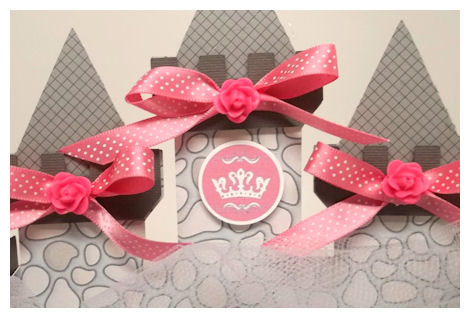
Here I have used the Castle in the Clouds Template, and “decorated” it using the Custom Construction Materials Digital Paper. It is absolutely perfect!
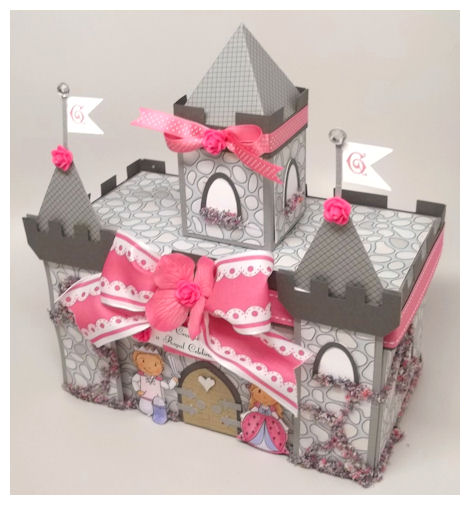
The base of the castle was cut in a light gray cardstock, with our accent pieces in a darker gray cardstock for some contrast.
Along the windows, and along the bottom of the castle (on all four sides) I used some really pretty Flowersoft, so that it looked like flowers were growing on, and up the castle, and along the sills of the windows.
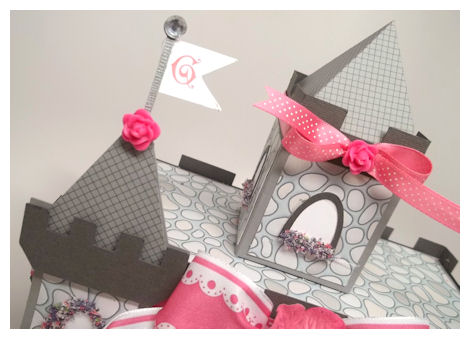
Atop the towers, you see the flags that come with this template. I printed the letter G on the flags in pink, using the monograms from the Merriest Monograms © set. I added some acrylic flowers top the tops as well.
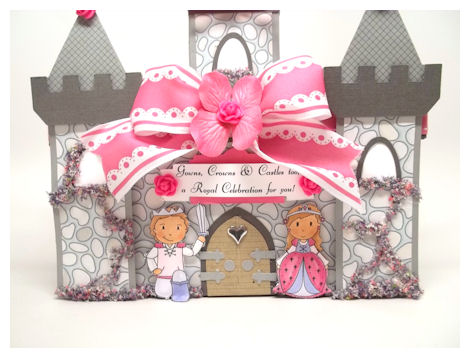
All of the new images found in the Something Magical set will really make these new items magical! The Knight in Shining Armour, and our Pretty Princess are from the Something Magical set!

The beautiful banner above our castle door uses a sentiment from the Simply Enchanting Set. which is sure to provide you with a variety of stunning sentiment options for any party or gift.
The banner was cut using the Un-Wined Labels ©!
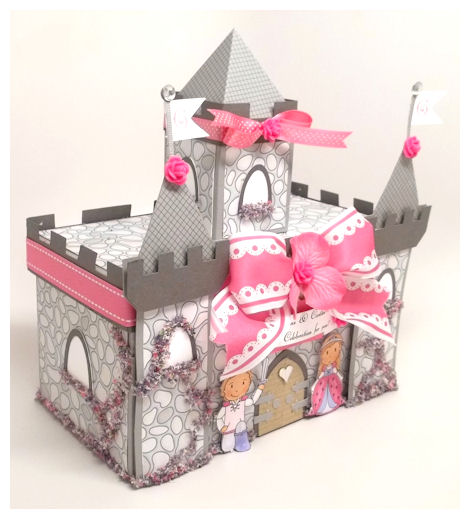
This is truly the perfect project for any Princess themed party, be it for the centerpiece or a stunning gift box that is sure to WOW the fairest of them all. It is also perfect for that “Knight” in shining armor too!
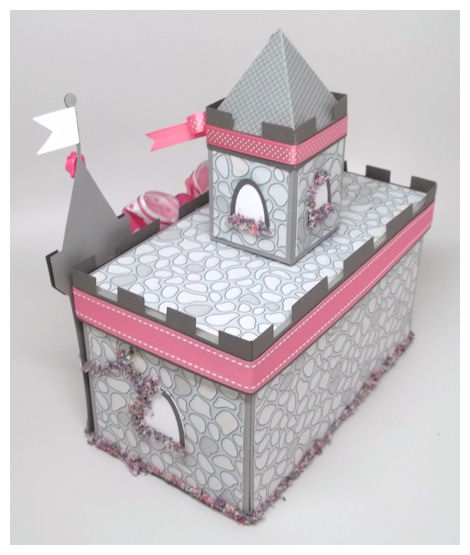
You may be wondering WHAT is inside!

Just lift off the lid…..and you can see we have gifts for the pretty princess of course!

We have a shimmery skirt, some jewels, and satin gloves, just to get the party started! Shopping at any local dollar store is ideal! They have an abundance of items that you can package up quite inexpensively.
There will be no prettier centerpiece on a table, or box for a gift, I assure you.
We have several other items that may be of interest to you such as the Castle of Dreams Cut File, Party Like a Princess Cut File, the Magical Birthday Wishes Cut File, and the King’s Crown…to name a few ideas! The possibilities are truly limitless.
If you like what you’ve seen so far, come back tomorrow because we have MUCH, MUCH more!!
Lots of Love: Year in Review
Jan 9, 2013 Author: mytime | Filed under: Home decor/3-D items, My Time Made EasyWell the time has come to literally wrap up our January release.
Today our design team is making something for Valentines Day using some of our older products. We were all suppose to creat something we LOVE for Valentine’s Day.
So take a moment and see what each designer LOVES, and has to share with you:
- Lauren Meader <—you are here!
- Debbie Marcinkiewicz
- Farida Rone
- Kimberly Morrow
- Lisa Kind
- Lori Hairston
- Lori Kalus
- Mara Campbell
- Pattie Goldman
- Tangii Crain
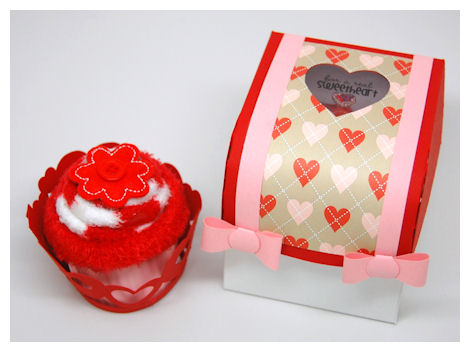
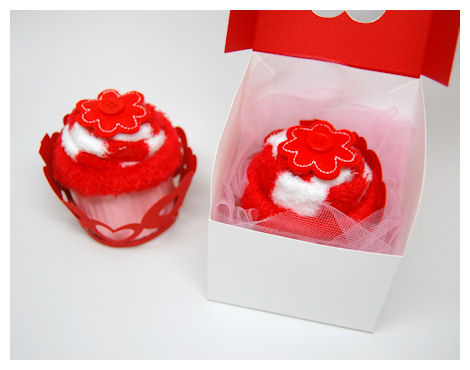
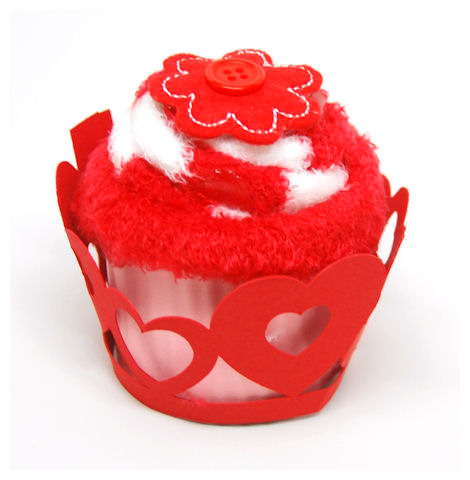
So, given the task at hand, here is what I LOVE: I love making gifts (obviously), I love re-purposing items, I love a challenge, I love hearts, I love argyle, I love cupcakes of all kinds, I love printing on acetate, I love boxes with windows in them, and I love red, pink and white together and I love this project and how it turned out!
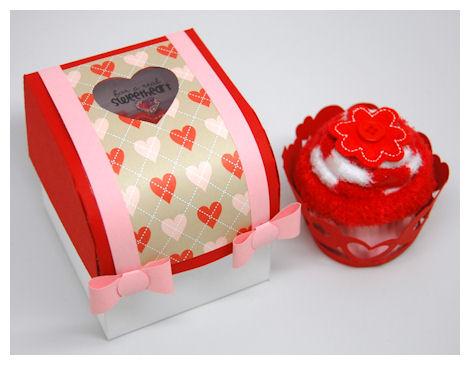
My project today was created at the suggestion of a customer (so long ago I don’t recall-SORRY!) who wanted to see the Hey Cupcake © template resized for just ONE cupcake. So, since I cannot resist a challenge, I took her up on the idea (and am posting it like a year later-sorry).
To do this I cut the width in half to 3 1/4 inch wide on both the base and lid (lid just a little larger obviously). I have a Cameo Silhouette and you can do it simply by moving the nodes.
This was decorated using the Candy Kisses © paper collection because I love the pattern and the colors. It really allowed me to make this project POP without a lot of effort. I love quick and simple projects that are easily duplicated, but has some sort of detail that really makes the gift special.
I added my super sweet bows (resized to about 50% I believe) from the Bow-Tied © cut file. I love little bows, and making my own from paper is every sweeter, easier and more affordable. I always have the rigth color and size for ANY project now!
For the heart window I used the heart from the Flag ‘Em Down © cut file.

I had printed the sentiment from the Sweet Sentiments © set, and the heart cake from the Sweet Treats © set directly onto my acetate, and colored it from the back using glitter pens. Its actually really pretty in person.
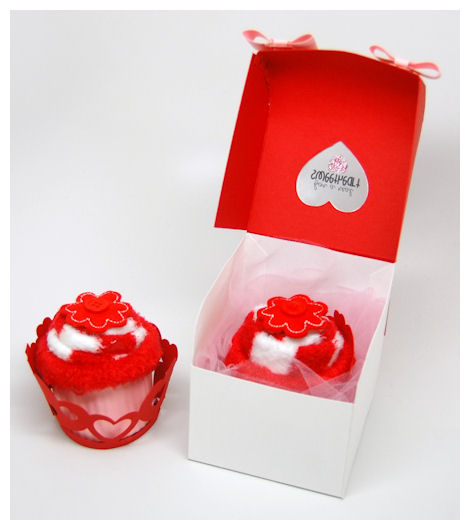 Now for my uber sweet “cupcake”…I used a pair of super soft sock/slippers from Bath & Body Works, rolled up to look like an actual cupcake.

Conversation Hearts
Jan 8, 2013 Author: mytime | Filed under: Home decor/3-D items, My Time Made EasyThere is never, ever enough time for me to personally create everything I want with everything we have! But I am thankful for my designers who can usually fill in those gaps with their fabulous projects!
Today you will most definitely want to visit:
Now I have already shared one sample using the With All My Heart template, but today I have another.
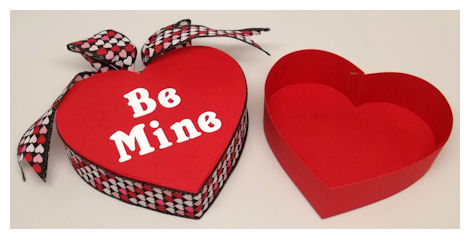
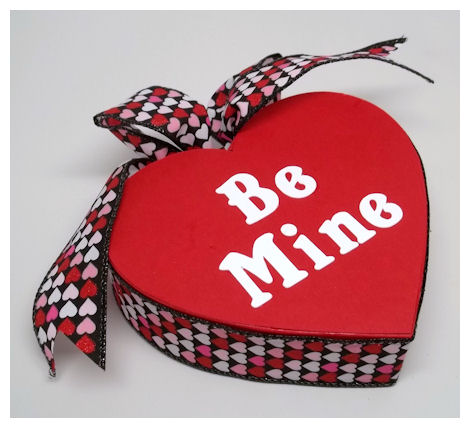
When we see heart boxes, and think Valentines day I think we all agree that our thoughts wander to the candy of all candies during Valentines Day and those of course are the conversation hearts!
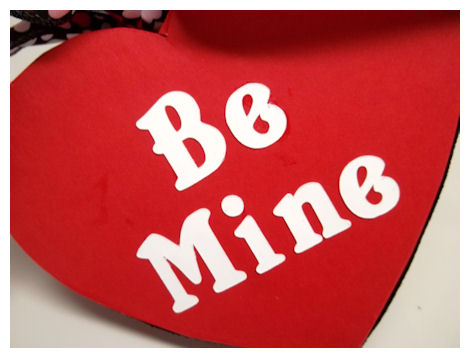
So here is my take on the conversation heart: Be Mine!
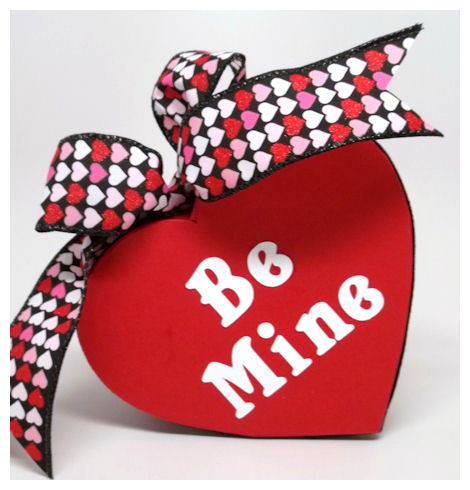
Template comes with (4) Love Notes: Love You, Be Mine, I’m Yours, and Sweet!

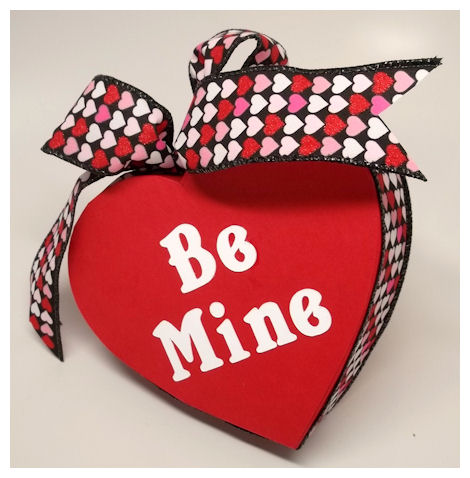
You can add these to the top of your template to create your own “conversation” heart box, or convey that special message.

The conversation heart went together in under 10 minutes!
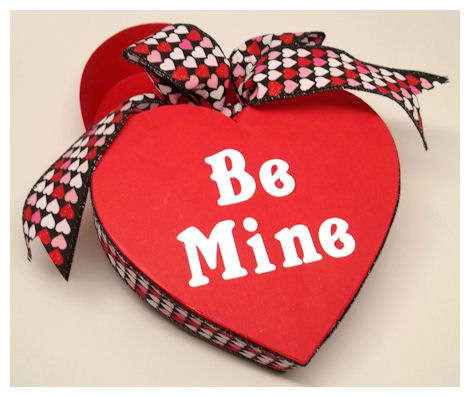
Cut and assembled in a red cardstock, then just glue on your sentiment! I tied around my heart patterned ribbon and was done.

I made this for my hubby for Valentines Day. I am going drop of the kids at my mothers, then I’m going to put tickets to a show, along with a note about our dinner plans for our weekend date! My mom is great, and takes the kids for us for the weekend, so we are so blessed to get a nice weekend together before we hit February vacation! LOL!
Talk about a no fuss project! I love that, and I know many of you will too.
Tune in tomorrow because we will give some old templates some new love!
See you then!
Welcome back to my blog everyone. I’m always excited with each new release to share my projects and ideas with you all. More often than not it is so hard to sit on projects and wait for them to be released. I wish I could just release as I create stuff but that would probably be overwhelming. I also love our design team and seeing what they create each month because it is often beyond anything I myself would think up. I am fortunate to have an amazing group of talented designers, each with their own unique style that lends different design ideas for just about any style.
Today you will want to take a moment and visit these talented ladies:
Today I am going to share a sample using one of our *NEW* cut files! It was based on a quick sketch from an email a few months back from one of our customers Lisa S. I always love being able to accommodate my customers requests. Some are for “general” ideas, such as our Clam-ped Shut this month, and others are more unique. I think this one was fun because Lisa is in the cake pop making buisness, and she attends many craft fairs. She wanted something that could quickly and easily wrap up her simplier cake pops or the candy coated delights she makes. So based on her drawing and ideas for add ons I can up with the simply sweet Pop On Over.
Pop On Over $2.50
Available in PDF, SVG, GSD, DXF, WPC
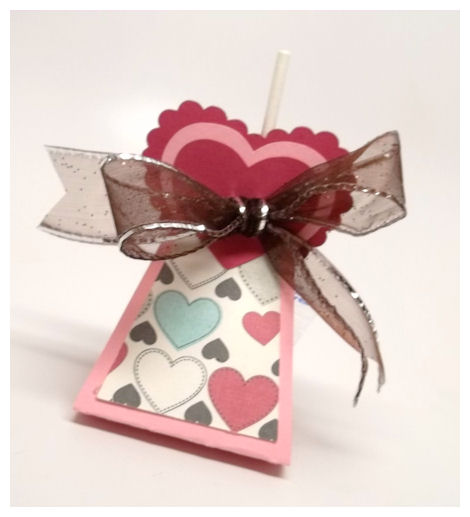
If you love lollipops, then you will really love this fun and fabulous cut file that “pops on over” any lollipop creation! This is a heart topped wrapper that just convey’s LOVE! You can also choose to use the scallop heart layer or not. Just wrap it up, and tie it off!
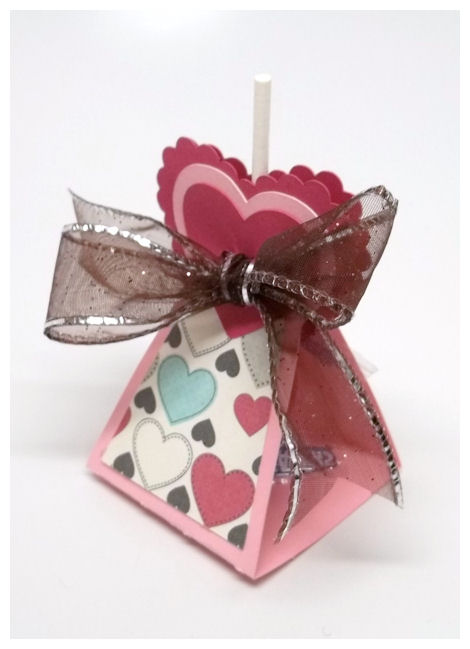
This is the plain version of this Pop On Over cut file. I used a pink cardstock, layered with the cute heart pattern from the Minty Chocolate © collection.
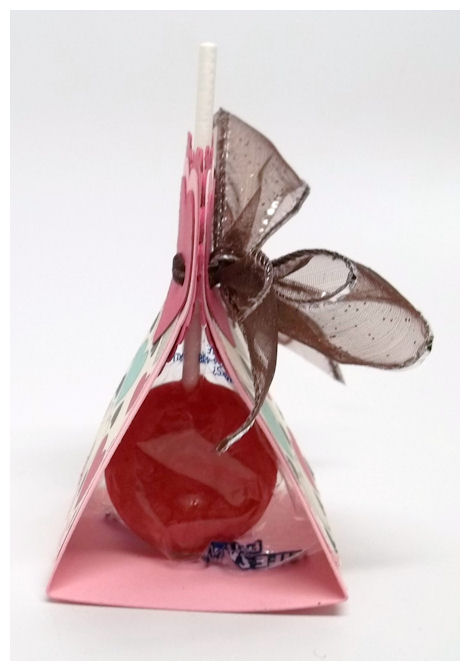
Here we have a simple lollipop we got in a mega bag at the store. You can use Blow Pops, Tootsie Pops, Sour Pops etc. It costs just pennies for this! Seriously cute and eyecatching. Just what Lisa S. wanted to dress up her cake pop display to set her apart from the other vendors at a fair or in the stores she sells her pops in.
Cake pop creations are on the rise, and fabulous ways to gift them are as well! That being said, who doesn’t love those chocolate versions as well? Notice no stick?
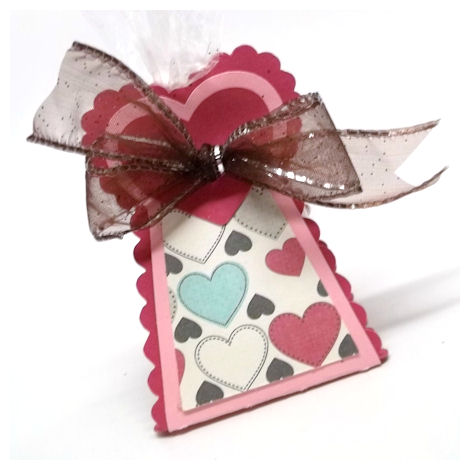
Here was have stepped it up a bit, adding the scallop layer to the Pop On Over cut file.
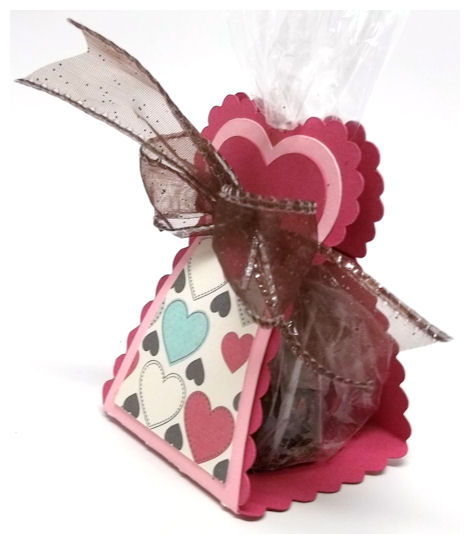
You can also place virtually any item in a plastic bag, then wrap it up with this Pop On Over cut file too! You just pull the top through to the top of the cut file, and tie it closed, as I did here.
There are two chocolate truffles wrapped up in here instead!
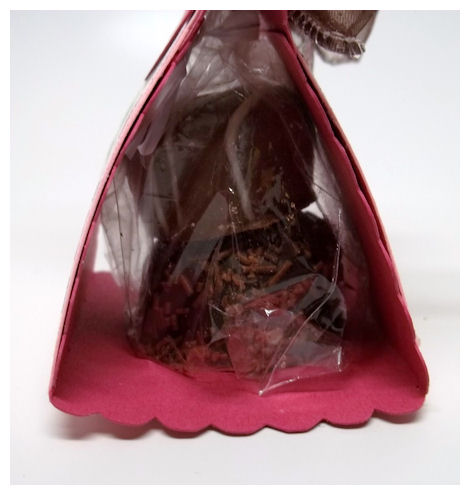
You could use any homemade chocolate, cookie, caramel, candy or how about Dove, Lindt, Godiva etc.
Don’t worry if you’re not Suzie Homemaker! That is no problem, because you can use any store bought creations too.
If you are like Lisa S. and many others out there who are making lollipops, or cake pops then you may also want to check out our amazing Sweet Treats Tote, as it includes an insert made just for lollipops (as well as 3 other design options)!
I know my own kids will be making cake pops and gifting them this Valentines Day! Amber just got a cake pop maker and chocolate melter. She made some for a kids cookie swap she was in. Too fun! No matter what time of year it is this is definitely something that can be used year round to turn something inexpensive to over the top fabulous!
January Release:With All My Heart
Jan 6, 2013 Author: mytime | Filed under: Cards, Home decor/3-D items, My Time Made EasyWell it may not be the 1st of the month, and the release may have been delayed for the holidays, but it is every but as fabulous as releases past!
We have released:
3 NEW! Pretty Packaging Templates
3 NEW! Pretty Impressions Stamp Sets
1 NEW! Pretty Printable Digital Paper Collection
2 NEW! Pretty Pieces Cut Files
Also be sure you check out our Pretty Package Collection, where you will save 25%!
As you may have come to know my company focuses on the “complete package”. We work hard to offer coordinating products that are easily interchangeable with previously released products. We really enjoy being able to share the ideas and versatility each product holds.
Today we are each sharing some creative ways to use the *NEW* products for January! They should help you send the message of LOVE to anyone you gift something to ♥
- Lauren Meader With All My Heart
- Debbie Marcinkiewicz Just a Gift
- Farida Rone Just a Gift
- Kimberly Morrow With All My Heart
- Lisa Kind With All My Heart
- Lori Hairston Just a Gift
- Lori Kalus Clam-ped Shut
- Pattie Goldman Clam-ped Shut
- Tangii Crain Clam-ped Shut
- Tina Hale Just a Gift
I am really excited about FINALLY being able to release the *NEW* With All My Heart Template.
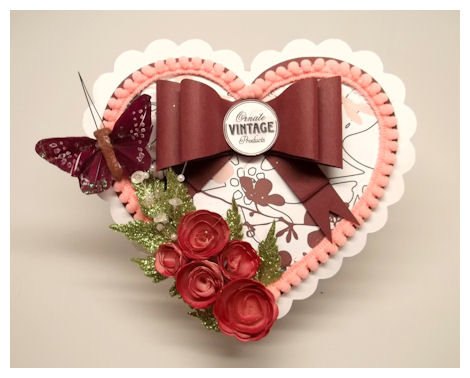
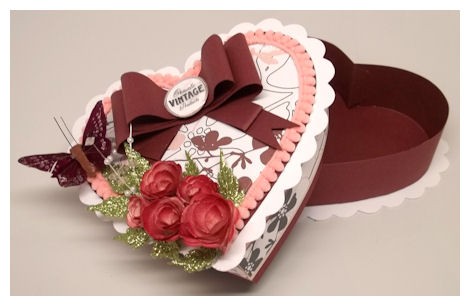
My creation today is MY version of a vintage valentine box.
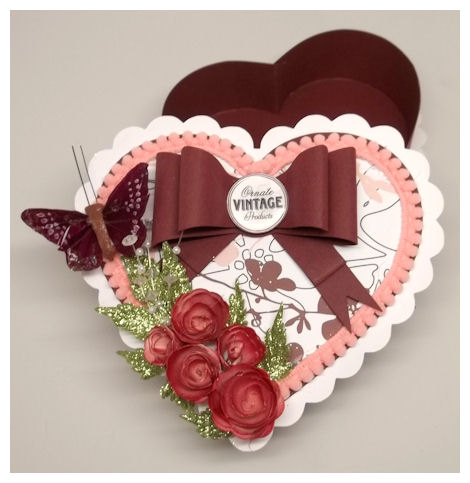
I cut mine using a Scarlett cardstock. I added my scallop layering in white.
I love the simple scallop layers that you can use, or NOT!
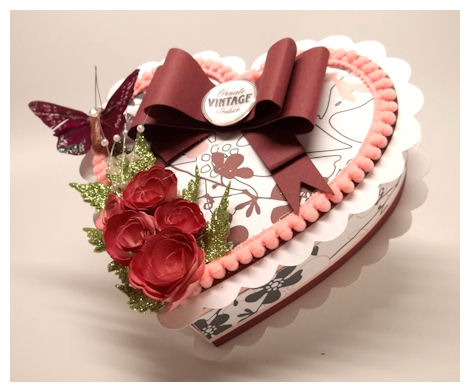
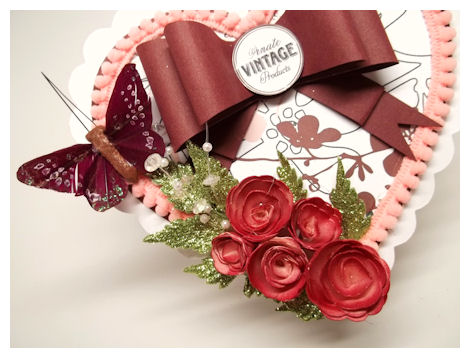
I then layered on the pretty patterned paper from the Cherry on Top © collection.
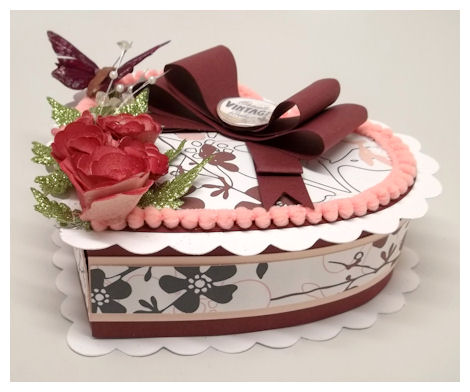
I added on some pom pom ribbon trim around the plain top layer.
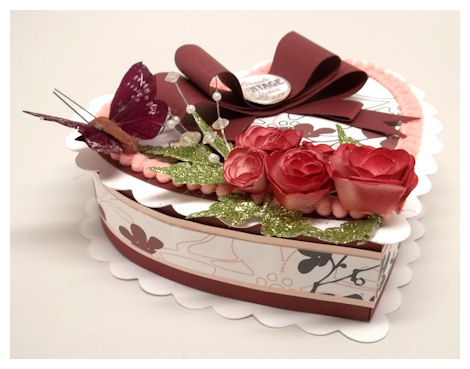
I accented the layer with a pretty paper bow I created using our Bow-Tied © cut file. In the center of my bow, I had used the sentiment and circle frame from the Grammy’s Sewing Kit © set.
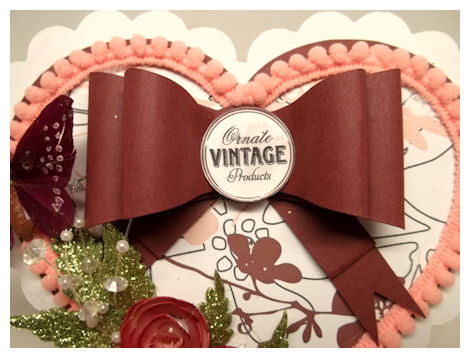
I added a large arylic cover over it. This project actually reminds me of my Grammy who passed away almost a year ago. She LOVED Valentine Day. One year she kept her little Christmas tree up and decorated it for Valentines day with all these little heart pillow ornaments she sewed. It was amazing. Pretty red velvet bows…I’ll never forget that.
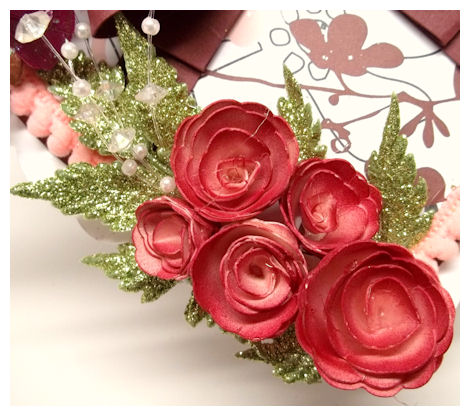
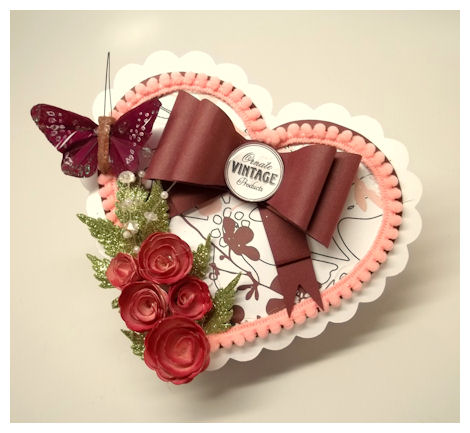
I absolutely love this box to pieces. It is obviously designed after all the fancy chocolate boxes that come out each Valentines Day that I have long loved since being a little girl! I usually find the prettiest ones filled with the chocolates I hate the most! LOL! Now I can MAKE my own, ANY TIME OF YEAR, and fill it with whatever I want to give!
I’ve had this template created for quite some time now, so I am happy to finally share it. As you know most companies work in advance. More often than not, I make TOO MUCH to release at one time (don’t want to over saturate you with too much at once) for the season/holiday I want to release it for, so it gets delayed. Many times that’s why you see my samples using older products. Much goes into the design of everything. Mainly the template comes first! Then I later design stamps/paper/cut files that I feel will best accent it. In order to get the directions and my first sample done I’ll try to use what we already have, or I delay the final product until all the products I want are done, but I don’t like doing that. I know a lot of info you don’t NEED to know! LOL!
Please view our Gallery for project samples, and alternative ways to use all our amazing coordinating products!
You may also want to check out our blog for weekly challenges, and even more amazing ideas.
Also if you haven’t already, you can follow us on Pinterest, as we have over 16 pinboards full of ideas, we are also on Facebook-so LIKE US there, and follow us on Twitter!
We will return tomorrow for more great gift ideas.
With Love:Preview 2
Jan 5, 2013 Author: mytime | Filed under: Home decor/3-D items, My Time Made EasyAre you falling in love with the latest projects for our release tomorrow?
I know I’m so inspired by what I have seen so far!
If you want some more eye “candy” please make sure you visit:
Clam-ped Shut
Just a Gift
With All My Heart
Available in PDF, SVG, GSD, DXF, WPC
Completed Project Size:
3 3/4 X 3 3/4 Inches Wide
2 Inches Tall
Our customers are amazing! You all have the best ideas, and you know best what YOU want! This is definitely one that has been requested for some time now. So without further delay…here is it.

This is a fresh take on a fabulous, old time favorite! With its clam shell like closure, is the perfect box for so giving so many treats. No matter what you “shut” in here, it is sure to bring a smile with it.
This one was made well over a year ago, so there is no *new* products used on it.
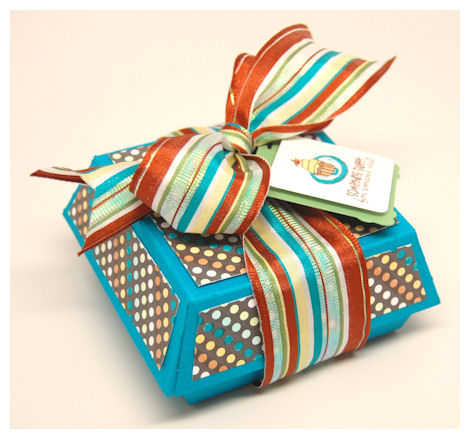
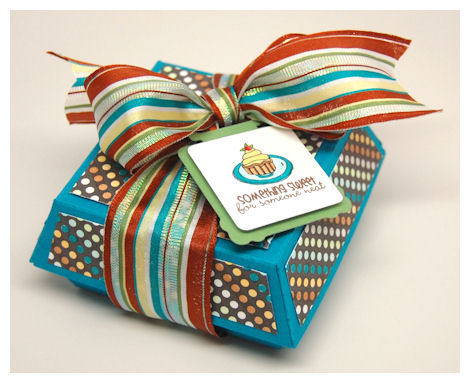
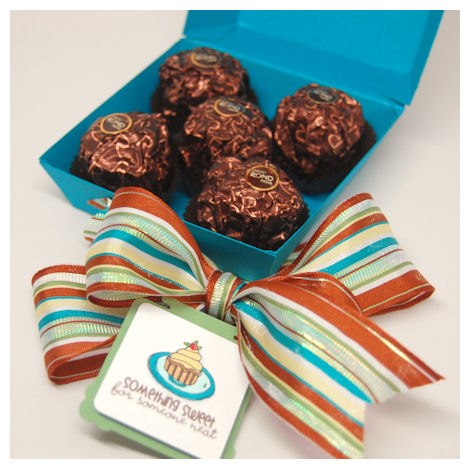
I cut my Clam-ped Shut Template out of teal cardstock, then decorated it using the Darling Dots © paper collection. I hand colored in the rows of dots using my Copic markers. Just a fun, simple trick for unique paper colors, since I wanted to match the pretty ribbon around my box.
Here I packed some (5) yummy Roche chocolate truffles! Quick, simple, affordable and Yum-azing!
The tag is from the All Tied Up! © Square, and it makes the perfect frame for my sweet images from the Sweet Treats © set.
You really don’t need to spend a lot of money to make an impact! Plus if you give someone TOO much chocolate AFTER their New Year resolution is made they will think you are trying to sabotage them, now show them some L♥VE!
Speaking of L♥VE…tomorrow you will fall for the NEW products we have to bring!
So come back then!
With Love: Preview 1
Jan 4, 2013 Author: mytime | Filed under: Cards, Home decor/3-D items, My Time Made EasyHappy New Year everyone!
Everyone at My Time Made Easy would like wish you a happy, healthy, creative and prosperous year to come. I’d like to thank you for your business, as I truly appreciate each of you. I also want to thank my entire team for their hard work, sharing their time and talents as well as their dedication over the last year. They really inspire me personally, with their ideas for use of our new products, and I hope you feel the same.
I look forward to this upcoming year of creativity!
Our previews for the January release will begin today, on the 5th, with our release being on the 7th. Hope you will join us as we kick off the new year with some inspiring ideas!
Today you can find the latest ideas using our *NEW* products by visiting the following designers:
Just a Gift
- Lauren Meader <—you are here
With All My Heart
Clam-ped Shut
SO today I personally am sharing a new gift box called Just a Gift!
Available in PDF, SVG, GSD, DXF, WPC
Completed Project Size:
4 1/4 Inches Tall
3 1/4 X 3 1/4 Inches Wide
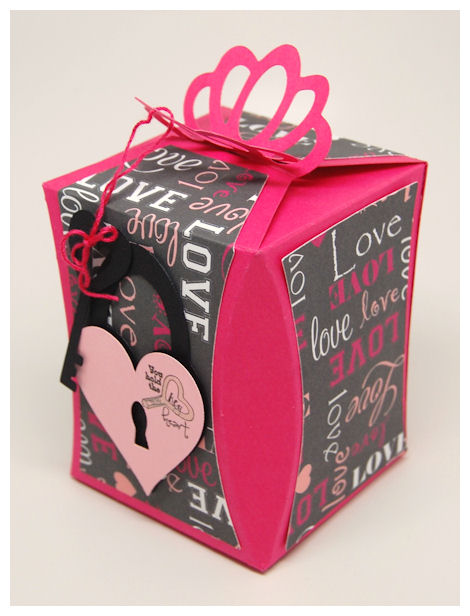
Sometimes we just need a box for that special gift. Look no further! This is literally the perfect gift box, as it takes the ordinary box, and makes it extraordinary!
I created this box quite some time ago, so while the Just a Gift! is NEW the items I used to decorate are available NOW!
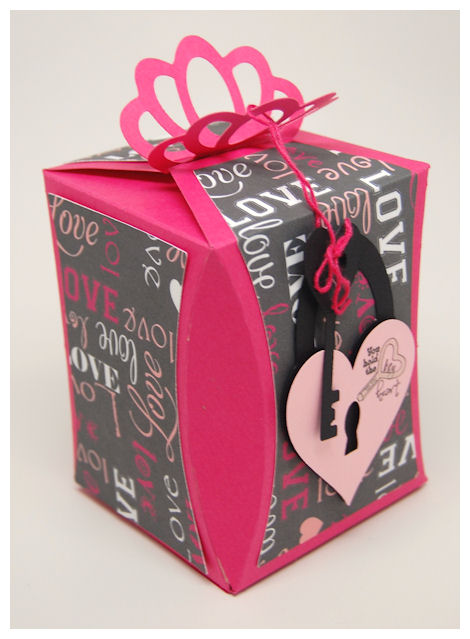
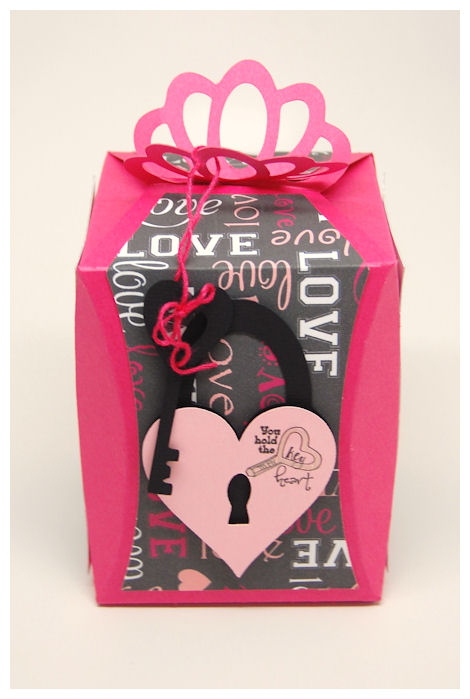
Here is used the perfectly pretty printed sheet from the Amour © paper collection to decorate the box.
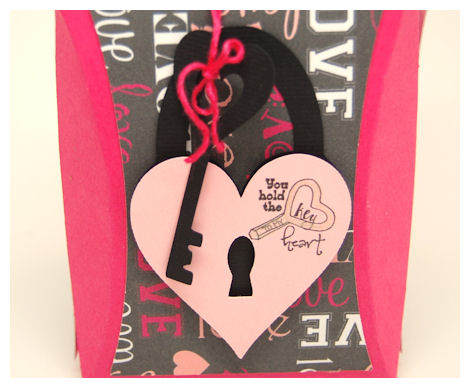
I added a lock & key from the Under Lock & Key © cut file. Printed onto the lock I used the sentiment from the super cute Wound Sentiments © set.
This gift box has some fun folds, and unique angles that are easy to assemble, and make it the perfect gift it itself.
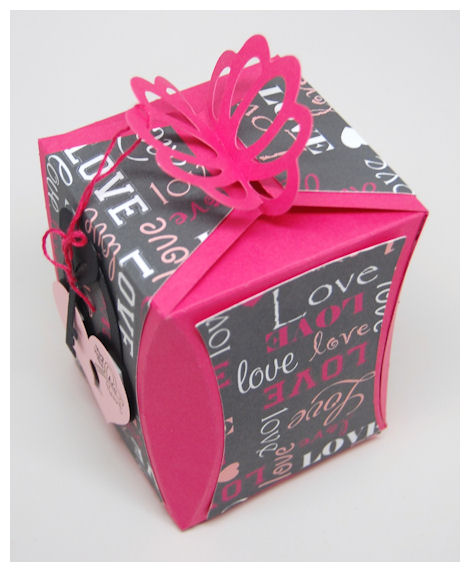
Want to know what makes it even MORE perfect? It comes complete, topped with a bow!
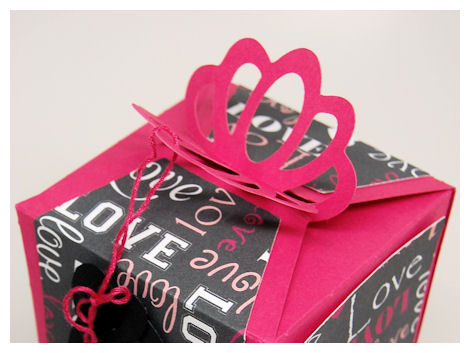
I love how perfectly simple it is to make but yet quite different.
This is how it opens up…
Easy peasy!
You could put a variety of items in here for any occasion. Perfect to celebrating any time of year when you want to give a GIFT! Don’t forget super cute table centerpieces! You can tier balloons to it, use them as party favors…whatever you want.
Speaking of celebrating…we aren’t done yet! We have several days left of creative ideas and new projects with our latest NEW items for our January 2013 Release, so come back tomorrow!
My Etsy

Who I Designed For
Blogroll
- Alicia
- Alli Miles
- Ally Blankenship
- Amber
- Andi @ crafts on a whim
- Angel R
- Angie Z
- Anne Kranitz
- Becky O
- Bee
- Beth Silaka
- Bethany Paull
- Beverly Nash
- Bobbie
- Cambria
- Cammie
- Card of the Week
- Card Positioning System (CPS)
- Cards for Cancer
- Catherine Doucette
- Charmaine
- Cheryl Sims
- Chriss Rollins
- Christina
- Christine Ewing
- Christine Wooden
- Colleen Schaan
- Craft Critique
- Craft Gossip
- Crystal
- Dawn Easton
- Emily Giovanni
- Geny
- Holly
- Igne Groot
- Inspirational Craft Blogs
- Irene
- Jami Sibley
- Jeanne Streiff
- Jen del Muro
- Jeni Bond
- JenMarie
- Jenn Balcer
- Jenn Diercks
- Jenn O
- Jennifer E
- Jennifer Mick
- Jennifer Pereda
- Jennifer-Sweet Treat
- Joanne Basile
- Jodi Collins
- Julia Stainton
- Julie Masse
- Karen
- Kathryn Berthiaume
- Katie Cotton
- Kelley Holland
- Kendra
- Kim Scholfield
- Kris’s Color Stripes! Get inspired here
- Kristen Dubosque
- Kristin Eberline
- Kristine
- Laura @ Sunshine Stamper
- Laura Turnmire
- Laurie Schmidlin
- Lesa Rapp
- Linda Duke
- Linda-LSN
- Lindsey Botkin
- Lisa (lakind scs)
- Lisa Kind
- Lori Craig
- Maggie
- Mara Campbell
- Maria
- Maria Levine
- Mary
- MaryJo
- Melanie M
- Monique Hansen
- Moxie Fab World
- Pam Imholz
- PaperCrafts Connection
- Peppers and Pollywogs Kids party site
- Rebecca Grohall
- Rita
- Robyn
- Rose Ann
- Sarah Vrolyk
- Sharon Harnist
- Sharon Johnson
- Sharon Rivera (a chemisrty with paper)
- Sherrie
- Sophia Landry
- Storage Units, Ink, & More Blog
- Sue Berker
- Susan (Rainy)
- Tangii Crane
- Tracy
- Tricia Traxler
- Trudee
- Velta
- VivLyn
- Zena
MTME Pretty Palette Color Team
MTME Pretty Patterns Sketch Team
My Time Made Easy TM LLC
Shop till you drop!
Lauren Meader
About Me
Copyrighted material
Subscribe To My Blog
Pages
- About me
- Alexa’s Story!
- My Crafty Corner!
- My Time Made Easy™ LLC
- Our Make A Wish Trip to Disney!
- Resume/Publication List
Calendar
| M | T | W | T | F | S | S |
|---|---|---|---|---|---|---|
| 1 | 2 | 3 | 4 | 5 | 6 | 7 |
| 8 | 9 | 10 | 11 | 12 | 13 | 14 |
| 15 | 16 | 17 | 18 | 19 | 20 | 21 |
| 22 | 23 | 24 | 25 | 26 | 27 | 28 |
| 29 | 30 | |||||
Archives
- August 2013
- July 2013
- June 2013
- May 2013
- April 2013
- March 2013
- February 2013
- January 2013
- December 2012
- November 2012
- October 2012
- September 2012
- August 2012
- July 2012
- June 2012
- May 2012
- April 2012
- March 2012
- February 2012
- January 2012
- December 2011
- November 2011
- October 2011
- September 2011
- August 2011
- July 2011
- June 2011
- May 2011
- April 2011
- March 2011
- February 2011
- January 2011
- December 2010
- November 2010
- October 2010
- September 2010
- August 2010
- July 2010
- June 2010
- May 2010
- April 2010
- March 2010
- February 2010
- January 2010
- December 2009
- November 2009
- October 2009
- September 2009
- August 2009
- July 2009
- June 2009
- May 2009
- April 2009
- March 2009
- February 2009
- January 2009
- December 2008
- November 2008
- October 2008
- September 2008
- August 2008
- July 2008
- June 2008
- May 2008
- April 2008
- March 2008
- February 2008
- January 2008
- December 2007
- November 2007
- October 2007
- September 2007
- August 2007
- July 2007
- June 2007
- May 2007
- April 2007
- March 2007
- January 2007
Categories
- About Me
- All That Scraps
- blogger challenge
- camera/photo play
- Cards
- Contests
- family stuff
- FOR SALE
- Home decor/3-D items
- How to FAKE it!
- Introduction
- JUGS Challenge
- JustRite Stampers
- Lizzie Anne Designs
- My family stuff
- My Stamping Space
- My Time Made Easy
- My Time To Color Challenge
- My Time to Create Challenge
- My Timeless Template Challenge
- My Timeless Templates
- Mytime Mail
- MYTIME MOVIE/VIDEOs
- Papertrey Newsletter
- Pink Cat Studio
- Pretty Palette Challenge
- Pretty Patterns Sketch
- Product Opinions and Must haves
- Recipe's
- Saturday Sketch
- Smilebox Creations
- Stampavie
- Tutorials
- Uncategorized
- videos
Most Popular
- Create your own Onesie Card Tutorial-and important NOTE! PLEASE READ (2529)
- Saturday Sketch-Boxed bag holder (2333)
- Going GREEN! Fancy Flower Flourish-Closure Video (1478)
- Fabulous Favorite - Giveaway! (1336)
- a Prayer Request (1232)
- QUICK-Easter Baskets from Nestabilities-PTI style-and blog challenge (1063)
- Teaser Sketch (999)
- February Release Giveway! (and a little peek) (996)
- Group Post and Rambling Rose Video Tutorial (985)
- GIVEAWAY! Who wants it all?! (895)
Recent Comments (RSS)
- 첫충사이트: 완전히 흥미로운 블로그 게시입니다. 저는
- sarah: Wow, Lauren, what a stunning
- hedie: خرید راهبند
- 야동: Love to read it,Waiting For
- 야동: This seller is in a
- 바카라사이트: 여기 처음 왔어요. 나는이 게시판을
- 야동티비: I was surfing the Internet
- 바카라사이트: 비슷한 주제에 대한 흥미로운 정보를
- 바카라사이트: "여기에 제공해 주신 귀중한 정보와
- 온라인홀덤: 유익한 웹 사이트를 게시하는 데
Copyright © 2007 - My Time, My Creations, My Stampendence - is proudly powered by WordPress
This blog has been Tweaked and Designed by Sara Williams