Archive for the ‘Cards’ Category
Pretty Palette #17
Jul 9, 2011 Author: mytime | Filed under: Cards, My Time Made Easy, Pretty Palette ChallengeHi everyone!
I hope you have all had an enjoyable July! I’ve been a little MIA, as I usually am in the summer (except for release weeks) since my children are home from school and I try to get out almost daily. They are like fish this summer and long for the water, so my time is spent by some body of water, be it the town pool, a lake, beach or sprinkler park. I’m sure you are all much the same, as I.
So, this week I participated in the Pretty Palette Challenge #17!

CLICK HERE TO VIEW DETAILS & PARTICIPATE!
Granted my entry is a very loose interpretation on the colors…but it was a start!
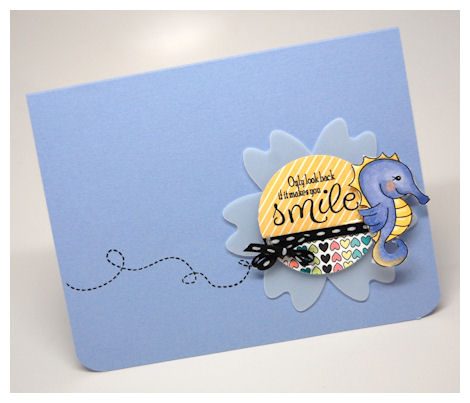
OK so its HEAVY on the orchid, but I couldn’t resist! I didn’t plan on all the yellow…but hey, it was the Palette that got me going. The Pretty Printables Digital Paper:Hearty Stripes © does have the navy and blue in it, so I cheated a bit!!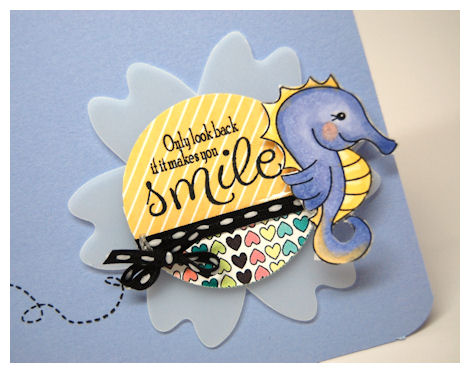
I used the Sheila Seahorse from the Underwater Wonderment set (Sheila Seahorse <—also available in a single) as my main image. The swimming trail is actually from the Bee-Loved © set (available in both digi and acrylic), and the sentiment from one of my fave sets Sensational Sentiments © (available in both digi and acrylic), for my sentiment, which I thought was cute since the seahorse is swimming along, off the card.
July: A Year in Review
Jul 3, 2011 Author: mytime | Filed under: Cards, Home decor/3-D items, My Time Made EasyWelcome back!
As we wrap up the end of another release, we always like to end it with a Year in Review. This is an ever popular time with all of you out there, and is probably even more so for us!
This is when the team and I use some older products, of our choosing, and show you something NEW with it! It is a fun and exciting way for us to use previous items we may not have had time to focus on, and share some ideas that inspired us with you, making old products new again.
Check out what the design team chose to make NEW!
Now here is my take.
Just Bee-Cause

Here is a gift set I had wanted to make some time ago, but time escaped me.
I love coordinating gifts with my packaging and cards.
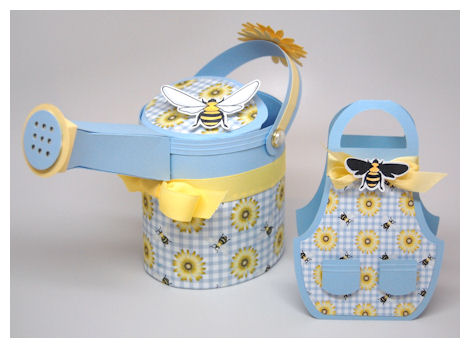
Here I wrapped up some Burt’s Bee’s products, and some flavored teas, and designed my packaging to coordinate!
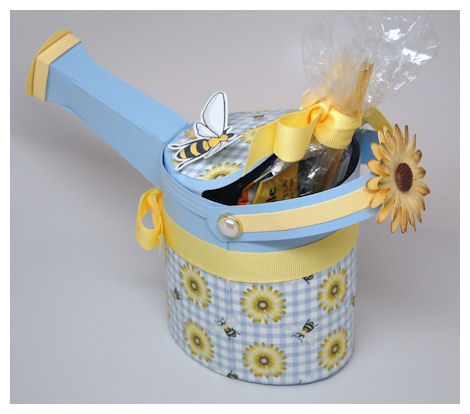
The Wonderful Watering Can © is one of my favorite templates to date, and I have longed to use it for some time now. Upon the release of Bee-Loved © 16 Images, I knew I wanted to create a bee themed gift set using this fab Wonderful Watering Can!!
I love the color scheme and pattern in the Bee Mine © digital paper collection, as it was my starting point for this gift set. The addition of the bee’s from the Bee-Loved © set, cut out using the My Bee Loved © worked perfectly with this.
I used the Flutters and Flowers © cut file to make the large daisy on the back of handle.
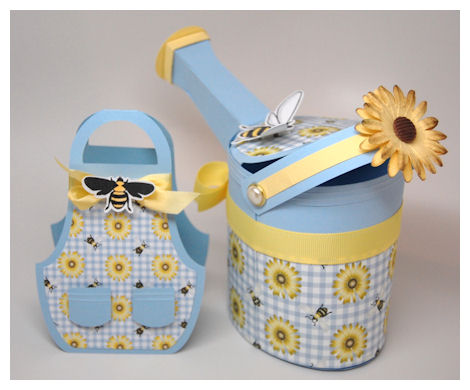
What perfectly compliments the Wonderful Watering Can better than the Gardeners Apron ©! So I used that cut file to create a coordinating card 😀

I love the added details on this one. I made my handle go across the back, I added a scored cardstock strip around the top edge, and the spout…
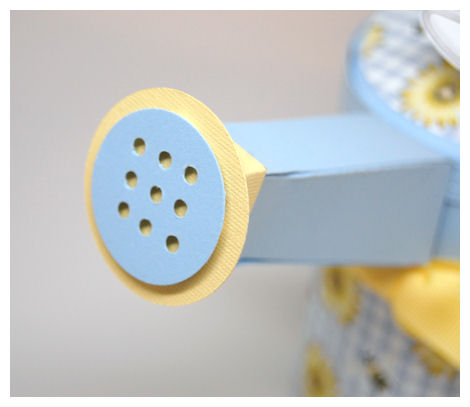
I added a layered circle to the top, with the punched out spout details 😀
There is so much you can do to alter and dress this one up.
 Supplies from My Time Made Easy ™ LLC
Wonderful Watering Can
Bee Loved
Pretty Printable Digital Paper:
Bee-Mine
My Bee Loved
Casual Clutch = Excellent Savings
Jul 2, 2011 Author: mytime | Filed under: Cards, Home decor/3-D items, My Time Made Easy, Pretty Palette ChallengeWell I hope you are having a wonderful holiday weekend! I know our weekend is jam packed with a bunch of festivities.
You will want to check out the Pretty Palette Challenge today on the MTME BLOG—>HERE!
The colors were chosen in honor of the 4th of July!
Well in addition to team members partaking in the color challenge, several of us have yet another day of projects for you!
Today you will definitely want to visit:
I am going to share another project idea with you using the Carry Clutch!
$ale! (((SIGH))) I’m in love!!
If I were sewing a handbag right now, these would be the colors for me 😀
Obviously I was heavily swayed by this pattern paper from the Blooming with Elegance Pretty Printable Digital Paper Collection. I am just in love with the colors, and patterns in this collection.
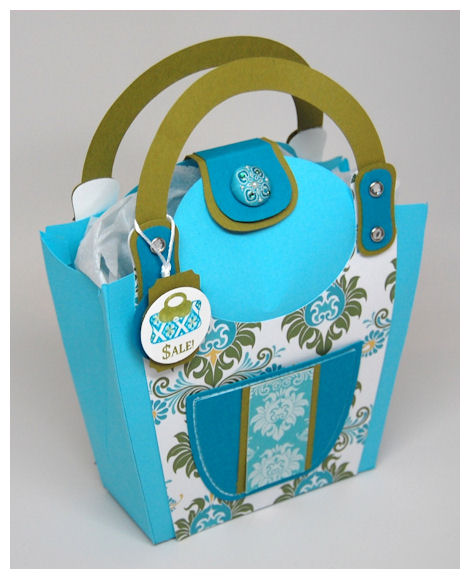
I think this pattern looks just like one I would by a handbag in 😀 I’m a HUGE Vera Bradley fan, so this reminds me of what I may find in her collection.
As you can see, this time my clutch sides aren’t angled out, but slightly scored, to tuck in.
Honestly I could make a million of these, each one different from the last. When I think of all the Pretty Printable Patterned Papersthat I could showcase! Way too fun! It’s the papercrafting version of sewing 😀 And its far quicker! LOL!
Now for the purty lil’ details.
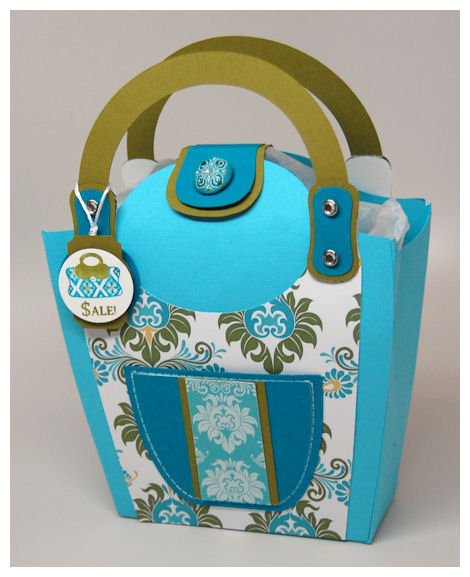
The latch
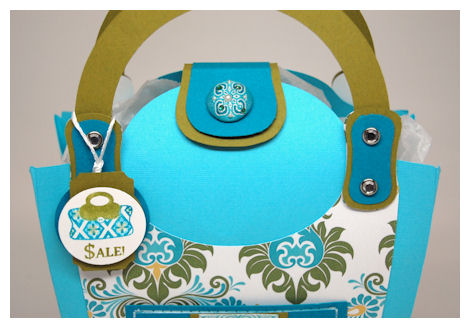
I had a bohemian style, fabric covered brad that was a perfect match to my Clutch design.
You can use snaps, or magnetic closured for a realistic closure 😀
Inside the Clutch…
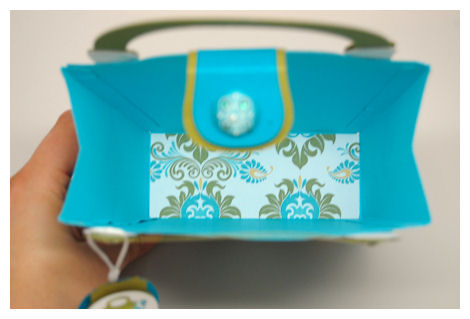
I used some of the Blooming with Elegance Pretty Printable Digital Paper. I just wanted a pretty printed bottom this time.
The handle covers have bling centered brads for an upscale, and more elegant look.
The tag was created using the purse, and $ale sentiment from the Money Well Spent © set.
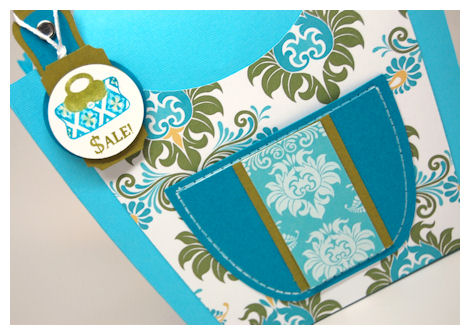
The pocket
Upon creating this one, I wanted to add a pocket to the details. I previously had no need for a pocket, but then thought, why not?! So, I used the decorative mat layer from the Grab a Cup © template, and it was PERFECTION!!!
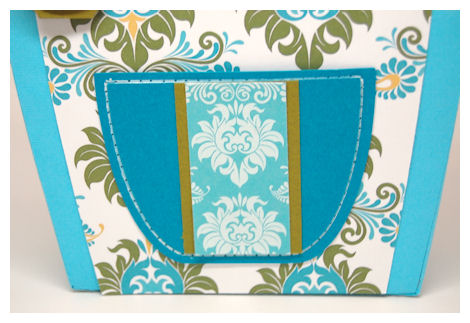
I used THIS TUTORIALfor the faux stitching of my pocket! So easy, and a perfect look every time.
I am going to be putting a gift card in the front pock (it’s a perfect fit :D) and then some sweet treats inside!
Supplies from My Time Made Easy ™ LLC
Carry Clutch, Grab a Cup
Money Well Spent
Pretty Printable Digital Paper:
Blooming with Elegance, Dainty Damask
Thanks so much once again for stopping by!
Tomorrow you won’t want to miss our Group Post: A Year in Review!
See you then
100% Handmade Original
Jul 1, 2011 Author: mytime | Filed under: Cards, Home decor/3-D items, My Time Made EasyWe are back today after our official July 1st release, and the ideas aren’t done yet!
View all our NEW! Products HERE!
I hope you have gained much inspiration from this current release, as the team has done an amazing job showcasing the many possibilities our products have to offer!
Visit some of our team members today for more ideas and inspiration:
Today I am sharing my project sample using the Carry Clutch Template!
Carry Clutch Pretty Packaging Template $5
Available in PDF, SVG, GSD, DXF, WPC
Completed Project Size:
7 1/4 Inches Wide
8 Inches Tall
2 1/2 Inches Deep
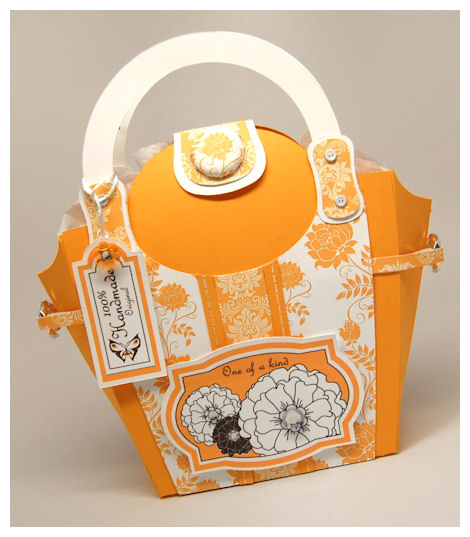
A girl can never have too many options, shoes, or handbags!
For me, I can never have too many handbag options, and that means amazing “bag” ideas to gift treasures to my favorite friends, my daughters friends, and/or family.
This is a fabulous cardstock version of a handbag that is sure to dress up any gift! I am totally in love with this latest template! I think its moved to the top of my favorites list.
This template includes all the details you need to make a fabulous gift bag.
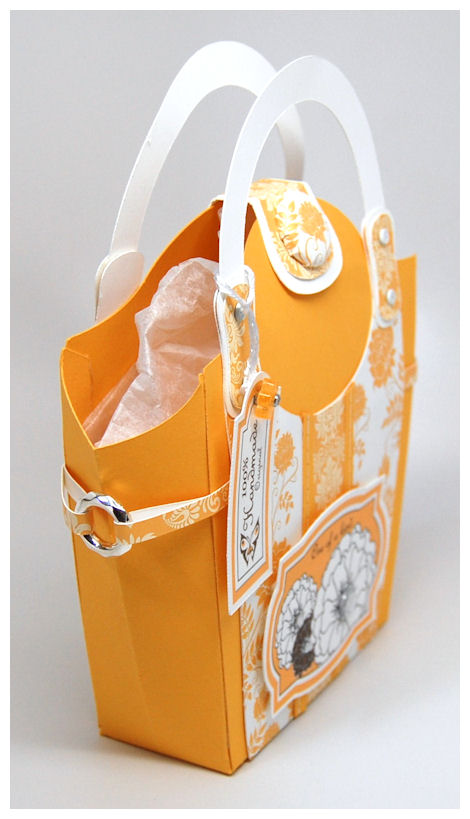
You can have the sides angle out, angle in, or not score them at all for a more boxy look.
On my sample I added these jewelry rings, and inserted some of my printed patterned cardstock through the centers, and adhered them behind the decorative front and back panels.

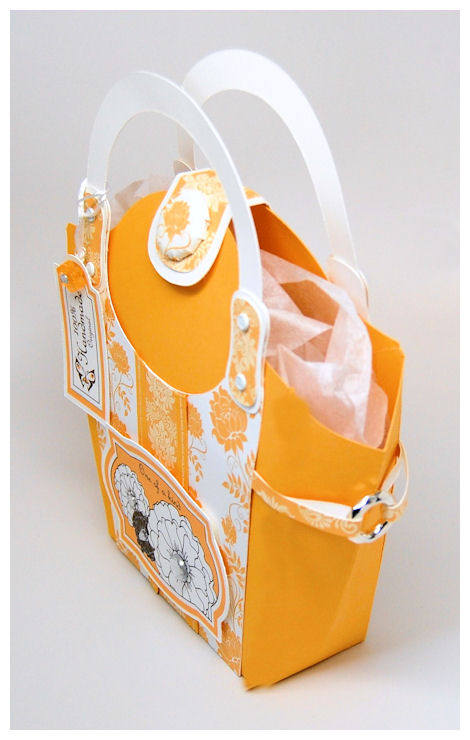
This is the back of the Carry Clutch.
As I ALWAYS say…the back should be as pretty as the front! I think all sides of any gift packaging you create be fully finished, and detailed.
I truly think the Carry Clutch is a gift in itself, with all the amazing design possibilities, its insane how amazingly easy you can create your own!
The hardest part to creating these amazing projects are parting with them!
There are many options for dressing this Carry Clutch up, and it is certain far more fun than any ole’ gift bag!
Design this to suit your gift giving needs… season after season it is sure to remain fresh, fabulous, and always in style.
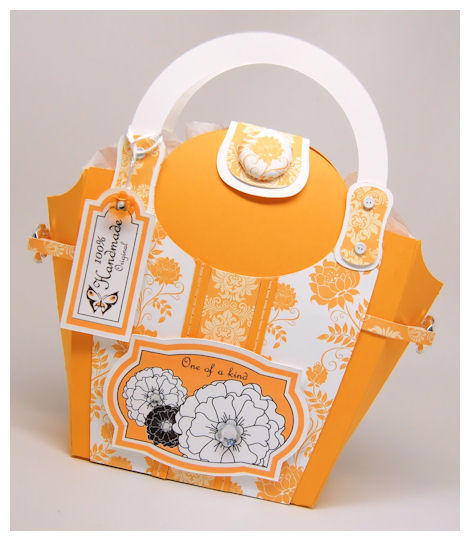
I created my Carry Clutch using the NEW! Crawling Vine Silhouettes, and Dainty Damask Printable Digital Paper Collections. They made creating this fun and EASY!
I even used the paper to create my own brad button, using my i-top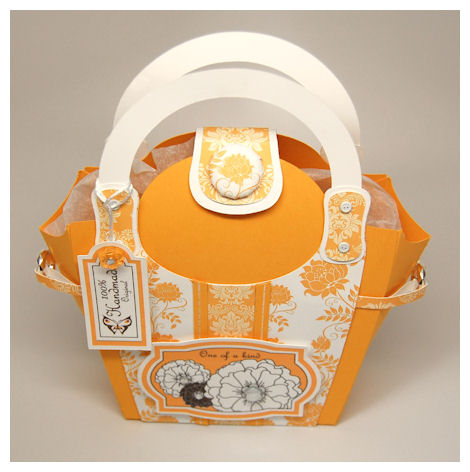
I paid attention to the little details, by adding little button brads to the handle covers. This template really does have it all!
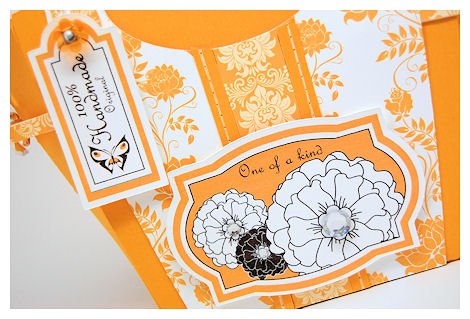
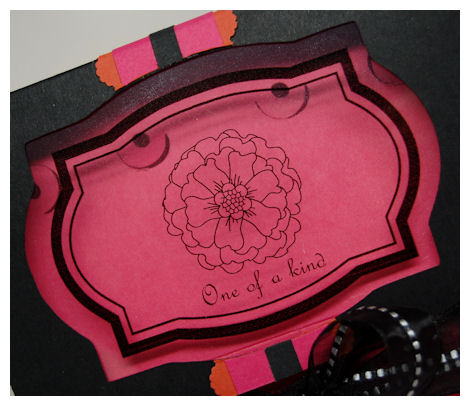
My labels are from the NEW! Be Dazzled stamp set, digitally colored, and created, then cut out using the NEW! Be DazzledCut File. Easy peasy! I loved creating the tag that states this is a 100% Handmade Original!! I personally never duplicate a creation, so all my designs remain an original, and I think whomever receives this will feel special knowing it is one of a kind (hence my main label sentiment :D). The large tag has some bling in the flower centers. I think you can clearly see that the NEW! Be Dazzled stamp set,has many possibilities for use.
Supplies from My Time Made Easy ™ LLC
Pretty Packaging Templates: Carry Clutch
Pretty Impressions Stamp Set: Be Dazzled
Pretty Printable Digital Paper: Crawling Vine Silhouettes, Dainty Damask
Pretty Pieces Cut File: Be Dazzled Cut File
Thank you for stopping by.
I’ll return with even more tomorrow!
July Release: Keep Dazzling Them!
Jun 30, 2011 Author: mytime | Filed under: Cards, Home decor/3-D items, My Time Made EasyToday is July Release for My Time Made Easy ™ LLC!
Check out our NEW! PRODUCTS —>HERE! You won’t want to miss a thing!
View our GALLERY! —> HERE! Always full of amazing gift ideas, just for you!
Want to participate in some fun weekly challenges? Check out our BLOG! —> HERE!
To celebrate our July Release we always start with a Group Post full of gifts and project ideas for you!
Today the team and myself will be using one of our NEW! Pretty Packaging Templates to create a gift set of 4 Cards! You can never have too many card set ideas (wink).
Be sure to visit the team today:
Today my project will be using the latest For Keeps Pretty Packaging Templates. Now I DID want to use our other template of the month: Carry Clutch as I have not shared anything about it yet, but this particular project idea (at least not on my blog-see the store or gallery), just flowed, so I went with it! Sometimes you just gotta go with where inspiration takes you!
I will share a sample featuring the Carry Clutch tomorrow 😀
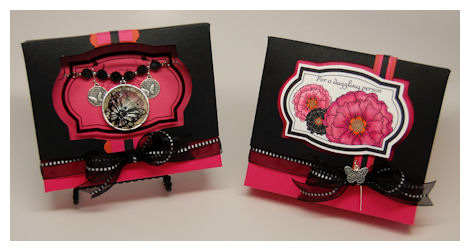
So here is my Blooming with Thanks gift set:
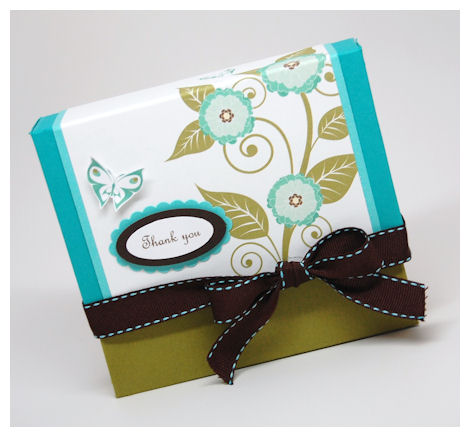
I really enjoyed using the For Keeps template.
My design for the lid was UBER simple!
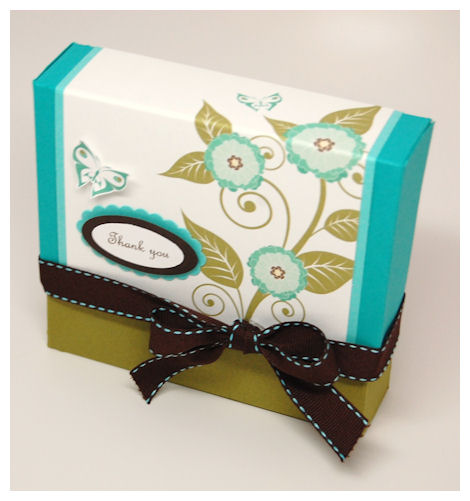
I simply printed the floral vine pattern from the Blooming with ElegancePretty Printables Digital Paper for my lid! I love how it turned out.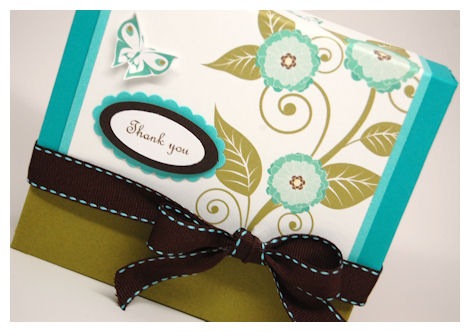
I then took the Thank You sentiment from the Keep It Organized © set, printed it in chocolate ink, then punched and layered it onto my label.
I used the Base Option #2 so that this could hold the 12 thank you cards I created. 
There are 3 different designs, 4 of each.
Just remove the lid, and you can see that they fit nicely in here.
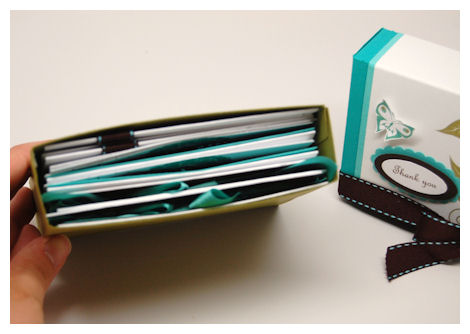
The card sizes are 4 3/4 Wide X 4 1/2 High.
Who would’ve thought this could fit SO MANY cards?! But it does.
Now the card details…
Embellished Blossoms
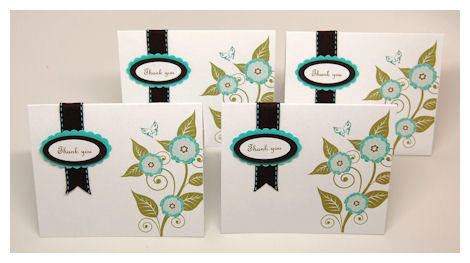
The first set of 4 were designed to coordinate with the design of the For Keeps template above.
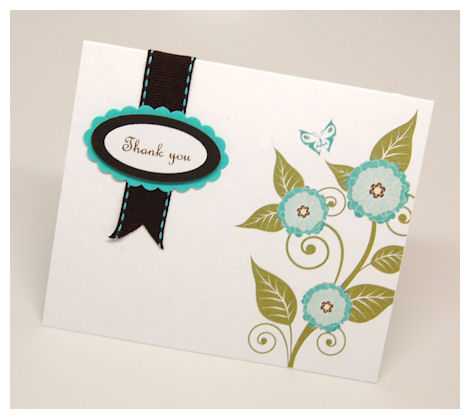
I used the Embellished Blossoms pattern from the Blooming with Elegance Pretty Printables Digital Paper, to serve as the focus of my card. Talk about EASY!!! Just print the size I wanted, cut and go!
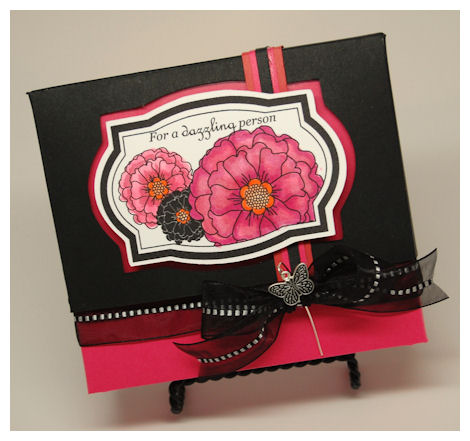
Dazzling Design
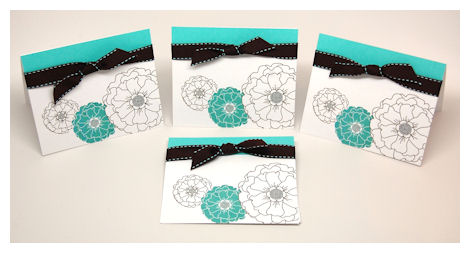
I saw a pillow in a magazine that totally inspired this set of card. It was just a few flowers, scattered/layered across part of the pillow.
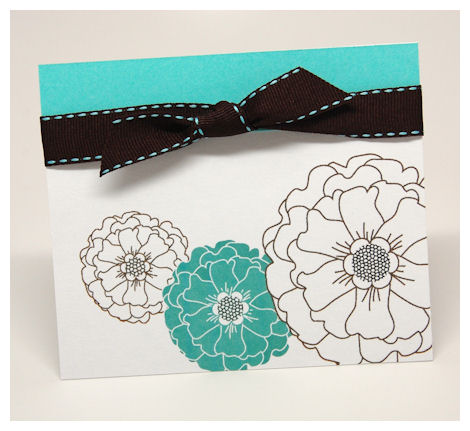
So I took the flowers from the Be Dazzled Stamp Set, digitally colored and layered them across my art board, then printed them out! It can’t get much easier than that!
Note: You can save your creations so you can easily re-produce more in the future! Pull the design up and re-color them for a whole new look!
Two Words
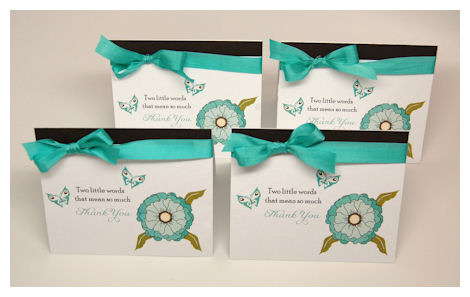
Here is another set that I created using images from the Be Dazzled Stamp Set. I just placed images where I wanted them, and then colored them digitally, for a quick set of 4 cards.
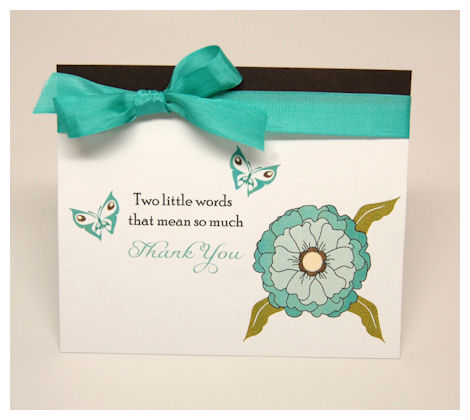
I chose to layer on a sentiment from the Sensational Digital Package © .
I love how it turned out. As stated above I was able to save this for future use, to allow me to quickly print n’ go!
Having created these cards digitally was so quick, fun and easy! Now I don’t have to constantly re-create my designs! If I need/want other colors I just click my paint bucket and change the colors. We often feel that we don’t have the time to make a card, if you digitally create a few cards, you can always find the time to print, cut and go as I did with my cards here today. It quicker and cheaper than running out quick to BUY a card in a pinch.
You can never have too many thank you notes.
Upon creating this set, I made it because I am going to actually need to send Thank You cards, hopefully on a regular basis!
Our daughter Amber recently received a 3 year modeling contract, in which she hopes to persue modeling/acting. She is learning so much in the classes they are having her take right now, and is LOVING it. Her latest modeling shoot went amazing, and the photographer and several staff members complimented her on several areas! I was very proud of her!! Most were surprised she was only 6 😀 They said she was very photogenic, professional, patient, and did excellent in taking directions, and was very easy to work with. WOW!
Anyway, her classes are teaching her a so much, and she informed me (rightly so) that after she goes for an audition, it is important for her to send out a Thank You note, immediately following her audition for a shoot/role.
So I got to work on mass producing several Thank You notes, for me to keep on hand so I can send them out immediately. As you see, I made 12 right now, for times when I get really busy, and need to get them out! In the future I can just print and go, as I saved my designs for easy duplication in the future.
She will soon be in a play: Snow White, with the Hampstead Stage Company, in late July. Not sure what role she will play yet, but I needed to send a thank you note out to the company ASAP!
I think each collection is clean, and simple, yet professional.
I try to create simple understated notes that I would actually purchase in store if I were to see them. I think these certainly fit the bill 😀
Supplies from My Time Made Easy ™ LLC
For Keeps
Be Dazzled, Keep it Organized, Sensational Sentiments
Pretty Printables Digital Paper:
Blooming with Elegance
Well, thanks again for letting me share.
Tomorrow I’ll return with more projects and ideas!
Pretty Peek:Dazzling Ideas
Jun 29, 2011 Author: mytime | Filed under: Cards, My Time Made Easy, Pretty Palette Challenge, Pretty Patterns SketchIt’s almost July and that means that on the 1st My Time Made Easy ™ LLC will have another amazing release of coordinating products for you!!
Each month gets better and better 😀
This month we have 2 Pretty Packaging Templates, 1 amazing & unique Pretty Impressions Stamp Set, 2 Pretty Pieces Cut Files, and 3 Pretty Printables Digital Paper Collections!!
Today we will be sharing a Group Post to peek some amazing projects that are being released tomorrow July 1st!
Be sure you visit:
They each have some AMAZING projects that are sure to get your creative ideas flowing 😀
Also be sure you check out the MTME Blog!!
The Pretty Pattern Sketch Team has posted a NEW! Sketch and samples today! Also check out the latest from the Pretty Palette Color Team has done!
Now let me share my project samples and some information about some of what we are releasing this month!
Be Dazzled!
I’m very excited to share this template and stamp set combination with you all!
I designed a stamp set that was designed with the jewelry maker in mind, or those who love to gift it!
The idea for this set came from a dear friend of mine Sonia, who makes and sells jewlery at Sonia Jung Designs! I have gotten many of her stunning creations from her store, and love to give them the proper presentation!
The stamp set is called Be Dazzled , and I will get to the details on that, following the template information.
The template is called For Keeps, and it offers a dual base option! So like another 2 for the price of 1!!
Here is some info!

For Keeps Pretty Packaging Template
Available in PDF, SVG, GSD, DXF, WPC
Completed Project Size:
5 1/4 Inches Wide
4 1/2 Inches Tall
1 2/3 Inches Deep
![]()
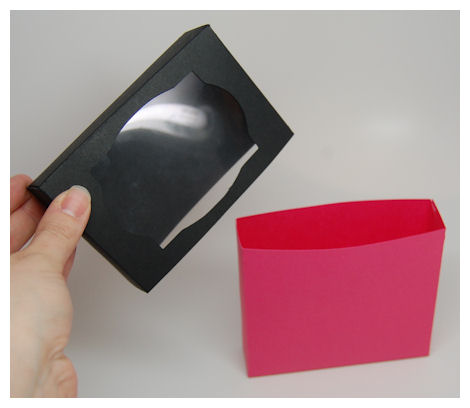
Note: There are 2 box base options with this template. The lid features a stunning window option, which you can choose to use the window cut out, or just decorate the lid as desired.
This Pretty Packaging was originally designed for you to package up those gifts that dazzle!
This versatile box is sure to quickly become a favorite with its endless design options.
The For Keeps Base 1
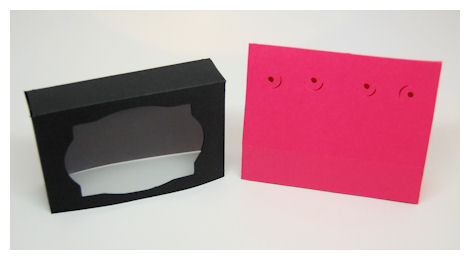
This base features alterable cut out options, that allow you to display your gifts of jewelry (handcrafted or store bought) such as earrings, necklaces, bracelets, anklets or even rings.
Alter the cut out options, as you see fit, to suit your gift!
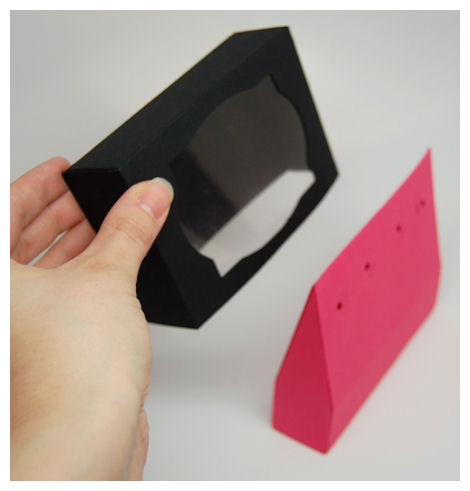
The lid fits perfectly over the top of the base.
Due to the base angle, your items will fit inside perfectly.
You an display items on one, or BOTH sides of this base!
HOW FUN?!
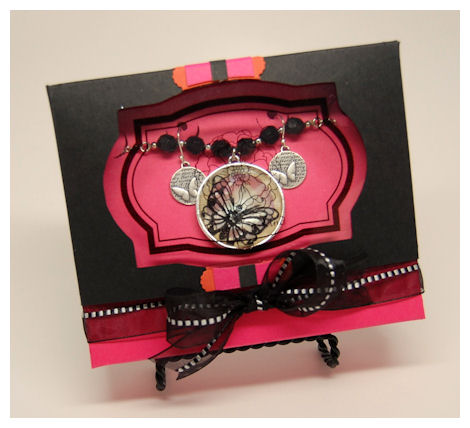
The optional window allows you to put your gifts that dazzle, on display!
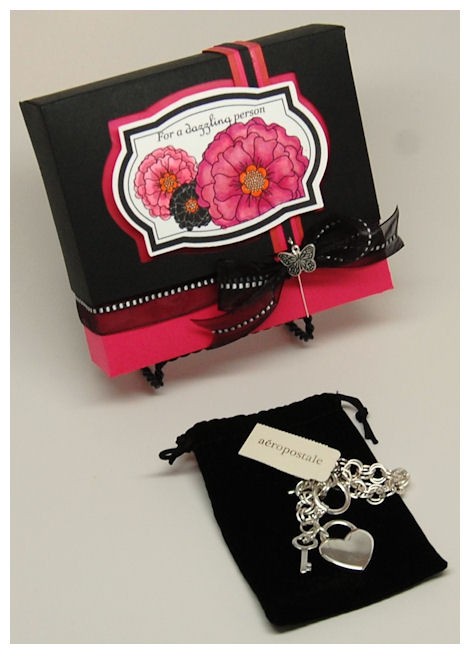
Here is a sample of this template, as seen above, ready for displaying a fabulous gift set:
![]()
Isn’t this stunning?
I wanted you to be able to see the printed window I created for the box window.
I designed my label on the box using the Be Dazzled Set. Once I created/layered my images, I then printed the label on my transparency sheet!!!
Yes! You can print (in color too!) on transparency sheets! I get mine at Target, and they are by Printworks.
Look how clear and crisp my image is. I will do one with full color at some point soon to show you how cool this can be!
Now onto the jewelry display…..
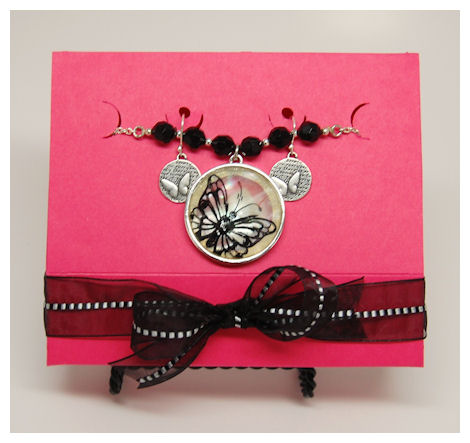
Here I am displaying a necklace and earring gift set.
The rest of the necklace hangs into the box base. The base open on the bottom, so you can easily manipulate everything.
The jewelry is displayed on an angled base, so that these items lay nicely against it, and really showcase the items displayed inside! It also allows your lid to slide over the top without getting stuck!
Now how cool it is that you can choose to design and display your gifts already packaged up, or remove the window so they can be surprised 😀 This is great for all of you out there her design/sell jewelry, especially at craft fairs! No more BORING jewelry boxes, that you already anticipate that there is jewelry in them before opening.
This is a far more fashionable, functional and FUN way to present such dazzling creations.
You can alter the cut outs to suit your project needs as well.
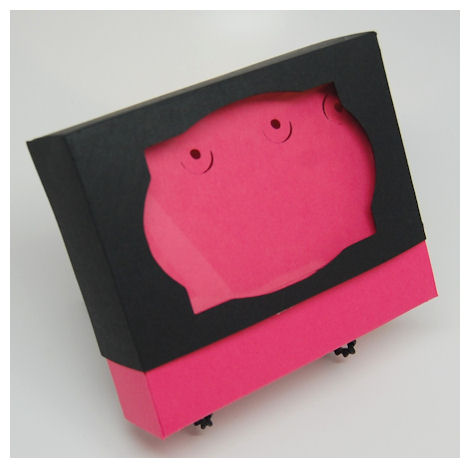
This base was altered to just hold earrings. The top is the same.
You can then use the lid with the stunning window cut out, to display your gifts beautifully
The window cut out was designed to coordinate with the Be Dazzled Pretty Impressions Stamp Set, and Be Dazzled Pretty Pieces Cut File. See the next project for details on that!
The For Keeps Base 2
This base is a boxed bottom, which is your 2nd base option.

This option was created for those times you want to package something IN a box base! Not everyone wants to gift jewelry, and you may just need a super fun and functional gift box, so this is it 😀
Simply put your gift inside.
In this one I designed it a little differently, as my gift will fit IN the box base, instead of being on display.
Now the gift ideas are truly endless.
Be sure you check out the Be Dazzled Pretty Impressions Stamp Set, and Be Dazzled Pretty Pieces Cut File, as these were used in my samples today.
Let me share the stamp set details now!
Be Dazzled Digital Stamp Set of 39 Digital Images $12
Have you longed for the perfect set of images to compliment and dress up your gifts that dazzle?
Then this is the set for you!
For all of you out there who make, sell, gift, or package handmade or even store bought jewelry, this is the set for you!
There are many sentiments in the set to help you describe exactly what you have gifted/created.
You can layer the sentiments and use them with the tag images in the set.
Sentiments Include:
Handcrafted
Handmade
Original
Made With:
100%
10 K
14 K
18 K
24 K
Gold
Sterling Silver
Filled
Plated
Semi-Precious
Crystals
Gemstones
Charm
Necklace
Bracelet
Earrings
Ring
Anklet
By:
&
,
To:
Love
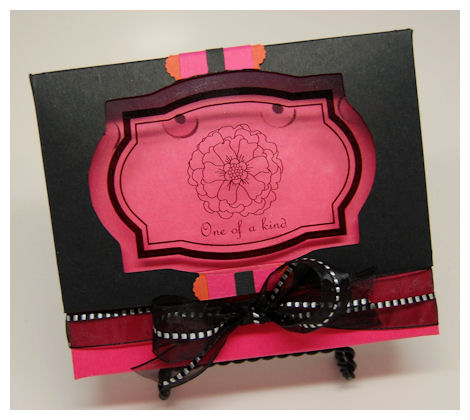
One of a kind
You’re a Gem!
For a dazzling person
There are some floral images and 2 labels within the set.
Here is the close up view of the tag on one of my boxes:
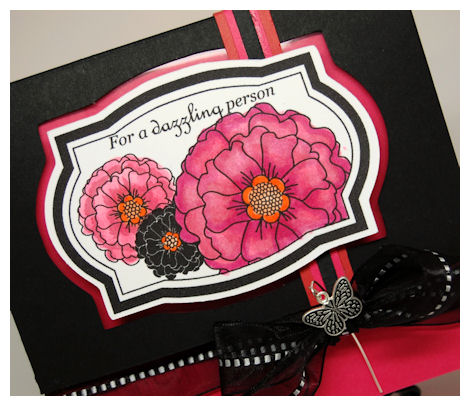
Isn’t this stunning?
I love all flowers, and thought that this set could use a few flowers to accent the amazing set of sentiments.
I just created my tag, then colored it with my Copic Markers!
I used the same tag frame as in the transparency window project above, only on this one, I printed my floral label, adding the sentiment “For a dazzling person”, and cut it out using the Be Dazzled Pretty Pieces Cut File. The large label fits perfectly into the labels in the Be Dazzled Digital Stamp Set.
The large label has many uses, but was made to perfectly accent and decorate your boxed gifts.
The smaller tag (not shown here today) was made for you to label your gift item! It is perfectly sized to hang off your dazzling gift.
You may want to check out the amazing For Keeps Pretty Packaging Template (shown above), as that was created to fabulously feature your dazzling gifts of jewelry, or other items you wish to package.
Be sure you also check out the Be Dazzled Pretty Pieces Cut File, as it was designed to cut the 2 tags in this set.
Here is some info on the tag:
Be Dazzled Pretty Pieces Cut File $2.50
Available in PDF, SVG, GSD, DXF, WPC
This is a set of 2 tags, designed to coordinate with the tag images from the Be Dazzled Pretty Impressions Stamp Set. These 2 tags are perfect for all your paper crafting needs be it for adding to your cards, frames, scrapbook pages, gifts, and of course any of your Pretty Packaging creations!
Supplies from My Time Made Easy ™ LLC
For Keeps
Be Dazzled
Be Dazzled
Well that is a lot to take in, in one day, so please come back tomorrow for our July Release, where you will be able to see even more projects and get all the details on our latest release. There is another template to share, and lots more ideas, so see you tomorrow!
Pretty Pattern Challenge 14!
Jun 15, 2011 Author: mytime | Filed under: Cards, My Time Made Easy, My Time To Color Challenge, My Time to Create ChallengeI’m back again!
Today I am sharing another sample using our latest Digital Release of Underwater Wonderment, combined with the latest Pretty Palette Sketch Challenge 14:

Click here to enter your submission, or view the sketch details/samples!
I am so happy to finally get to play along with the Pretty Pattern Sketch team, on time! LOL!
I’ve been quite busy wrapping up projects, and completing end of year teacher gifts, since tonight we will meet with our school staff at the Author’s Night. I will share those projects when the products I chose to use have been released 😀 For now it’s top secret 😀
Here is my take on the sketch.
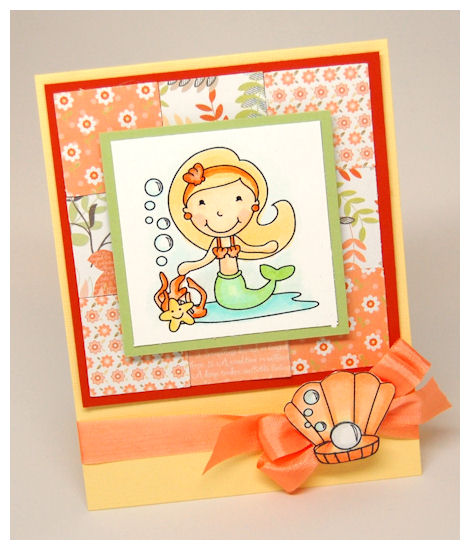
Don’t you just love the NEW! Alexa Mermaid image from the Underwater Wonderment © set? She was designed with my sweet daughter Alexa, in mind. She loves to swim, like a little fish, and requested a Mermaid she could use and color herself.
designed this using the latest Pretty Palette Color Challenge 13:

I LOVED this sketch that Tangii designed, as it allowed me to work with several patterns of paper, all together, which were inspired by the color palette!
I chose to use:
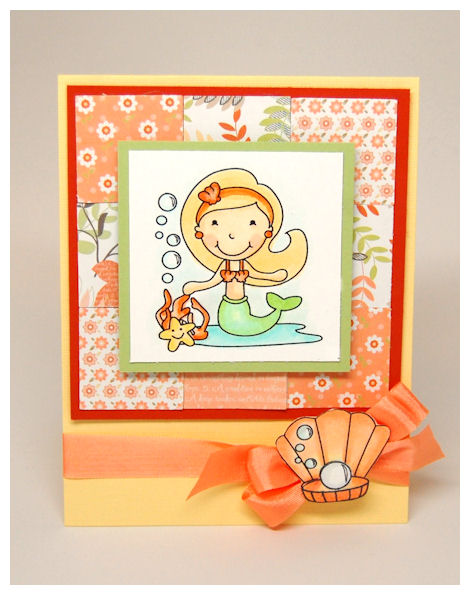
Don’t the patterns really compliment eachother, and add to the sea like feel of it, despite the fact they AREN’T “sea” themed?
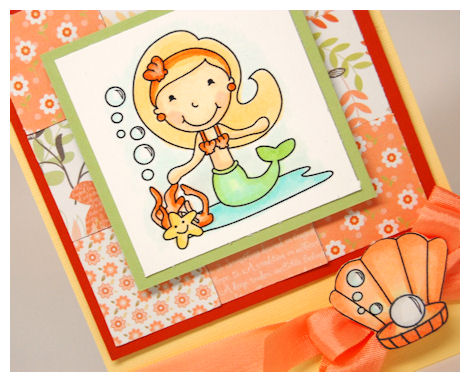
I printed and colored by mermaid using my Copic Markers. I also chose to adorn the corner with the O’mazing Oyster image, instead of the “bow” in the sketch. I love her to pieces.
Thanks for stopping by for a visit! I hope you enjoyed today’s sample and that you get some time to check out what the Pretty Pattern Sketch team has come up with! Maybe you will even play along with one of our fun challenges 😀
Until next time!
New! Release: Underwater Wonderment
Jun 15, 2011 Author: mytime | Filed under: Cards, My Time Made EasyHi Everyone!
(UGH! This post got erased 3 times already :C Crossing fingers this one works!)
Well I have another mid-month release of Digital Images for you, just in time for the Summer!
Introducing Underwater Wonderment!
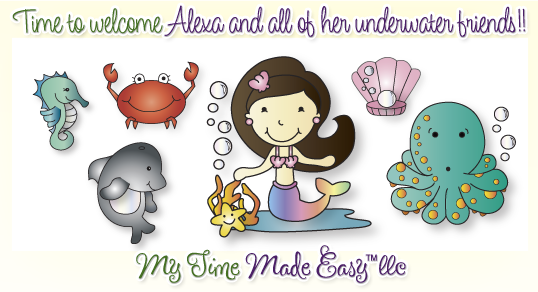
Underwater Wonderment Digital Stamp Set of 6 Images $10
* Images also sold separately*
This is the most adorable set!
You, or that special child in your life are sure to enjoy making some wonderful creations with this under the sea themed set of creatures!
This set features the following images:
Alexa Mermaid
Daphne Dolphin
Gabby Grabber
Olivia Octopus
Sheila Seahorse
O’mazing Oyster
You’ll find this set is just perfect for those under the sea themed party invites, color pages, cards, tags, packaging templates, iron ons or even room decor!
Project ideas include:
Print large for a coloring page
Color or paint, then frame for room decor
Print out on vinyl wall cling
Use on Iron On sheet to decorate t-shirt, curtains, lampshades, pillows, tote bags, backpacks and even clothing!
The possibilities for some wonderful projects are endless!
Now how about some samples from the team?
CLICK HERE:
Now it’s my turn to share some ideas with you!
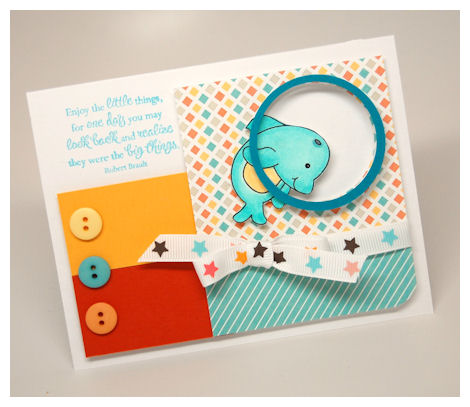
Jumpin’ through hoops:
 I love this card.
This is for the son of a family friend 😀 for his 4th birthday. I think he will like it.
I went with a fun, summery, boyish color palette, that I grabbed from my colors from the Under the Cabana paper collection. (SORRY! This paper collection won’t be released until August but I couldn’t resist using it)
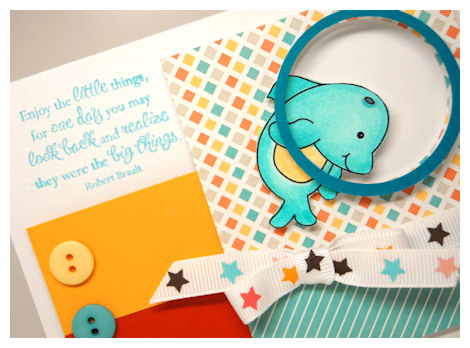
The first thing I thought of when I saw the Daphne/Daniel Dolphin image from the Underwater Wonderment © – Digital was the dolphin jumping through a hoop, much like you’d see at Sea World.
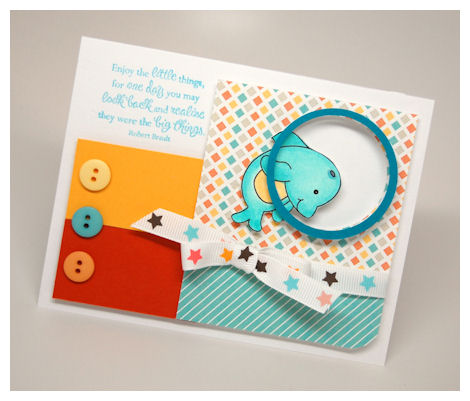
The sentiment is from the Chase Your Dreams © set.
I printed the sentiment in a aqua ink first, then proceed to cut and create my card.
Next up Bubbling with Happiness:

How cute is this lil’ octopus???
This is Olivia/Oliver Octopus
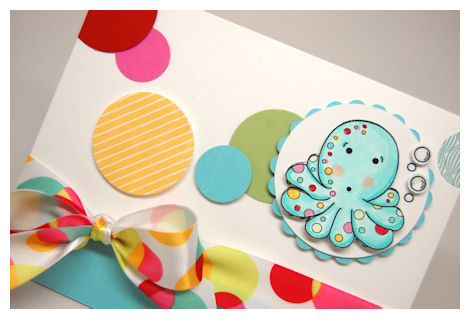
I cut out several sized circles, and layered them across my card.
I always start with a color palette first, then create from there.
I love taking colors from advertisements, clothing, ribbon or patterned paper.
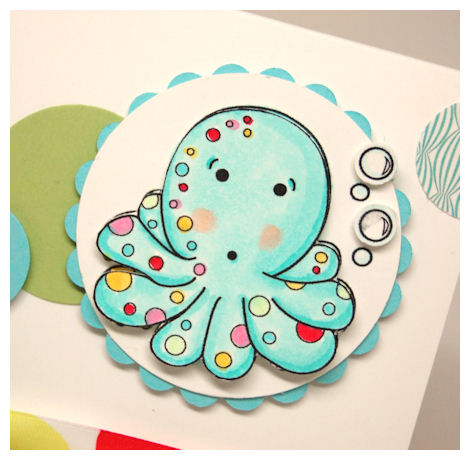
I also love having things on dimensionals! Everything looks better when its not all FLAT!
Next up…know someone whose crabby?
Why not cheer them up with this lil’ crab!
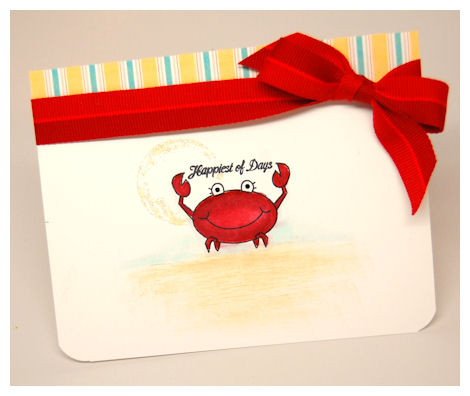
Is this not adorable?
I love Gabby/Gabriel Grabber Crab
I love that (aside from Alexa Mermaid) this images in this set are gender nuetral.
That “Happiest of Days” sentiment comes from the Timed Write ©.
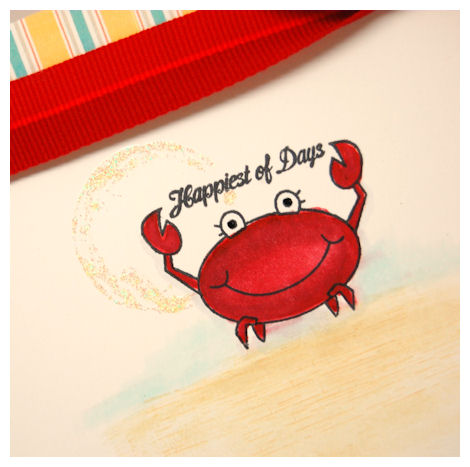
It was perfect for my crab to “hold”!
I printed my images on my card, then colored with my Copic markers. For the background, I just sponged on some ink for the “sand” and the “sky”.
I had a circle cut-out that I used as a template to create a subtle sun, using yellow stickles.
Once again I used the Under the Cabana paper collection (releasing in August).
Easy peasy.
I hope you like the new set!
Well that is all for me today.
Come back for more tomorrow as I share another sample for our Pretty Pattern Sketch Challenge!
MTME Publications
Jun 10, 2011 Author: mytime | Filed under: Cards, Home decor/3-D items, My Time Made EasyHi everyone!
Some exciting news to share!
Our very own Monique Hansen has been published in Create: Stamping Magazine!
You can purchase this magazine —> HERE <—
When you purchase this magazine you are offered a free book!! Monique also has a cone party ensemble in the Create: For the Home magazine, which is one of the FREE options!
I’ve ordered my copy, and cannot wait to get it!
Another publication I was made aware of by another design team member Fran is in the Summer Edition of Magnolia Ink Magazine.

A designer in the magazine, named “Christine”, used our Berry Sweet Basket, and is is featured on the first page!!
I am aware from customers looking for certain products they’ve seen published, that there are many others out there who’ve had recent publications using our products.
If you see something from our store published, or you yourself are being published, please let me know!
Contact [email protected]
We are very happy and excited when our customers choose to feature our products in their publication submissions 😀 Our coordinating products make is easier for many of you who are trying to fit specific calls for products 😀
Thank you to all our customers.
June: A Year in Review
Jun 4, 2011 Author: mytime | Filed under: Cards, Home decor/3-D items, My Time Made Easy, My Time To Color ChallengeToday we wrap up our June Release Projects, and as always we like to end thing with the ever popular Year in Review!
This is when the team gets together to provide you all with NEW! ideas using older products.
So get inspired and see what the team has created:
So for my project today I combined some new with old 😀 and the latest
Pretty Palette Color Challenge 12
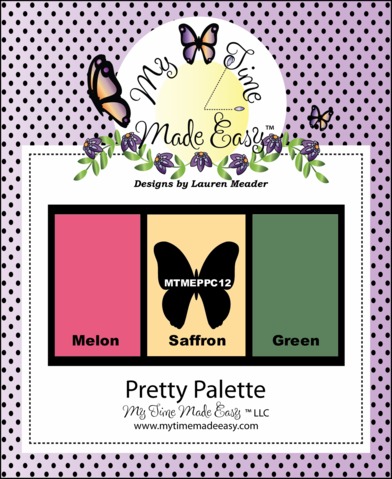
Click here to view challenge details and to enter your own creation!
Here is mine:
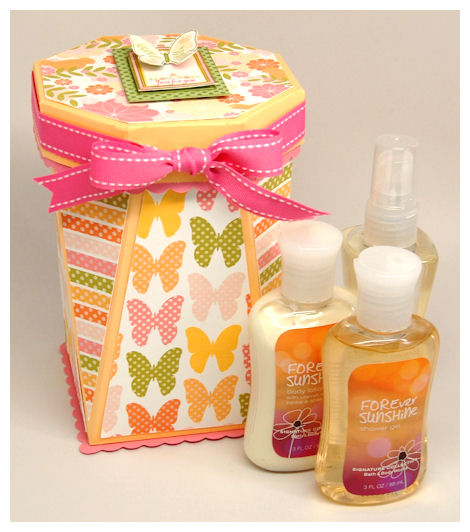
Forever Sunshine
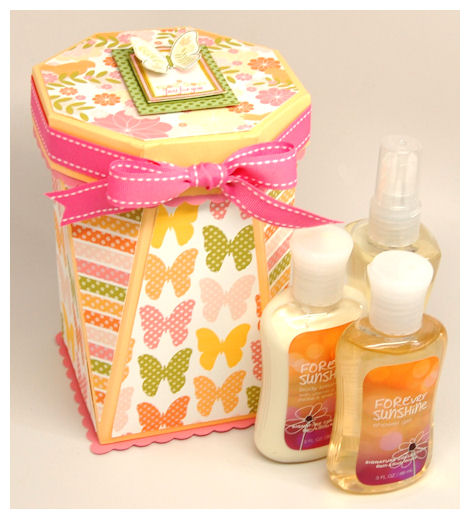
OH! How I love the colors and cheery feeling this gift set has 😀
I adore designing packaging to suit my gift, and making it coordinate.
This month I designed a paper collection called Spring is Here! This collection utilized some images from older sets, to create some NEW! fresh and fun pattern paper!
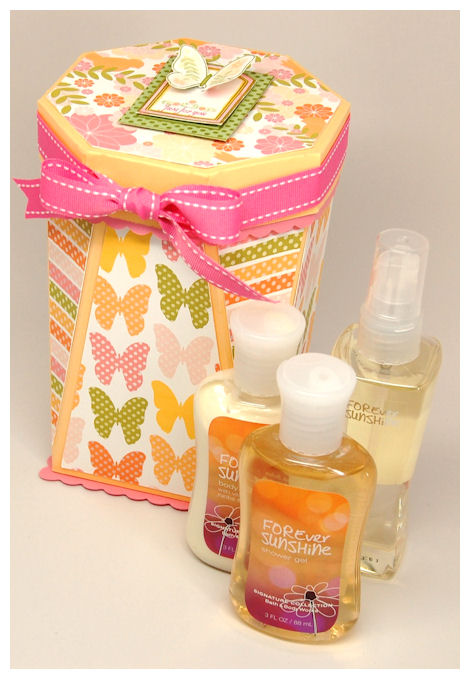
I used this paper as the main focus on an older template: What’s Your Angle? ©
Here if the full front view, obscured.
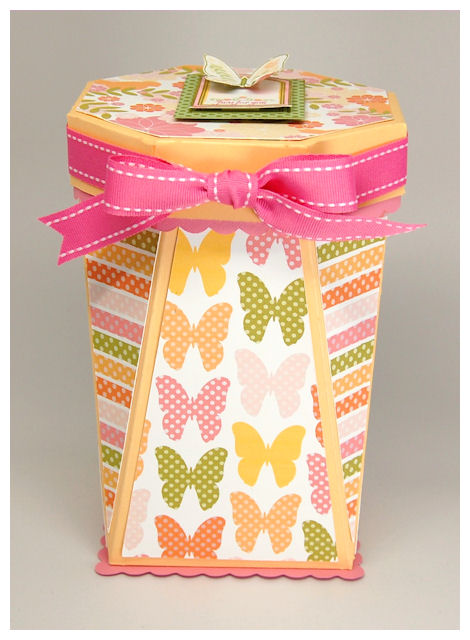
I loved this box!
I love the size of it, the unique angles of the box, and how you can use various patterns of paper to show them off 😀

Here I used 3 patterns from the Spring is Here! collection, and they are showcased perfectly!
I used the butterflies on the wide angles, and the stripe pattern on the triangular sides.
It looks amazing all the way around!
That is so important when creating anything.
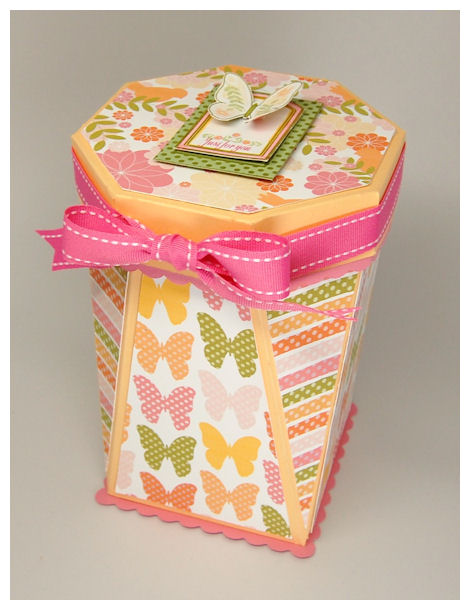
The finishing details.
All sides looking nice & professional.
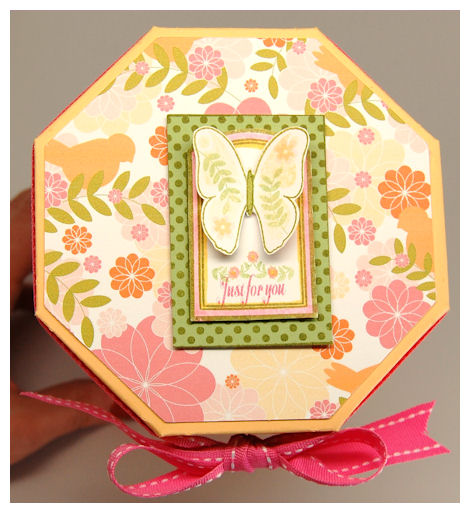
For the top, I chose to use the floral pattern. I love that pattern 😀
To adorn the top I went once again with old, made new stamp sets: Tending The Garden © & All A Flutter ©! The border is the seed packet image from Tending The Garden .
I stamped the leaf image from Tending The Garden onto the open line image of the butterfly from All A Flutter. I had too much fun combining these sets and paper collection.
I love pulling out my older stuff and finding new uses. In this economy we need to stretch our purchases and uses for them.
Supplies from My Time Made Easy ™ LLC
What’s You Angle?
Tending the Garden, All A Flutter
Pretty Printable Digital Paper:
Spring is Here!
My Etsy

Who I Designed For
Blogroll
- Alicia
- Alli Miles
- Ally Blankenship
- Amber
- Andi @ crafts on a whim
- Angel R
- Angie Z
- Anne Kranitz
- Becky O
- Bee
- Beth Silaka
- Bethany Paull
- Beverly Nash
- Bobbie
- Cambria
- Cammie
- Card of the Week
- Card Positioning System (CPS)
- Cards for Cancer
- Catherine Doucette
- Charmaine
- Cheryl Sims
- Chriss Rollins
- Christina
- Christine Ewing
- Christine Wooden
- Colleen Schaan
- Craft Critique
- Craft Gossip
- Crystal
- Dawn Easton
- Emily Giovanni
- Geny
- Holly
- Igne Groot
- Inspirational Craft Blogs
- Irene
- Jami Sibley
- Jeanne Streiff
- Jen del Muro
- Jeni Bond
- JenMarie
- Jenn Balcer
- Jenn Diercks
- Jenn O
- Jennifer E
- Jennifer Mick
- Jennifer Pereda
- Jennifer-Sweet Treat
- Joanne Basile
- Jodi Collins
- Julia Stainton
- Julie Masse
- Karen
- Kathryn Berthiaume
- Katie Cotton
- Kelley Holland
- Kendra
- Kim Scholfield
- Kris’s Color Stripes! Get inspired here
- Kristen Dubosque
- Kristin Eberline
- Kristine
- Laura @ Sunshine Stamper
- Laura Turnmire
- Laurie Schmidlin
- Lesa Rapp
- Linda Duke
- Linda-LSN
- Lindsey Botkin
- Lisa (lakind scs)
- Lisa Kind
- Lori Craig
- Maggie
- Mara Campbell
- Maria
- Maria Levine
- Mary
- MaryJo
- Melanie M
- Monique Hansen
- Moxie Fab World
- Pam Imholz
- PaperCrafts Connection
- Peppers and Pollywogs Kids party site
- Rebecca Grohall
- Rita
- Robyn
- Rose Ann
- Sarah Vrolyk
- Sharon Harnist
- Sharon Johnson
- Sharon Rivera (a chemisrty with paper)
- Sherrie
- Sophia Landry
- Storage Units, Ink, & More Blog
- Sue Berker
- Susan (Rainy)
- Tangii Crane
- Tracy
- Tricia Traxler
- Trudee
- Velta
- VivLyn
- Zena
MTME Pretty Palette Color Team
MTME Pretty Patterns Sketch Team
My Time Made Easy TM LLC
Shop till you drop!
Lauren Meader
About Me
Copyrighted material
Subscribe To My Blog
Pages
- About me
- Alexa’s Story!
- My Crafty Corner!
- My Time Made Easy™ LLC
- Our Make A Wish Trip to Disney!
- Resume/Publication List
Calendar
| M | T | W | T | F | S | S |
|---|---|---|---|---|---|---|
| 1 | 2 | 3 | 4 | 5 | 6 | 7 |
| 8 | 9 | 10 | 11 | 12 | 13 | 14 |
| 15 | 16 | 17 | 18 | 19 | 20 | 21 |
| 22 | 23 | 24 | 25 | 26 | 27 | 28 |
| 29 | 30 | |||||
Archives
- August 2013
- July 2013
- June 2013
- May 2013
- April 2013
- March 2013
- February 2013
- January 2013
- December 2012
- November 2012
- October 2012
- September 2012
- August 2012
- July 2012
- June 2012
- May 2012
- April 2012
- March 2012
- February 2012
- January 2012
- December 2011
- November 2011
- October 2011
- September 2011
- August 2011
- July 2011
- June 2011
- May 2011
- April 2011
- March 2011
- February 2011
- January 2011
- December 2010
- November 2010
- October 2010
- September 2010
- August 2010
- July 2010
- June 2010
- May 2010
- April 2010
- March 2010
- February 2010
- January 2010
- December 2009
- November 2009
- October 2009
- September 2009
- August 2009
- July 2009
- June 2009
- May 2009
- April 2009
- March 2009
- February 2009
- January 2009
- December 2008
- November 2008
- October 2008
- September 2008
- August 2008
- July 2008
- June 2008
- May 2008
- April 2008
- March 2008
- February 2008
- January 2008
- December 2007
- November 2007
- October 2007
- September 2007
- August 2007
- July 2007
- June 2007
- May 2007
- April 2007
- March 2007
- January 2007
Categories
- About Me
- All That Scraps
- blogger challenge
- camera/photo play
- Cards
- Contests
- family stuff
- FOR SALE
- Home decor/3-D items
- How to FAKE it!
- Introduction
- JUGS Challenge
- JustRite Stampers
- Lizzie Anne Designs
- My family stuff
- My Stamping Space
- My Time Made Easy
- My Time To Color Challenge
- My Time to Create Challenge
- My Timeless Template Challenge
- My Timeless Templates
- Mytime Mail
- MYTIME MOVIE/VIDEOs
- Papertrey Newsletter
- Pink Cat Studio
- Pretty Palette Challenge
- Pretty Patterns Sketch
- Product Opinions and Must haves
- Recipe's
- Saturday Sketch
- Smilebox Creations
- Stampavie
- Tutorials
- Uncategorized
- videos
Most Popular
- Create your own Onesie Card Tutorial-and important NOTE! PLEASE READ (2529)
- Saturday Sketch-Boxed bag holder (2333)
- Going GREEN! Fancy Flower Flourish-Closure Video (1478)
- Fabulous Favorite - Giveaway! (1336)
- a Prayer Request (1232)
- QUICK-Easter Baskets from Nestabilities-PTI style-and blog challenge (1063)
- Teaser Sketch (999)
- February Release Giveway! (and a little peek) (996)
- Group Post and Rambling Rose Video Tutorial (985)
- GIVEAWAY! Who wants it all?! (895)
Recent Comments (RSS)
- 첫충사이트: 완전히 흥미로운 블로그 게시입니다. 저는
- sarah: Wow, Lauren, what a stunning
- hedie: خرید راهبند
- 야동: Love to read it,Waiting For
- 야동: This seller is in a
- 바카라사이트: 여기 처음 왔어요. 나는이 게시판을
- 야동티비: I was surfing the Internet
- 바카라사이트: 비슷한 주제에 대한 흥미로운 정보를
- 바카라사이트: "여기에 제공해 주신 귀중한 정보와
- 온라인홀덤: 유익한 웹 사이트를 게시하는 데
Copyright © 2007 - My Time, My Creations, My Stampendence - is proudly powered by WordPress
This blog has been Tweaked and Designed by Sara Williams