Archive for June, 2010
Quick update: A Spot of Tea is arriving June 19th! WHEW! So all your orders will ship then 😀 It took longer because I had to double my order! That is an amazing response 😀 My postal office is hating me this month! LOL!
SO in the meantime, here is another QUICK sample! I have to be short and sweet since I have teacher gifts to complete TONIGHT!! Tomorrow is the last day of school so I’m cutting it CLOSE.
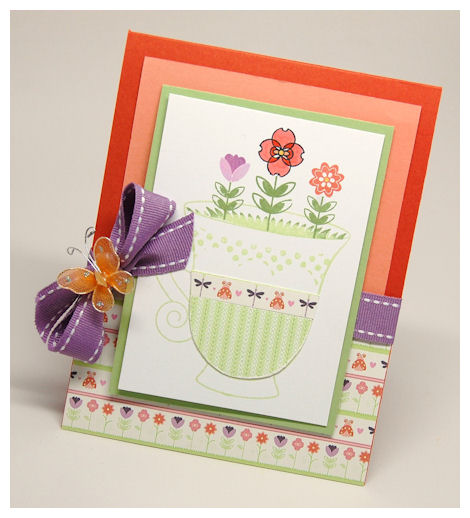
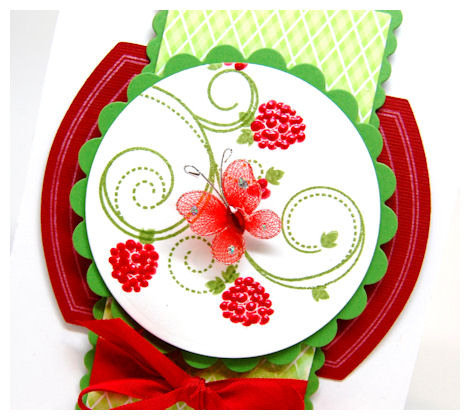
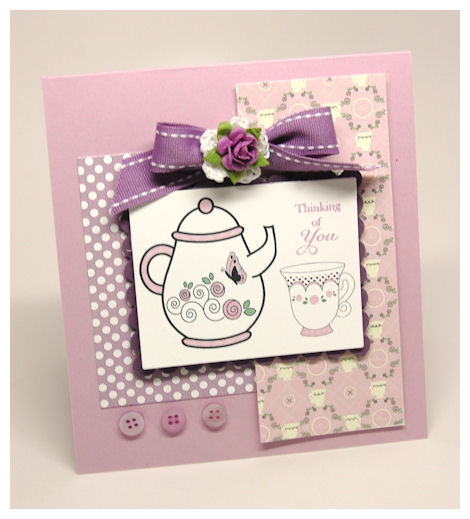
I used the A Spot of Tea set to make this super sweet card today.
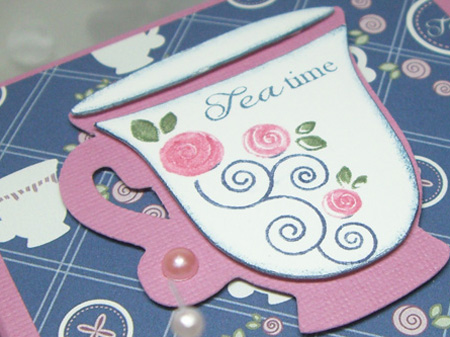
Bloomin tea
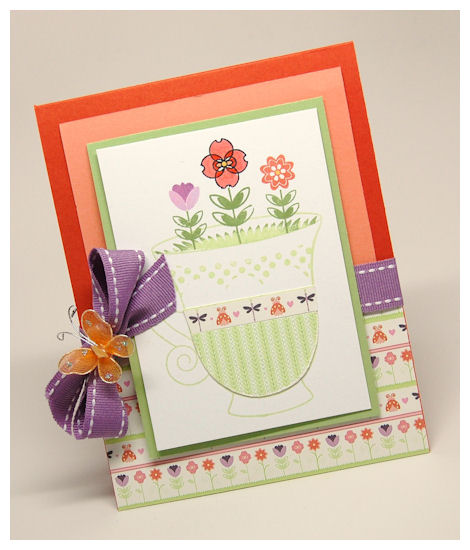
What better way to say CHEER UP! or Get Well than with a tea cup of bloomin flowers!
Did you ever consider having items come up out of your tea cup? I think it looks pretty cute. I had this idea immediately after I got my stamp set!
I was VERY inspired by the Flower Fusion paper. I loved the design and the colors so much so that I made my flowers in the tea cup MATCH perfectly!
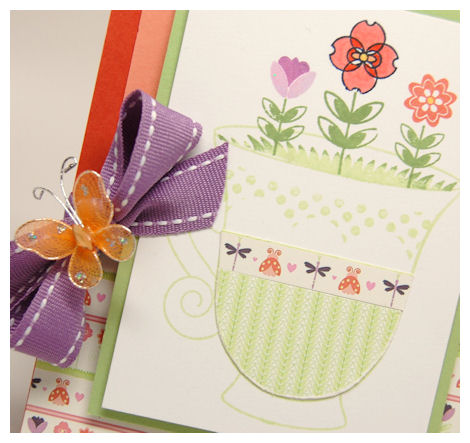
I stamped my polka dot border in a pear ink.The tea cup can be easily paper pieced which I did using Flower Fusion and Mini Leafy Stripes. I used the flower from Sensational Sentiments (make the “T” in one of the sentiments) in the center, then I used the grass and the other 2 flowers from Sensational Stems
I also loved the colors. Colors I personally wouldn’t have put together, this paper inspired me to actually combine 😀
I love that.
OK back to work!
Be back soon 😀
Yes you “CAN”!!
Jun 12, 2010 Author: mytime | Filed under: Cards, Contests, Home decor/3-D items, My Time Made Easy, TutorialsI have a VERY full and informative post for you today! SO grab your favorite cup of whatever you enjoy most, and have a seat!
I promised to share a book and some ideas for those of you out there who are “Canning” challenged. So make sure you take a moment and soak in all the endless ideas 😀 More on that at the bottom!
Today I want to first share some cards with you! Now today I am sponsoring the
JUGS Technique Challenge 37: Let’s Get Digital <—CLICK IT! You could be entered to win a FREE digital stamp set and paper package!
The team used the Digital Stamps from My Time Made Easy ™ LLC for thier challenge. Some even used the Digital Paper!
Now for those of you who are too TERRIFIED to TRY anything digital My Time Made Easy ™ LLC has a FREE digital stamp you can get HERE. FREE…..That means NO RISK!
Never tried our digital stamps?
Well one of my lovely customers created a video for you!
Working with Digital Stamps by Terri Moore <—CLICK TO VIEW.
EASY PEASY!! PLUS All our digital images come with step by step photo instructions as well.
Want to try some digital paper?
We have THREE different FREE digital paper packs found HERE and HERE and HERE! AGAIN-RISK FREE!
I have also created a video for you for using Pretty Printables © <—CLICK HERE!
I have an entire post breaking down the cost effectiveness of the digital paper—> HERE!
I have made several video tutorials for MTME! You can view them ALL —-> HERE!
Over the last few months I have made numerous samples with our digital images, and am always using the digital paper, so I thought I’d share a few more samples today.
AND because I promised you all even more ways to use the Well Preserved set thought today would be the perfect day to share it all.
Apples, Oranges, Cherries and Pears! OH MY!
I wanted to share even more versatile card ideas using more of the fruit images!
First up:
An apple for teacher
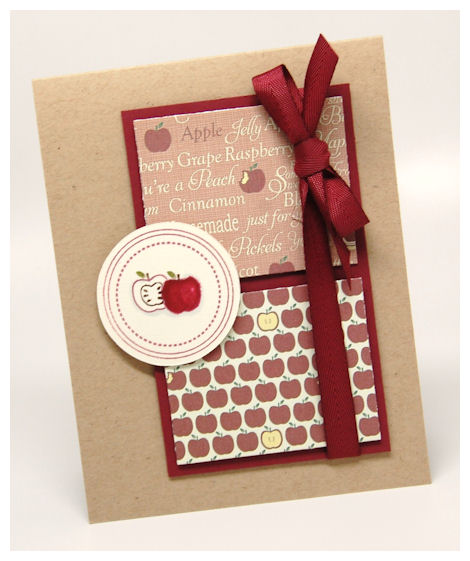
I’m working on teacher thank yous and gifts, and thought this could be perfect for one of the 12 I have to gift things to!
I used the Preserve It: Apples and Pears digital collection for this one. Super simple layout that can be switched up with every fruit in the set.
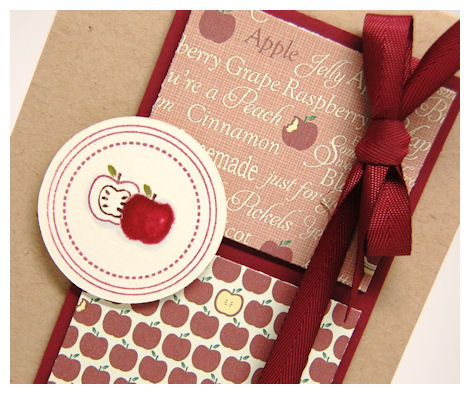
The LOVE the versatility in the apple because you can color it, leave it outlined or ADD the sliced apple core image!
FUN! FUN! FUN!! Plus they are the perfect size for creating your own background paper or becoming the mail focus of a creation.
Sending you sunshine!
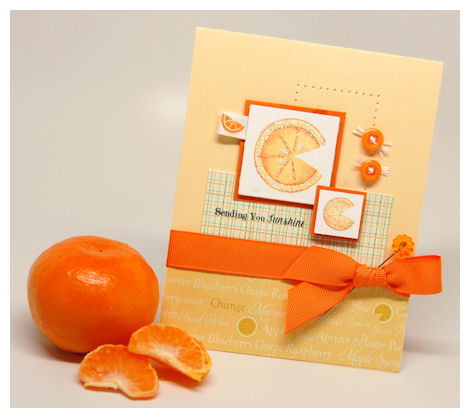
How “sweet” is this?
Reminds me of a Florida Orange Juice commercial! LOL!
For this I printed some of the Pretty Printable paper from the Preserve It: Oranges & Strawberries collection, and the Vintage Plaid Hues of Red with Sugar!
I had so much fun combining the fruit slices from both the A Spot of Tea (which is the large fruit wedge) then the Well Preserved set which used the little fruit wedge!
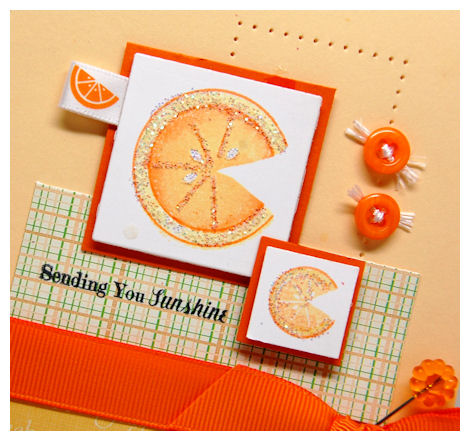
I just stamped them as seen in this: Using the Fruit Wedge from A Spot of Tea © video, and added some glitter.
My sentiment is from the You’ve Got Mail set 😀 Its such a fun and unique set that really gives new meaning to HAPPY MAIL!!
Two Lil’ Cherries
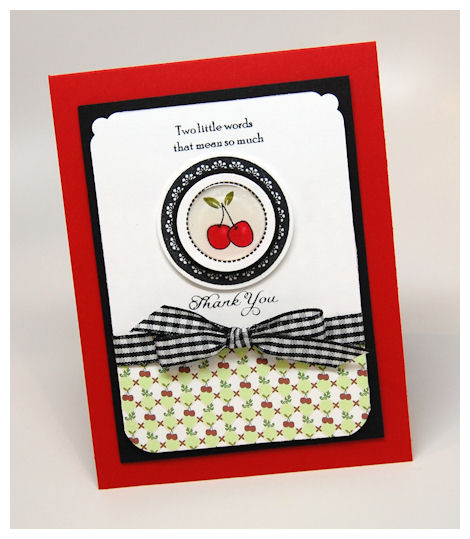
OH! I so loved this one when I was done!
I combined the label image from the Well Preserved set with the cherries, and added a clear page pebble over them.
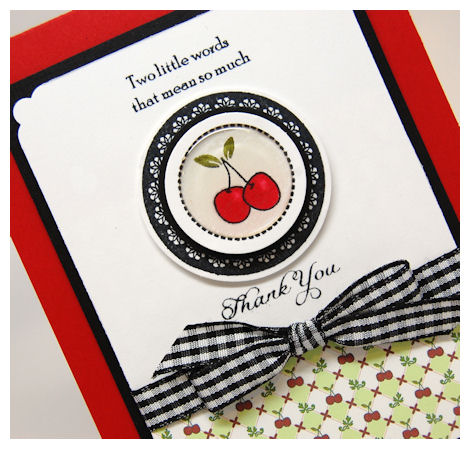
I then layered it onto the floral circle frame from Paper Pattern Pieces. It gave such a elegant look!!
I decided to split the sentiment from Sensational Sentiments.With the two lil’ cherries, and the sentiment “two words” it was perfect to me.
I used the Fruit Medley collectionfor the bottom of this one. It was the perfect addition to my card!
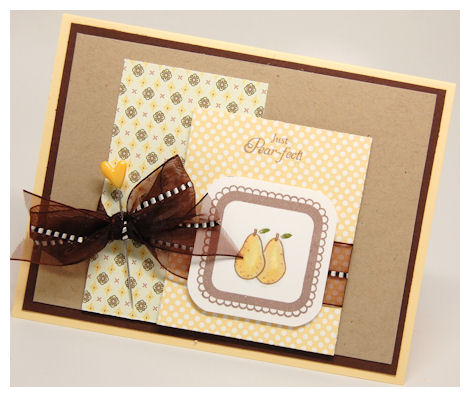
Just Pear-fect
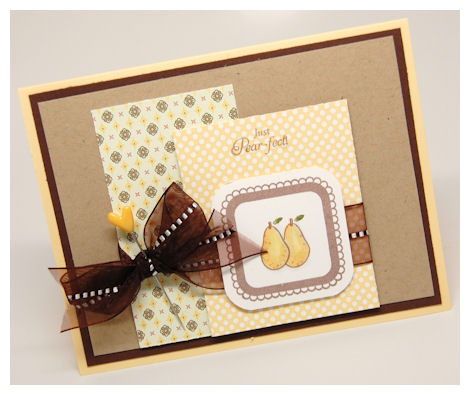
This is last but certainly not least!!
Loving the colors and the paper on this one. I used Nomad polka dot pattern from the Darling Dots collection, then the floral paper from the Tea Parlor Nomad’s Warm Apple Cider Collection. You really should check out all the patterns within each collection!! There is generally a large variety of AWESOME patterns for so many uses.
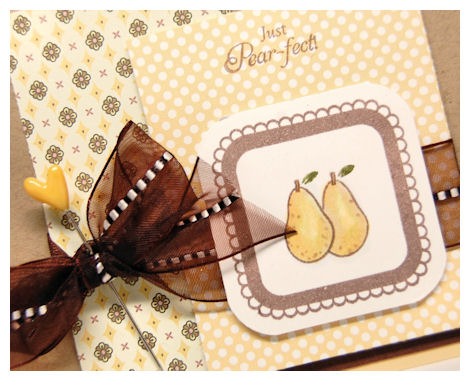
Once again I used the frame from Paper Pattern Pieces, This time it was the square. I love stamping the 2 pears together. I just stamped one pear, then masked it before I stamped the second one. I enjoyed coloring them, but you could easily leave them alone, or paper piece them.
OK now onto more details, as promised.
There are tons of you out there who are CANNING challenged!
Many of you expressed that you love the Well Preserved set but aren’t sure you could use it since you don’t “Can”.
Well I think (or hope) I’ve given you a ton of ideas (for those of you who don’t “CAN”) to find uses for this set all the same. The set is very versatile, as are many of the sentiments.
For all you out there who CAN’T can, because
1) you don’t want to
2) you don’t have time
3) you never even tired-where to begin?
4) you have no ambition to
….then I have some wonderful alternatives for you to still be able tp utilize the Well Preserved stamp set, as well as the Jam Packed template!
So if you thought you CAN’T now you CAN!!
For all of you out there who CAN’T can your own fruit goodness, or maybe you never tried it and WANT to, then I think you will love this book I found at Walmart!
Ball Blue Book: Guide to Preserving
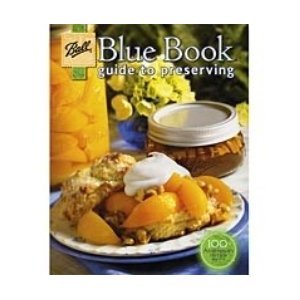
I found this with the canning supplies (near the dish section). It has EVERYTHING you would ever want or need (with photos for you visual people like myself) for someone who has NEVER canned before 😀 I hope to share my very first batch of jam making with you all once we pick our own FRESH fruit. I think that makes the difference 😀
Now back to you all who don’t want to bother canning, YES! you “CAN” find some great uses for the Well Preserved stamp set.
You can also just just the jars for packaging stuff!! IF you can fit it in a half pint canning jar you can “JAM PACK” it, with style! So the ideas are endless.
From sewing and stamping supplies, to delectable edibles!
There are all sorts of things you can put in the half pint Ball Canning Jar! They are pretty inexpensive too. Just let your imagination soar a little. Think outside the BOX!
Here is a little something I made!
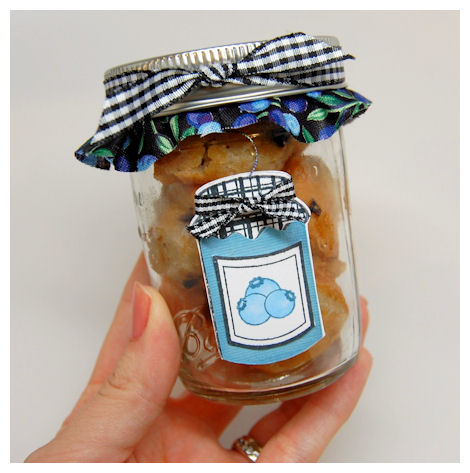
Some mini blueberry muffins!
One batch of mix goes a LONG way when giving gifts!
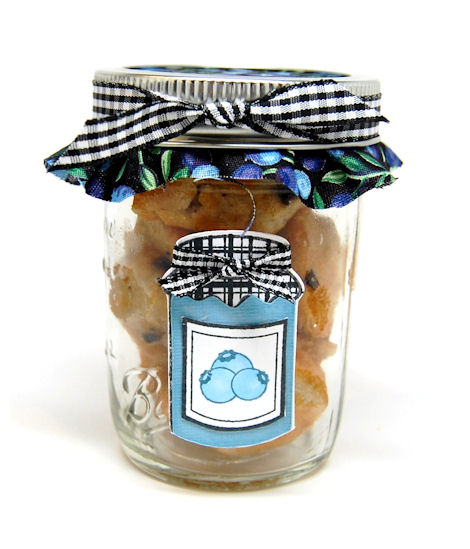
I fit in about 6 per jar. They equal a smidgen more than gifting on large muffin, and look so cute in here.
I just used the half pint jar, to put my mini muffins in, then for the front decoration I use the Well Preserved set with coordinating Well Preserved Cut File . You can whip up a ton of tags like this. I then added some blueberry fabric to my jar lid, then tied with some gingham ribbon. SIMPLE! DONE!
Here are some ideas for you:
Food mixes-like strawberry, blueberry and raspberry pankcake mix, muffin mix (already made muffin), or even bread mix.
Drink mixes!! You will want to see Tracey’s post for sure 😀
Candy-there is a plethora of fruit flavored candies! Some of my faves are the gummy fruit wedges and the Haribou Raspberries!
Candles-yes! You can make your own scented candles and package it up in a Ball canning jar! How cute would that be?
Cookies! Yup! Stack em’ up and put them in a jar instead of a bag. My favorite are Raspberry Linzer cookies!
Scented bath & body products! How about some handmade (or store bought) soaps, or bath-salts? Lots of sweet scents!
Fudge and other chocolate yumminess.
Peanuts, or oven roasted cashews!! YUM!
Apple Cider, Coffee, or Hot Cocoa mix!
Dip! Already mixed, and ready to present to a hostess 😀
What about the layered mixes you can put in a jar! There are ALL sorts of soups and cookie recipes that you can layer in a jar!
Instead of a bowl of soup, what about a JAR! They can pop it in the fridge until they are ready to heat and eat.
I think I could go on and on, but you get the idea. Get creative with your gifts, and you will be pleasantly surprised at how the smallest of gifts, presented perfectly goes a LONG way, and gets an amazing response.
Remember, your presentation is the FIRST thing people notice, and that is what really “SELLS” people on products in the marketplace! Catchy colors, packaging designs and logos!
Now it is easier than ever.
Thanks for stopping by.
I hope you took something away from my MILE LONG post today. Jeepers, I should have cleaned the house before I started this post, because now I want to go create something, instead of dust, vacuum, and wash the floor.
Until next time.
Makin Metal
Jun 10, 2010 Author: mytime | Filed under: Cards, Home decor/3-D items, My Time Made Easy, TutorialsBUSY! BUSY! BUSY!!
The things I’ve crossed off my to do list the last few days are INSANE! How about you?
We are getting ready for vacation, so I’m back to workin my hiney off to be swim suit ready within the next month, and I have 2 things to say:
1) OUCH!
My body hurts!! I know its a good hurt because I’m using muscles that have been neglected. The ONLY muscle getting any use the last few months has been my BUTT cause I’ve been sitting on it typing and makin files! LOL! OH and then I guess my finger too
2) I’m STARVING!
LOL! When I work out I eat WAY more than I usually do, because my body/metabolism is actually working! I eat more than usual and LOSE weight. Typically I don’t eat breakfast or lunch, and then by 3pm I’m starving. I can generally live off coffee the first few hours of life, so hunger normally doesn’t occur. This is BAD. I NEED to eat. its good for you to eat several smaller meals a day. Keeps everything moving, and you body burning calories, so I am getting back to that.
OK totally off topic but I felt the need to just say it, since all I can think of is how SORE and HUNGRY I am! LOL!
Its the end of the year, and teacher gifts need completing, so WHY am I typing this post instead?
(You may want to check out the Boxed Lunch Perfect Package if you ARE making gifts :D)
I don’t know, maybe its my therapy! LOL! My little connection to the world. I enjoy sharing everything here. Its kinds like a virtual diary of creativity 😀 Its the coolest thing to know others may get enjoyment or inspiration from me in any way 😀 So I keep doing my best to keep creating.
My husbands jokes “Don’t you worry about running out of ideas?” While I giggle, YES! That does freak me out! LOL! But I have so many ideas jotted down it may take a lifetime to get them all made, so I won’t worry about that just yet.
Speaking of ideas and creativity, I figured I share a fun little project using a technique I’ve not tried in a long time, so I hope you have a minute (or like 5)
The official June release week at My Time Made Easy ™ LLC is over, but I made SO much stuff I still have plenty to keep sharing! Certainly NOT a bad thing.
So I figured I’d share some samples I created using the rose bud flourish image from the A Spot of Tea set! I LOVE the way that turned out, so I wanted to showcase it a little. I think the tags, and that flourish a SUPER on thier own 😀
First up here is a simple card I made.

I really loved using the Rambling Rose Cut File, combined with the flourish image from the A Spot of Tea !! It makes a stunning combination!
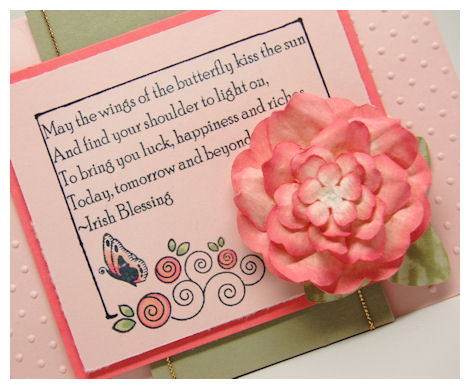
I drew a frame around the sentiment, which is from the All A Flutter Sentiments. I really love this sentiment, and has forgotten all about it until I got a birthday card from Pam! When I read it I was just like “WOW! I so love that sentiment. I swear I have that somewhere!” Then it dawned on me “DUH!! You MADE it into a set! LOL!” So I knew that was going to be what I wanted for my card 😀 I then obviously needed a butterfly (I swear I could use a butterfly on EVERY project and never tire of them) so I used the butterfly from Just For You set. I’m finding I turn to that set A LOT too 😀 I love incorporating older sets/products with the newer sets/products!
Next, you may have seen this on the website, so I figured it would be a good one to share (Plus I got some HOW DID YOU DO THAT? emails :D)
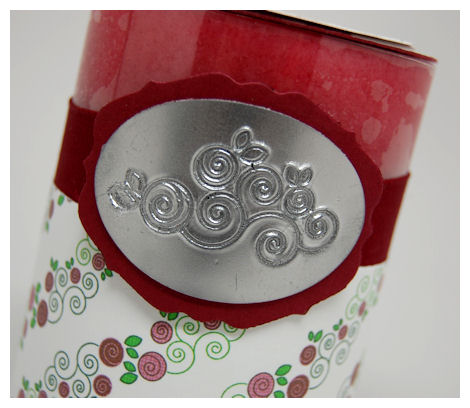
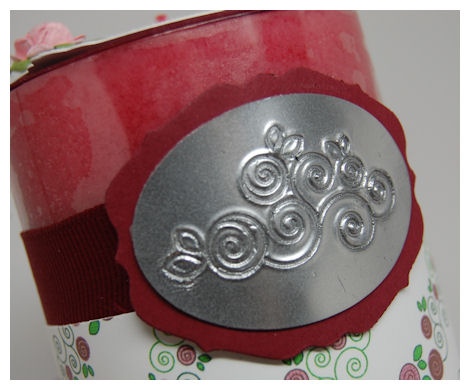
Now keeping the focus on that same rose bud flourish, from A Spot of Tea, I decided to make a “faux metal” embellishment for my candle!
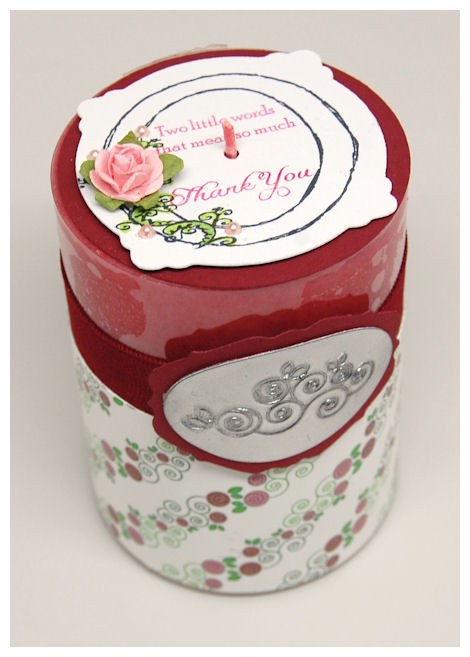
I knew I wanted to take a simple candle and “step it up”.
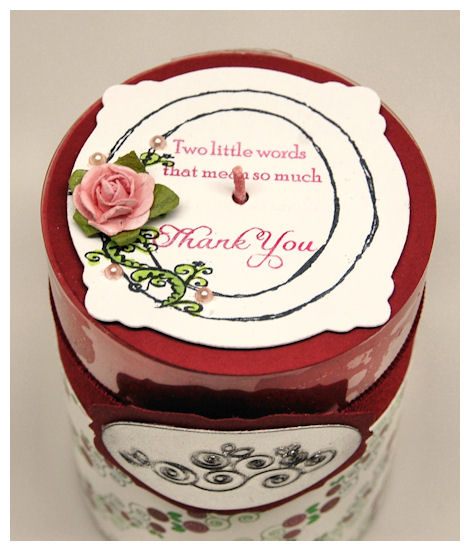
So, I made a fancy schmancy topper for the candle.
I used the Killer Curves Frame to cut my label. Then I stamped it with the Killer Curves : Fancy Framesborder, which I colored in with my Copic markers.
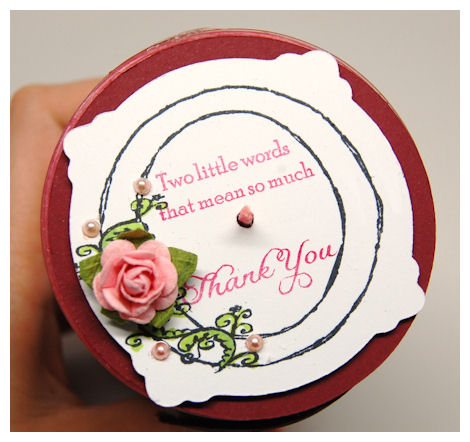
Punched a hole in the center, to pull my wick though, then stamped the sentiment from Sensational Sentiments. Note: you will want to punch your hole FIRST so you can ensure it is in the center! The stamps are clear photo-polymer, so lining things up is a breeze.
Then I added some pearls and a Prima flower! Love it.
This was wrapped with the Tea Parlor: Bow Bells Lagoon paper. It was designed using the rose bud flourish so it is a PERFECT match! Love matchy matchy stuff!
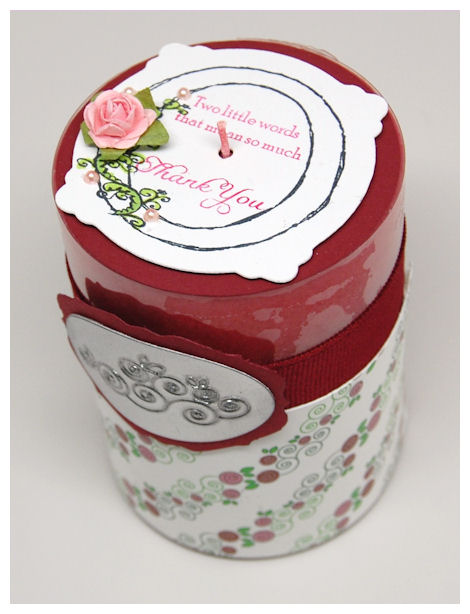
How AMAZING does that look? Can you believe its NOT real metal?!
DIRECTIONS:
All I did want use my Versamark ink pad, smooshed it onto my cardstock. Ensuring lots of ink got on there evenly.
Layered on some Silver embossing powder, then heat set.
Repeat at LEAST 5 X’s-Smoosh ink pad, add embossing powder, heat set!
On the LAST time for the heat setting that last layer, make sure you ink your stamp in either versamark ink ,or you can use a permanent black for a cool look.
JUST as you finish heat setting QUICKLY stamp your image into the HOT powder!
This is the look you get!
Pretty cool huh?
This just went from a sweet smelling $1 candle to being worth far more than that! And its OH SO PRETTY!
Well that does it for me. I have an Ice Cream Social to go to with the kids (I PRAY I can stay away from getting a scoop myself!).
I’ll be back really soon with more to share!
Thanks for stopping by and letting me share a piece of my world with you.
A berry inspirational blog hop
Jun 7, 2010 Author: mytime | Filed under: Cards, Home decor/3-D items, My Time Made EasyToday we have the entire design team sharing some great projects for you using items from the June Release from My Time Made Easy ™ LLC
Be sure you stop by and visit each one for some fantastic gift ideas!
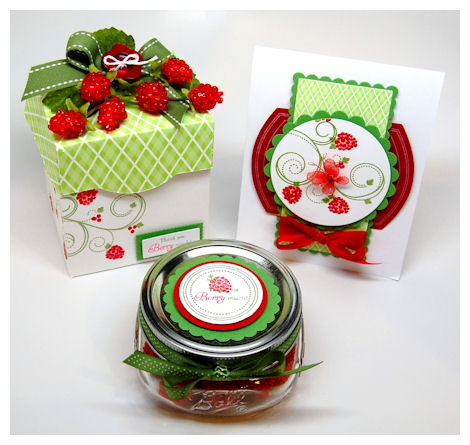
My project today is one of my favorite to date!! I hope you enjoy it.

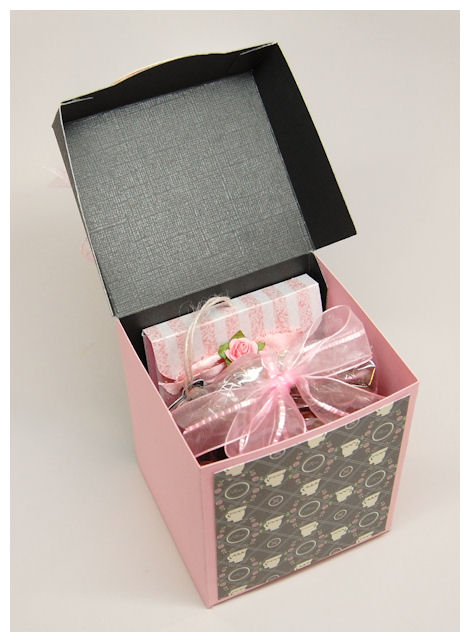
I knew whatever I did I wanted it to be a COMPLETE gift set. I’m ALL about matchy matchy stuff. That is what got me into stamping in the first place! I wanted cards/tags/boxes that matched my gifts….5 years later here I am, making it ALL on my own. I totally love it. It is just a gratifing feeling to know I made ever aspect of my gift for someone-from the box, to the card, and the tag!
I have to say I’m in love with it.

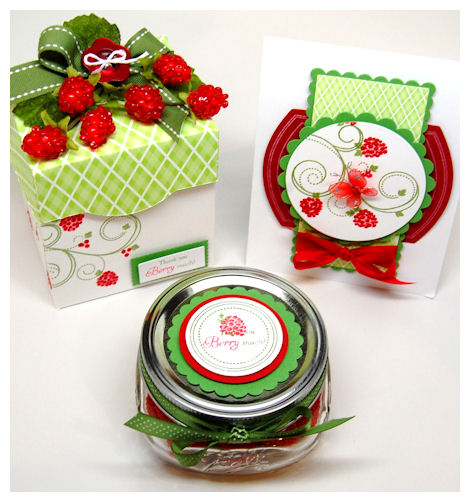
When I designed the Well Preserved set several months ago, I knew I really wanted to make some dimensional raspberries at some point. I could envision this entire project in my head, but admittedly it all came together better than planned!!
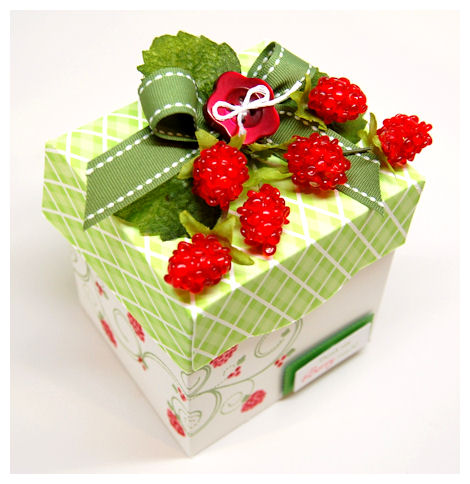
I was really inspired by some Hairibou Raspberry candies, and knew I wanted a fancy way to package it, so I turned to the Tea Tabbed Box. With or without the tea cut out, this is a super cute box that goes together in a pinch, and will have you wanting to use it over and over again. I decided that I would package the candies in a flat canning jar. I just cut and stamped a simple matching label for the top, using the raspberry, sentiment and circle label from the set.
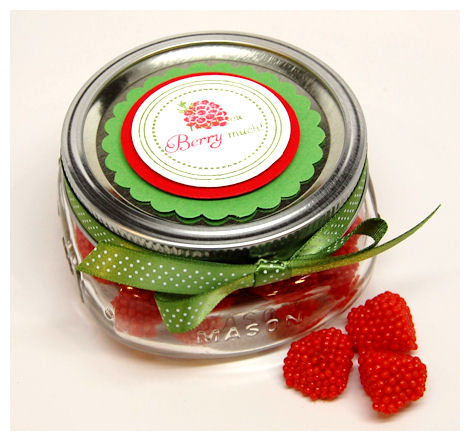
Since releasing Well Preserved, I am finding all sorts of great uses for these everyday, inexpesnsive jars for my holders. I also love the airtight feature, which ensures whatever treat I put in there will stay much more fresh than any baggie!!!
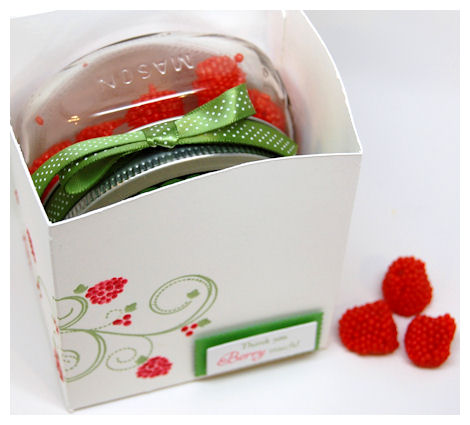
I obviously could have use the half pint jar for this and packaged it in the Jam Packed template, but I wanted the style of the Tea Tabbed Box for this one instread. Plus I love sharing all the various possibilities for every template! This jar does fit perfectly too.
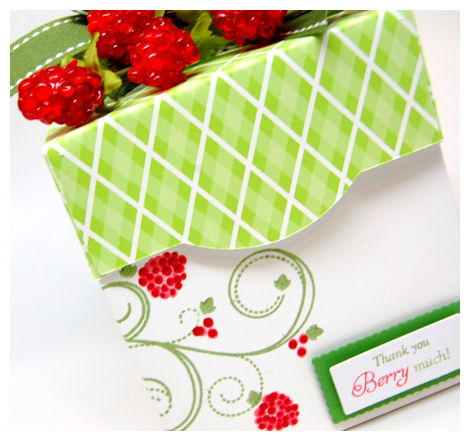
So I made my base using some OSW white cardstock.I stamped my Fanciful Flourishes on my template first (before fully assembling). I then added my red raspberries, and little leaves.

To make my raspberries more dimesional, so I used some red liquid pearls to dot on each berry! I wasn’t trying to be perfect, and it actually went really quick. I think you will agree that it was well worth the extra step of using the liquid pearls. It really makes this project POP.
For my lid I printed my paper : School Plaid Collection 1 , then cut the top lid.
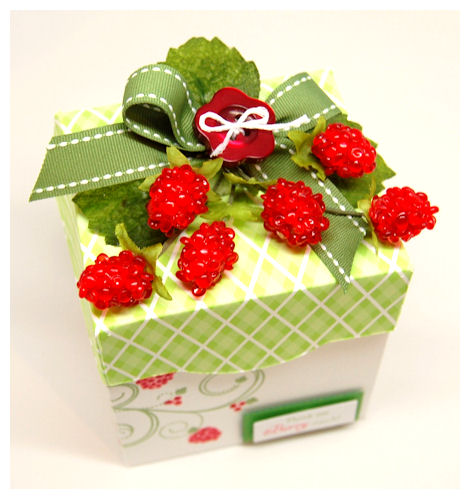
I wasn’t sure HOW I was going to adorn my lid but I knew it had to be equally stunning as the stamping on the bottom of the box.
I had purchased these red raspberry garland stuff in the plant section at Michaels over the WINTER!! At the time I had NO idea what I would do with them but they wer ON SALE, so I couldn’t pass them up! When I began making this project lightbulb went off! My only regret is I didn’t buy MORE!!!

Once the Tea Tabbed Box was done I was nervous that my card would pale in comaparison. So I just let the card guide me 😀
I took the circular element from my jar, as my inspiration for the circular panel of red raspberries.
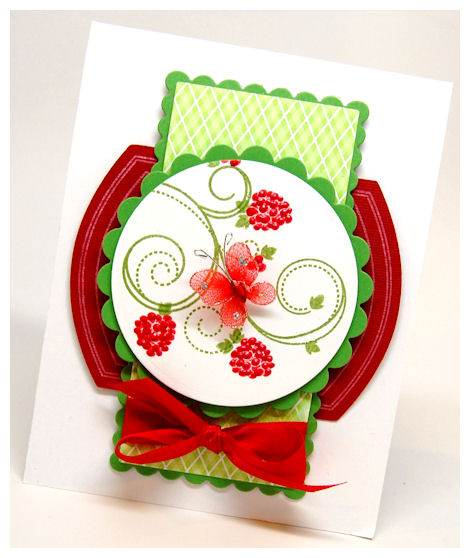
I repeated the same steps on them as on my Tea Tabbed Box. Once that was done I added this purty wire butterfly I had in my stash of treatlets. I also used a scaled down version of the same School Plaid Collection 1 paper (I so love digital paper and that is just ONE of the many reasons!) I used on my box lid.
Once that was layered I knew I wanted some RED so I used the large label from the Well Preserved set, along with the Well Preserved Cut File (I cut 2 red labels), and stamped them in a white craft ink. I then layered then under my main panel-one rounded side going left, and one going right! I LOVE the look it gave me.
So that is that!
It started with some inspiration from a CANDY, then flourished into this entire coordinating gift set.This entire project took almost an hour. Not bad considering I was totally unsure what I was actually going to do!
Now you have some inspiration, you can easily whip up your own! It took longer for the liquid pearls to dry than the actual gift set creation 😀
Supplies:
Pretty Packaging Template: Tea Tabbed BoxPretty
Impressions Stamps: Well Preserved, Fanciful Flourshes
Pretty Printables Digital paper: School Plaid Collection 1
Pretty Pieces Cut File: Well Preserved
Cardstock from Couture Cardstock
Liquid pearls, buttons by Foo Fa La, Wire Butterfly unknown, Rapsberry Garland, rectangle, circle layers from Cricut Machine, Ball canning jar, Haribou Candy
Thank you all for stopping by!
I have even more to share this week, so come back tomrorow!! I’ll also keep you posted on when our SOLD OUT sets get back in stock!!
Till tomorrow.
A Spot of Tea Please
Jun 6, 2010 Author: mytime | Filed under: Home decor/3-D items, My Time Made EasyThis has been an amazing release! My mojo was just in overdrive 😀
We still have more to share, and tomorrow the design team and myself will be sharing a group post. I personally have even more “never before seen” projects, so I hope you will continue to return! Including some CARDS 😀
I’m excited that we were able to tap into the tea lovers market, although I don’t think you have to love tea, or jam to use ANY of our new release items!
Each month we will continue to inspire everyone to get even more creative with our line of coordinating products. Wehter you are brand spankin new to papercrafting, or a seasoned crafter, you can easily recreate our projects. My goal is to inspire you to think outside the “box” and take your papercrafting up a notch! I think it’s really catching on how easy it all can be with all we have to offer. All the “hard work” has been done for you with our great templates, and when you have stamps and paper that match it gets even EASIER!
Today Catherine has a project using the AMAZING A Spot of Tea © Pretty Impressions set! Now the set is currently out of stock, but we have ONE more here, and ready to ship to SOMEONE!! SO run on over to Catherine Doucette‘s blog to enter to win!
A Spot of Tea
Well you may have seen this project on our Website!
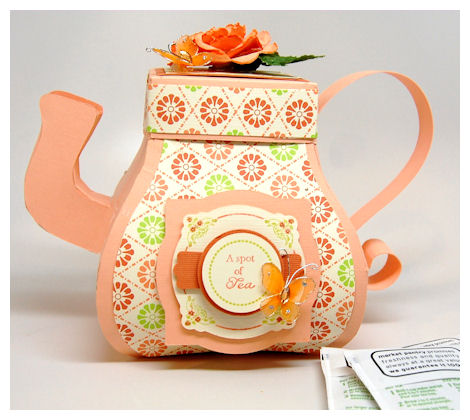
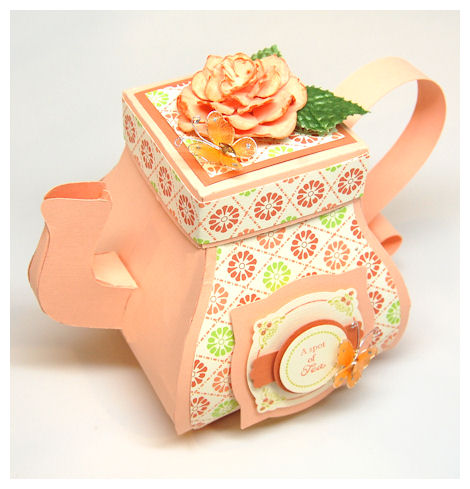
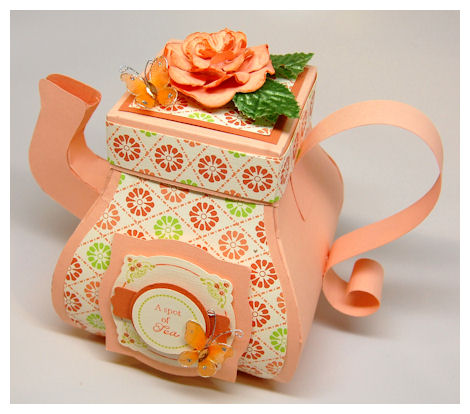
Can you believe that now YOU can make a 3D Tea Pot by purchasing my Tea For You © template!
As I said this is my proudest creation to date (and I still have more creative templates to come that are pretty WOW!) for obvious reasons. The best part is, is making it EASY for you to do too. It is a true dream come true that I have found a way to help other recreate projects I’ve designed.
There are so many possibilities for the design of this.
I used some Basic Blooms paper for this design. It really allowed me to keep it simple!
The shape of the template itself is certainly enough of a WOW! Plus the size is perfect! It is practically the size of a REAL tea pot! I kid you not.
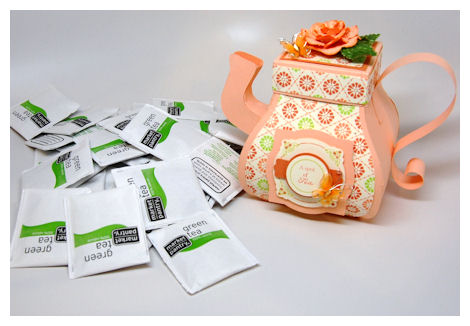
Would you believe this holds over 40 tea bags?
Well it does…..
Here they are stacked inside! Can you saw WOW!

That is pretty amazing, don’t you think? Plus you can shrink it to be uber cute if you want too.
Now lets get to the designer elements shall we.
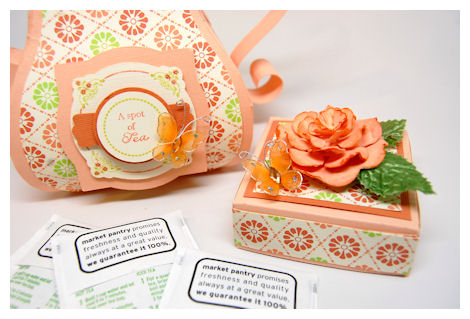
On the top of my tea pot I decided that the Rambling Rose Cut File was going to be PERFECT!

**Click Here to View the Complete Rambling Rose Video Tutorial**
For the FRONT embellishment:
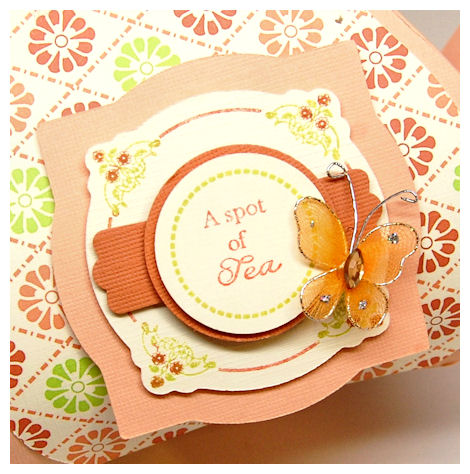
I used the STUNNING Killer Curves Frame, with its coordinating Killer Curves © Label! THis is a fabulous set of large frames that you will LOVE! This particular label matches the floral border design in the A Spot of Tea © Pretty Impressions set! That is where my sentiment comes from. The dashed circle label is from the Just For You © set. I love mixing and matching.
I just think this is breath taking. What a great gift to give to someone.
Don’t miss our AMAZING A Spot of Tea © Pretty Impressions set, as well as our matching A Spot of Tea Pretty Pieces Cut file so you can complete your “tea party” ideas with tea cup shaped cards, tags, place cards, and more! We even have an amazing collection of Pretty Printables paper called Tea Parlor ©!
Pretty Packaging © template – Tea For You
Pretty Impressions © Stamps- A Spot of Tea, Killer Curves: Fancy Frames, and Just For You
Pretty Printables Digital Paper: Basic Blooms
Cardstock by Couture Cardstock
Ink: Momento
Pretty Pieces © Cut File- Killer Curves Label, Rambling Rose
Thanks for stopping by! I look forward to seeing you at our blog hop tomorrow 😀
Somethin simply sweet
Jun 5, 2010 Author: mytime | Filed under: Cards, Home decor/3-D items, My Time Made EasyHi everyone!
Ready for some more projects?
Be sure to visit Catherine Doucette! She is sharing even MORE with the A Spot of Tea. I have to say it has been nice having her back with us this month!
Wait until you see what Tracey made! YUM! YUM! YUM!
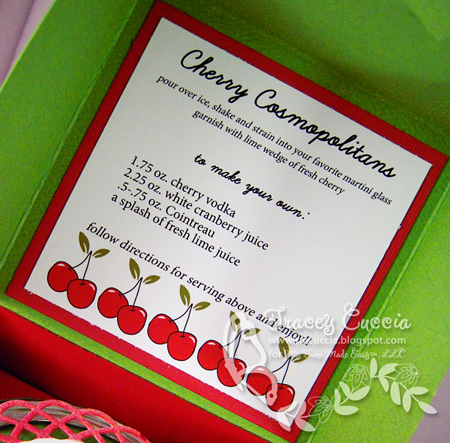
“Lauren has done it again this month. The new Well Preserved set is SO versatile, and tons of fun. Fruit is timeless – lol. What are NOT timeless, are “Hot Drinks”. Not temperature hot, but trendy hot. Come by to see how I used the Jam Packed Template along with the Well Preserved digi and regular sets to make some “Hot Drinks” into a gift for a good friend”
I have so much to share its crazy! Lots of cards and gift ideas.
I’m also working “ahead” because I’m going on vacation and am feeling the CRUNCH!
AND I have a hair appointment today so I need to be brief 😀
I know you are all just as busy as I am this weekend, so I’ll save the real god stuff for the weekdays, when most of you catch up on the blog reading.
Now living in NH Maple Syrup and Maple candy is a BIG deal! We get it FRESH, and let me tell you, it is TASTY!!
That is why I HAD to include a Maple Leaf in the set, along with some coordinating sentiments 😀
I was going to wait to share this one, since I am making the Tea Tabbed box to put it in, but I thought I could share this now, and maybe do the box later 😀
NH Made Maple

So here is my gift set-inspired by my card!
It was great to have some inspiration and a starting point.
If you missed all the cards I made using the Well Preserved © set you can go here!
Maple Syrup
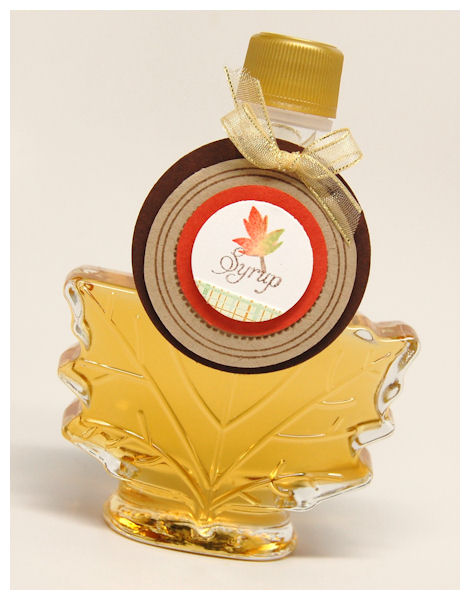
So here is my sweet lil jar of Maple Syrup.
I just used the circle label from the Well Preserved © set , and the Well Preserved Cut File to make a super quick tag to hang off my jar of maple syrup!
Next up-Maple Candy! I just inked my leaf in 4 different colors to get a “fall” leaf look.
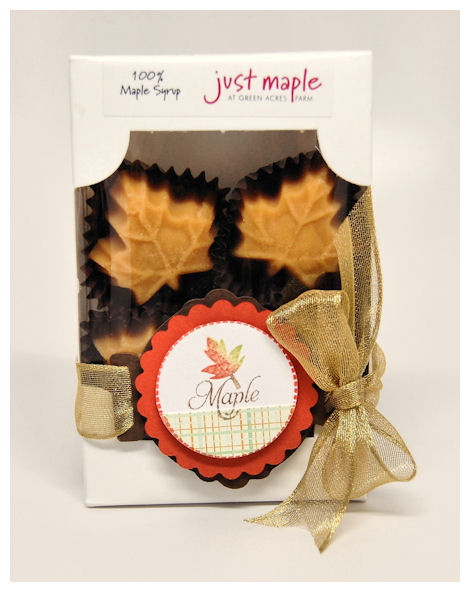
This stuff is SO sweet it is sure to kill any sugar frenzy you may have!
For this one I used the All Tied Up: Circle to hold my Maple Leaf image, and tied it around the box!
Package these up in the Tea Tabbed Box (without the tea cut out!)and it is the perfect gift!!
Pretty Packaging © template – Tea Tabbed <—if you are looking for the perfect packaging for these goods!
Pretty Impressions © Stamps- Well Preserved
Pretty Printables Digital Paper: Vintage Plaid
Cardstock by Couture Cardstock
Ink: Momento
Pretty Pieces © Cut File- Well Preserved, All Tied Up: Circle
Ribbon by May Arts
OK Lots more to come, so stop on by tomorrow!
Just Peachy
Jun 4, 2010 Author: mytime | Filed under: Cards, Home decor/3-D items, My Time Made EasyOK its been so quiet here on the blog! Where on earth did you all go??
I was going to post one of my LONG projects, but decided to wait. I figure if everyone is busy (especially with the weekend) then I would follow suit, and keep it short and sweet too. I have stuff I want to do with my family and this shorter post will allow me the day to do just that. Especially since I’ve been even more busy packing up all the orders that come in daily 😀
Happy mail has a new meaning now 😀
Don’t miss another project from Catherine Doucette today.
Today we also have a super peek from Stephanie Kraft

Here is what she has to say:
When I first saw Lauren’s 3-D tea pot, I was both amazed and intimidated! After cutting out all of the pieces for the Tea For You © template, I was pleasantly surprised at how easily it all came together. This is the perfect gift for any tea loving friend (or even yourself!), and it combines so well the Tea Tabbed © box, A Spot of Tea © stamp set, cut files and digital papers. I made today’s project for a friend of mine, but I was so inspired that I made a complete tea set for myself (I’ll share that on our final group post day)!
Be sure you pay Stephanie a visit!
Many of you have told me about your plans for the Well Preseved © set! How exciting to hear what you are all going to be doing with it! I have tons more projects and ideas, and I will share them as the week progresses, but today I’m keepin it simple.
Today I’ll share a project I made to match my card I posted the other day.
It was great to have some inspiration and a starting point.
If you missed all the cards I made using the Well Preseved © set you can go here!
CLICK HERE TOO! You have to see what Katie did using the Digital Well Preserved set!
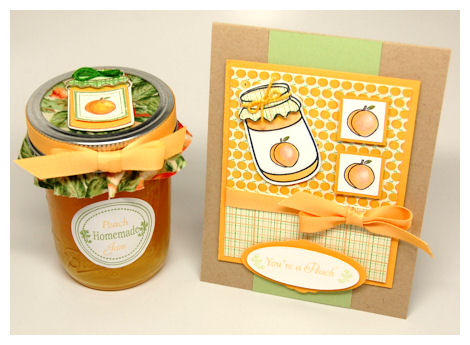
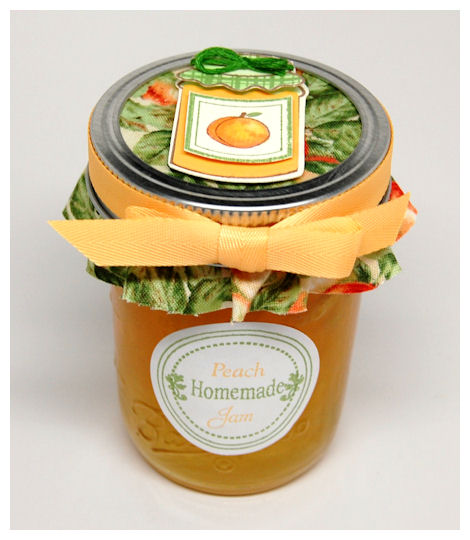
This is a jar of Peach Jam! Talk about SWEET 😀
I personally don’t make my own jam, I ahve a friend who does, and she stock piles my kitchen for me 😀 I also love to go to the local Farmers Market and/or farm-stands to purchase various types there as well. They make excellent gifts!
I did find an AMAZING book about canning that I will share later in the week. I also have some other ideas for these half pint Ball canning jars for those of you who don’t can, or have no time/interest in it.
The is the top of my jar lid.

I have to say I impressd myself with the colors of my peach! LOL! It looks quite real (I think anyway)
I had some gorgeous Peach fabric that I cut into a circle for my lid cover. I then stamped, colored and cut (using the Well Preserved Cut File) my Peach Jam Jar, and added it to the top! Easy Peasy! You can really whip up these jars in not time.

I used the Well Preserved Cut File to make is go much quicker and allow me to layer my jelly jar iamage without hardly any effort! How did I live without my Cricut?? To think I use to HAND CUT everything! No wonder I can get so much MORE done now 😀
Note: We sell the PDF versions of all our templates, some cut files are NOT available in PDF, so check the descriptions to be sure.
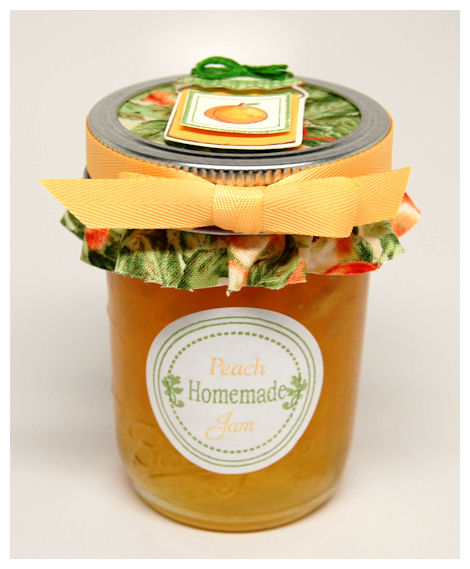
I also used the Well Preserved Cut File to create my circle label for my jam. I just stamped my circle tag onto the cut adhesive label I made, and stamped the leaves and “homemade” in green. The “Peach Jam” was stamped in a cantaloupe ink. Simple yet a true WOW! In the set there is even a “date:” sentiment, and some other labels that you may find useful like: From the kitchen of, Hand Picked, Just for You…to name a few. If nothing else the fruits are SO cool on their own.
Supplies
Pretty Packaging © template – Jam Packed <—if you are looking for the perfect packaging for you canned goods!
Pretty Impressions © Stamps- Well Preserved
Pretty Printables Digital Paper: Vintage Plaid
Cardstock by Couture Cardstock
Ink: Momento & Copic Markers
Pretty Pieces © Cut File- Well Preserved
Ribbon by May Arts, DMC embroidery floss
Other: Avery Adhesive Label sheets, Fabric
There is still even more to come, so if you have some time, stop on by tomorrow!
Thanks for stopping by and enjoy the weekend.
Well it’s the 4th and I still have SOOOOOO many ideas and projects left to share.
Today we have Pam Imholz with a super project for you!!
Here is what Pam has to say:
Nothing is more soothing than a cup of tea – whether it’s a it hot cup on a cold winter day or iced and crisp on a hot summer day. You’ve got to see the new Tea Time ideas from My Time Made Easy this month. You will be over the moon and ready for Tea Time after you see these new coordinated items.
Go ahead and check out what Pam has done!
Don’t forget that Catherine Doucette is back with us sharing some samples too!
I have a few things to share too! Shockingly no template, I thought I’d go the card route instead. (Don’t worry lot’s more template ideas to come!)
Since I began My Time Made Easy ™ LLCback in December MANY of you have since taken the plunge to try your hand at new things!! Things you’ve never tried before 😀 I cannot tell you how good it feels to know that many of you have tried your hand at something new using my products!!
One thing that may have you intimidated is the Pretty Impressions Digital version of our stamps. Now I totally get it! I’m generally note a HUGE digital stamp person, but the last year I have grown to appreciate the possibilities they can offer. That being said I’ve begun to offer select sets in a digital version. Over the last year or so I’ve started to use them more and more, and even enjoy it. I recall when I first tried acrylic stamps. I HATED them, now that is ALL I will use! I love and prefer them. When storage space and money are a factor the digital stamps can be a great option too 😀
One of my customers: Terri Moore alerted me to something she put together using MTME! She created a step by step video tutorial on using the A Spot of Tea Digital set!! She did an amazing job! THANK YOU TERRI!!
You can view her VIDEO TUTORIAL HERE!
Each of our digital images come with step by step photo instructions. You can try one of our digi’s FREE—>HERE!
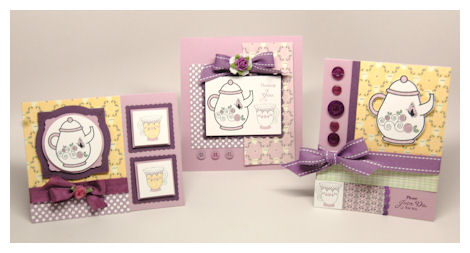
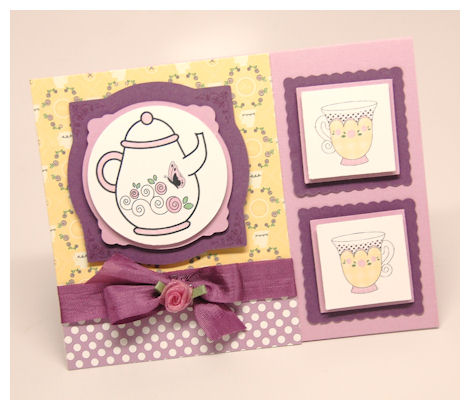
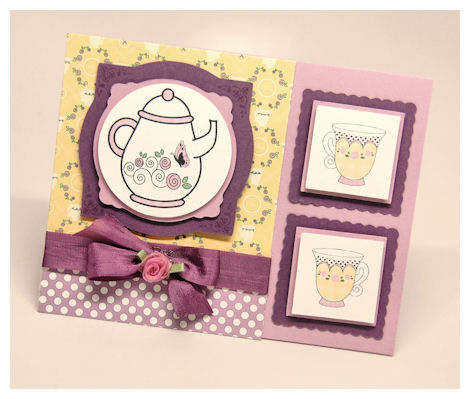
Today I created 3 different cards using the A Spot of Tea Digital set, and combined it with the Digital version of the Just For You set!
I also used the Tea Parlor papers in Plum/ Silent Night, Nomad’s Warm Apple Cider , and the Darling Dots collection.
First up You & Me for tea
If there is ONE thing I love it is combining stamps sets! I love having the ability to mix and match all my images, and sentiments with other sets in my collection. Now when I design I keep these possibilities in mind. This novelty is further expanded when you use any of our Pretty Impressions Digital version of the sets!
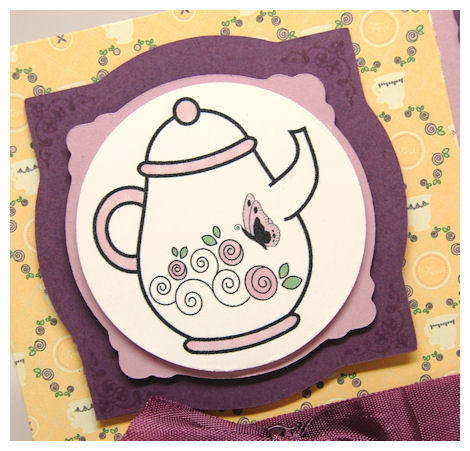
I enlarged the tea pot from the Just For You , and digitally added the butterfly (from the same set) along with the rose flourish-which I was able to MIRROR in the program! How cool!!
The tea pot is on some layered I made using the Killer Curves: Fancy Framescut file. I stamped one of the corner adorner’s from the Killer Curves: Fancy Frames stamp set.
The tea cups were mirrored too 😀 As you can see one goes in the original direction, and the other points the opposite way. I used my photo software to color in my images too! While I love to color with my Copic’s, I find this is a GREAT option to have, especially if you are going to mass produce something like invitations 😀
Please Join Us for Tea
Like this 😀
OK you could certainly make it much more simple…but I love this one!! I also used the Vintage Plaid collection
My sentiment is from the actual A Spot of Tea STAMP set, but the rest was all digital 😀 Or hybrid as most like to call it.

Also note on my tea cup, I arranged the rose bus images to my liking 😀 Something not so easily done with stamps.
I love purple and yellow! I know many of you out there aren’t purple fans…but you can use whatever Tea Parlor collection you like in your favorite colors to recreate your own version.
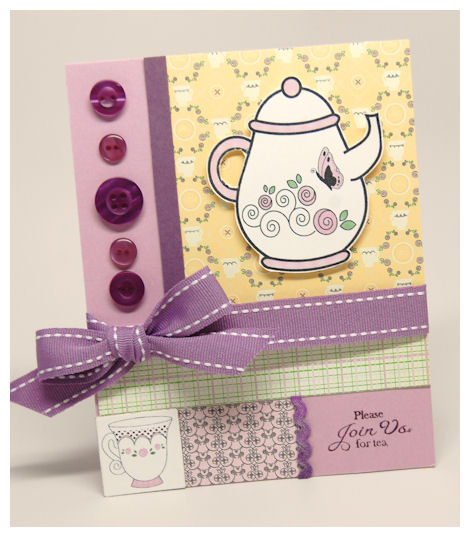
Now for my favorite one!
No yellow, bit I think this is so sweet and dainty 😀
In this one I combined my images together (the same completed tea pot, and my plain tea cup). My sentiment also stamped.
When I designed the A Spot of Tea set, I didn’t NEED to design a tea pot because I knew I already had an “adjustable” one is the Just For You digital set. Its cool to have BOTH the acrylic and digital version. I like being able to touch and feel my stamps, but SOMETIMES (like in this case) I have an image that I wish were adjustable!

Now you don’t have to digitally color it. You can print it, like a coloring book page 😀 and handcolor it. No one would ever know it was digital! You can then make it as BIG or as small as you want. Add other images to it…..flip it…..whatever you want!
As you can see (and I feel like a broken record saying this but it is true) the possibilities are ENDLESS!
I think that should be my moto! LOL!!!
Supplies:
Pretty Impressions © Stamps- A Spot of Tea acrylic & digital, Killer Curves: Fanciful Frames, Just for You
Pretty Printables Digital Paper: Tea Parlor Collection, Vintage Plaid, Darling Dots
Cardstock by Couture Cardstock
flower by Prima, Ribbon by May Arts, Buttons by Foo Fa La
Thank you for stopping by today. I hope the projects whet your creative pallet!
I’ll be back with even more tomorrow 😀
Life is like a box of chocolates
Jun 2, 2010 Author: mytime | Filed under: Home decor/3-D items, My Time Made EasyWell the MTME release has come and gone, but the projects will continue ALL week long 😀 I still have so many great projects to come, so make sure you stop by all week.
On thing I think we can all agree on is that is has been “tea-riffic” Release!!
Today Silke Ledlow has a STUNNING project for you!

There is a little peek of it for you. Now you need to go check her out.
You will also want to look in on Catherine Doucette! She is whipping up the projects this week!
I have a project too! OF COURSE 😀
We are all utilizing the A Spot of Tea © stamp set

This is available in BOTH acrylic and digital! So something for everyone!
WOW! You all love your tea!!
A Spot of Tea has SOLD OUT! It is expected to be back in stock by mid month. Per request I have decided to allow you to still order the A Spot of Tea as well as the So Sentimental set!
Keep in mind that part of your order will not ship until the set arrives back in stock (as stated in the store)
We do have our A Spot of Tea digital file available as well ![]() More to come with this I promise 😀
More to come with this I promise 😀
Here is my project for today.
Homemade Chocolates

How DELICIOUS does this look?
I decided today I would show you a project using the Tea Tabbed Box (without the tea slot cut out) to give you some ideas of how pretty and fancy it can be, even when NOT using it for tea 😀

I used mine for chocolate!!
Don’t you just LOVE the tabbed front? So many design options.
It was the perfect fit for the All Tied Up: Oval (which was shrunken a bit :D) to use my sentiment from Well Preserved set on. I stamped my “Homemade” and then my “Chocolate” onto the tag, over the little stamped rosebud. I was so pleased to be able to have THAT particular combination within the set 😀 Its also perfect for chocolate covered fruits 😀
For my box I kept it simple and used the Tea Parlor paper, which is just so GORGEOUS! I fell in lobe with it from first glance.
You don’t need lots of bells and whistles when you have paper like that.
Here is the top view. I wanted my tea cup to be the focus of this, and obviously the Tea Parlor paper was my GO TO for inspiration. If you haven’t tried out Digital paper yet you should!! We have several FREE packages for you to try, so you can see the QUALITY before you even buy 😀
I also have a video on how to use the digital paper—> HERE!

I stamped my lined and scallop tea cup pattern from the A Spot of Tea © stamp set on the top & bottom of my cup, which was made using the A Spot of Tea Cut File. I then inked up the roses! For a subtle additional WOW! I used the flourish pattern from Fanciful Flourishes, in a pale pear ink.

I colored the “tea” on my cup.
I added some ribbon onto the handle, then for a stunning addition used a wired butterfly I had in my stash of dingle-hoppers (remember the lil mermaid?).
Now what do we have tucked inside?
A perfect treat of homemade chocolate covered toffee, and some afternoon tea! OF COURSE!
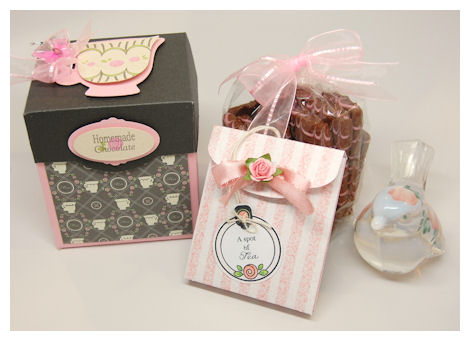
See that little “something” on the right side. Well that my friends is our NEW! Time for Tea Bag Pretty Pieces Cut File
I knew NO tea pot template or A Spot of Tea © stamp set would be complete without a “tea bag” style “tea” holder!
Time for Tea Bag $2.50

Available in PDF, SVG, WPC, DXF, GSD
Ever wish you had the perfect little “tea bag” wrapper to give your own tea samplers to others? Well this is the perfect cut file for you! In just a minute you can make the ultimate tea favor! Complete with 2 pretty pockets, sized perfectly to hold your special tea bags!
You will definitely want to check out our A Spot of Tea Pretty Impressions Stamp set, as well as the Tea For You & Tea Tabbed Pretty Packaging to complete the plethora of amazing tea gifts, cards, tags, favors and ideas!
Note: I used the A Spot of Tea Cut File for my little tag too 😀
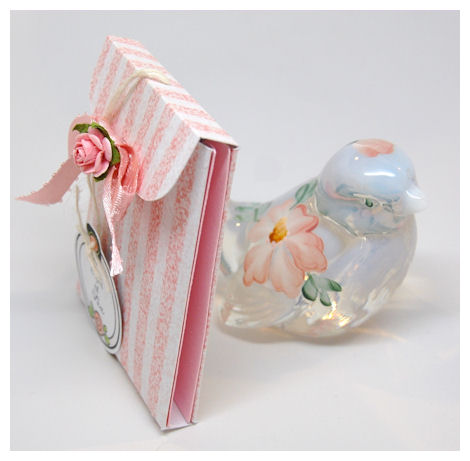
My tea bag was first printed using the Vintage Stripes Collection 2 A simple bow, and my tag from the A Spot of Tea © set was a perfectly simple touchHere is the side view. Tucked together, just like a tea bag 😀 Even my tag is hung like that of a real tea bag.
I used a magnetic closure for my project
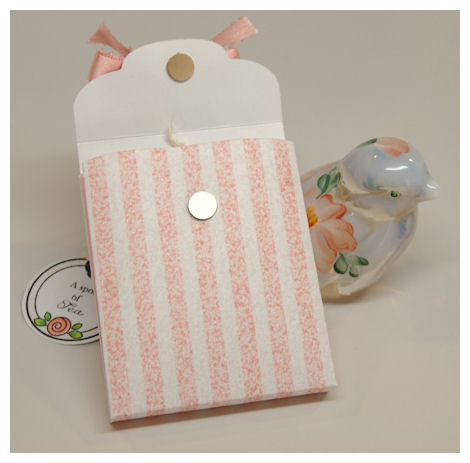
It literally just unfolds!

Each side holds one to two teabags, with the idea they can enjoy a cup with you or a friend! Makes a super party favor or tea sampler!
OR for some other ideas:
Put in some Crystal Light or other “TO – GO” flavor packets that everyone sells now too!!
You can use it as a money holder
A dip packet holder (I LOVE Tastefully Simple dip mixes, and they make great gifts)
Movie tickets
Homemade coupons for chores, babysitting…..
Facial packets
Maybe put in some Tylenol travel packets???
Design 2 mini cards to keep tucked away…..
You get the idea.
Open side 1
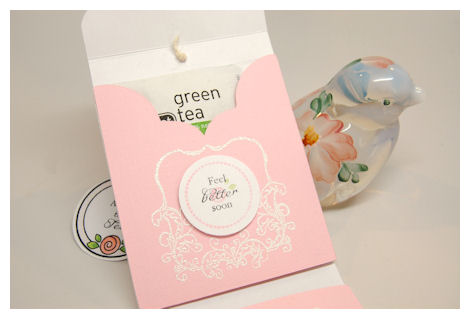
Here you can see I utilized the Flourished Frame from Killer Curves: Fancy Frames to “frame” my sentiment.
This is the set:
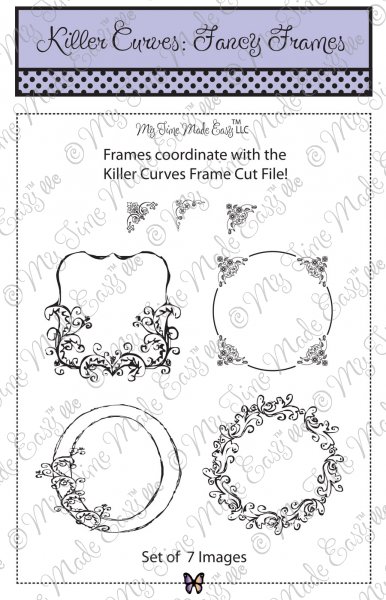
It is REALLY pretty (as you will see) and coordinates with a cut file: Killer Curves Frame
The frame was stamped and embossed with white embossing powder.
The dashed circle border is from Just For You, and the sentiment, and Rose bud is from A Spot of Tea ©
Open Side 2
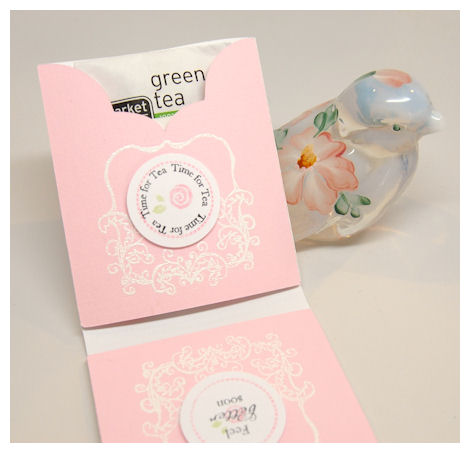
On the other side of the tea bag I repeated my design, only this time I used the Time for Tea sentiment from the Just For You set.
Supplies:
Pretty Packaging © template – Tea Tabbed Box
Pretty Impressions © Stamps- A Spot of Tea, Well Preserved, Killer Curves: Fanciful Frames, Just for You, Fanciful Flourishes
Pretty Printables Digital Paper: Tea Parlor Collection, Vintage Stripes
Cardstock by Couture Cardstock: OSW White, Disclosure, Blushing
Ink: Momento, Copic Markers
Pretty Pieces © Cut File- Time For Tea Bag, All Tied Up: Oval
flower by Prima, Ribbon by May Arts
Thanks so much for stopping by. I can’t wait to see what YOU make using all our new goodies! Tomorrow I have another special project, so I will see you back here then!
Until tomorrow.
PDF link
Jun 2, 2010 Author: mytime | Filed under: UncategorizedFor those of you hoping to use the PDF sketch—> CLICK here!
The link in my post was previously disabled.
My Etsy

Who I Designed For
Blogroll
- Alicia
- Alli Miles
- Ally Blankenship
- Amber
- Andi @ crafts on a whim
- Angel R
- Angie Z
- Anne Kranitz
- Becky O
- Bee
- Beth Silaka
- Bethany Paull
- Beverly Nash
- Bobbie
- Cambria
- Cammie
- Card of the Week
- Card Positioning System (CPS)
- Cards for Cancer
- Catherine Doucette
- Charmaine
- Cheryl Sims
- Chriss Rollins
- Christina
- Christine Ewing
- Christine Wooden
- Colleen Schaan
- Craft Critique
- Craft Gossip
- Crystal
- Dawn Easton
- Emily Giovanni
- Geny
- Holly
- Igne Groot
- Inspirational Craft Blogs
- Irene
- Jami Sibley
- Jeanne Streiff
- Jen del Muro
- Jeni Bond
- JenMarie
- Jenn Balcer
- Jenn Diercks
- Jenn O
- Jennifer E
- Jennifer Mick
- Jennifer Pereda
- Jennifer-Sweet Treat
- Joanne Basile
- Jodi Collins
- Julia Stainton
- Julie Masse
- Karen
- Kathryn Berthiaume
- Katie Cotton
- Kelley Holland
- Kendra
- Kim Scholfield
- Kris’s Color Stripes! Get inspired here
- Kristen Dubosque
- Kristin Eberline
- Kristine
- Laura @ Sunshine Stamper
- Laura Turnmire
- Laurie Schmidlin
- Lesa Rapp
- Linda Duke
- Linda-LSN
- Lindsey Botkin
- Lisa (lakind scs)
- Lisa Kind
- Lori Craig
- Maggie
- Mara Campbell
- Maria
- Maria Levine
- Mary
- MaryJo
- Melanie M
- Monique Hansen
- Moxie Fab World
- Pam Imholz
- PaperCrafts Connection
- Peppers and Pollywogs Kids party site
- Rebecca Grohall
- Rita
- Robyn
- Rose Ann
- Sarah Vrolyk
- Sharon Harnist
- Sharon Johnson
- Sharon Rivera (a chemisrty with paper)
- Sherrie
- Sophia Landry
- Storage Units, Ink, & More Blog
- Sue Berker
- Susan (Rainy)
- Tangii Crane
- Tracy
- Tricia Traxler
- Trudee
- Velta
- VivLyn
- Zena
MTME Pretty Palette Color Team
MTME Pretty Patterns Sketch Team
My Time Made Easy TM LLC
Shop till you drop!
Lauren Meader
About Me
Copyrighted material
Subscribe To My Blog
Pages
- About me
- Alexa’s Story!
- My Crafty Corner!
- My Time Made Easy™ LLC
- Our Make A Wish Trip to Disney!
- Resume/Publication List
Calendar
Archives
- August 2013
- July 2013
- June 2013
- May 2013
- April 2013
- March 2013
- February 2013
- January 2013
- December 2012
- November 2012
- October 2012
- September 2012
- August 2012
- July 2012
- June 2012
- May 2012
- April 2012
- March 2012
- February 2012
- January 2012
- December 2011
- November 2011
- October 2011
- September 2011
- August 2011
- July 2011
- June 2011
- May 2011
- April 2011
- March 2011
- February 2011
- January 2011
- December 2010
- November 2010
- October 2010
- September 2010
- August 2010
- July 2010
- June 2010
- May 2010
- April 2010
- March 2010
- February 2010
- January 2010
- December 2009
- November 2009
- October 2009
- September 2009
- August 2009
- July 2009
- June 2009
- May 2009
- April 2009
- March 2009
- February 2009
- January 2009
- December 2008
- November 2008
- October 2008
- September 2008
- August 2008
- July 2008
- June 2008
- May 2008
- April 2008
- March 2008
- February 2008
- January 2008
- December 2007
- November 2007
- October 2007
- September 2007
- August 2007
- July 2007
- June 2007
- May 2007
- April 2007
- March 2007
- January 2007
Categories
- About Me
- All That Scraps
- blogger challenge
- camera/photo play
- Cards
- Contests
- family stuff
- FOR SALE
- Home decor/3-D items
- How to FAKE it!
- Introduction
- JUGS Challenge
- JustRite Stampers
- Lizzie Anne Designs
- My family stuff
- My Stamping Space
- My Time Made Easy
- My Time To Color Challenge
- My Time to Create Challenge
- My Timeless Template Challenge
- My Timeless Templates
- Mytime Mail
- MYTIME MOVIE/VIDEOs
- Papertrey Newsletter
- Pink Cat Studio
- Pretty Palette Challenge
- Pretty Patterns Sketch
- Product Opinions and Must haves
- Recipe's
- Saturday Sketch
- Smilebox Creations
- Stampavie
- Tutorials
- Uncategorized
- videos
Most Popular
- Create your own Onesie Card Tutorial-and important NOTE! PLEASE READ (2529)
- Saturday Sketch-Boxed bag holder (2333)
- Going GREEN! Fancy Flower Flourish-Closure Video (1478)
- Fabulous Favorite - Giveaway! (1336)
- a Prayer Request (1231)
- QUICK-Easter Baskets from Nestabilities-PTI style-and blog challenge (1063)
- Teaser Sketch (999)
- February Release Giveway! (and a little peek) (996)
- Group Post and Rambling Rose Video Tutorial (985)
- GIVEAWAY! Who wants it all?! (895)
Recent Comments (RSS)
- 바카라사이트: 비슷한 주제에 대한 흥미로운 정보를
- 바카라사이트: "여기에 제공해 주신 귀중한 정보와
- 온라인홀덤: 유익한 웹 사이트를 게시하는 데
- 홀덤나라: 나는 당신의 블로그를 정말 좋아합니다.
- lisa: Technology, too, has left an
- 주소모음: 흠 !! 이 블로그는 정말
- FutureGen Apps: Thank You For Sharing fantastic
- 웹툰사이트: 터키에서 온라인 스포츠 베팅을 할
- 툰코: It is a really very
- 온라인홀덤: I’ll be sure to come
Copyright © 2007 - My Time, My Creations, My Stampendence - is proudly powered by WordPress
This blog has been Tweaked and Designed by Sara Williams