Archive for February, 2010
Cut it out! Easy guide to using Cricut with SCAL software: VIDEO and PDF download
Feb 5, 2010 Author: mytime | Filed under: My Time Made Easy, videosYou asked, I listened.
That is my goal as a fellow papercrafter, and store owner.
I spent some time making a video to show you the step by step process for the basic things you need to know when using your Cricut and SCAL for the Pretty Packaging © templates or Pretty Pieces © Cut Files!
VIDEO:
PLEASE NOTE: I had to hold the video in hand, type and record. SORRY!! I hope my camera base gets fixed so I can put it in the tripod next time.
[veoh v19775489cxMTpTXY#]
If you want to safely view ALL the videos I published on Veoh, please CLICK HERE!
NOTE: DO NOT CLICK ON THE THUMBNAILS !If you click ON the thumbnails AFTER the video it takes you to the Veoh site. Some of the content there I am told is “R” and even “X”rated (EEK!) and you may not want to do that around young children. So if you just watch the video here on my blog, and avoid the thumbnails you should be OK. Not sure WHY they don’t have ONLY stamp related videos pop up, but I guess some aren’t.
Bottom line: Click at your own risk!
I am not responsible for content that links to the videos from the Veoh site.
Thank you ![]()
I also put together a step by step PDF download with the instructions for the basic steps that are covered in the video, so you can utilize your Cricut and SCAL. Now you have both a text and visual reference.
If you for some reason cannot view the video, no worries! All the needed info is attached below.
PDF:
my-time-made-easy-guide-to-using-cricut-with-scal-software.pdf <—-Click that to download/print/save a PDF of the general instructions for what you will want/need to know to get started in MINUTES!
There are SO many various things you can do with your Cricut. This was made to serve as a quick reference! Play around and have fun with it. Now you can print it out and keep it next to your computer as you get ready to download your Pretty Packaging © template or Pretty Pieces © Cut File!
Since many of you are so nervous, feeling technically challenged, or may be on the fence about learning how to use the Pretty Packaging © templates in our fabulous cut file versions, I want to tell you to CUT IT OUT! (I mean that literally :D) Put down the scissors……and keep reading.
I should make it known that all our Pretty Packaging © templates or Pretty Pieces © Cut Files come in files for just about every cutting machine available!
We offer our files in PDF-for those of you with a home printers, as well as SVG, WPC, DXF, and GSD.
For more details please read —>HERE.
I want all of you to know that YOU can accomplish ANYTHING. There are NO limits. If I can do something to help you achieve that accomplishment, then I am over the moon to do that for you. I take pride in especially helping you make AMAZING coordinating cards,tags and gifts EASIER and more affordable than ever!
There is no better feeling than learning something you thought impossible.
So with that being said I am here today to show you how to use the Pretty Packaging © template or Pretty Pieces ©Cut File with your Cricut and Sure Cuts A Lot software.
NOTE: The Cricut is the most popular type of personal cutter, and the one I get the most requests/questions about. It is also the cutting system that I personally use, so that is why I am using this cutter for my tutorial.
I do advise you to look in to ALL other personal cutting machine options before making the choice to purchase one, should you be considering that investment. We all have different prefernces/wants/needs, as well as budgets! Make a decision based on what is best for you.
You may not even want a personal cutter, as you enjoy our PDF version. That is perfectly wonderful. I ensure you that I will continue to always offer my products in that format 😀 No worries!
To get started:
You would need the Cricut, ANY Cricut Cartridge, Sure Cuts A Lot Software, and a USB cable
You can find the Sure Cuts A Lot software for the BEST price I have ever seen–> HERE! YES! There is a MAC version too.
I forgot to mention that they are offering a coupon code right now. The code will take an additional 10% off of the entire purchase. The code is FEB14 and it expires at midnight EST on 2/14/10.PS I don’t get a commission or ANYTHING from Cricut, or CandaCraft. I just enjoy sharing what I love and a great deal!
MANY of us are visual learners so that is why I put together a quick video for you! I knew once I was able to show you just how easy it is to download and use our Pretty Packaging © templates or Pretty Pieces ©Cut Files with your Cricut you would feel more confident in knowing YOU can do this.
You can access a FREE Pretty Packaging © template in our store —> Cutesy Cover. Now you can start with a great template RISK FREE!
All our template cut files come with a PDF version. Each template has full color photos, with step by step instructions. It is very clear and easy to understand, no matter what your skill level!
When you download your Pretty Packaging © template or Pretty Pieces © Cut File make a folder for JUST those types of files.
This keeps your files organized so you can easily access them. Then each time you go to obtain a file to cut, it will be readily available in that same folder you opened in the Sure Cuts A Lot program.
I’d love to hear your thoughts on this. I hope you found it informative and helpful.
Now if you are looking for actual eye candy you will want to see what Tracey Cuccia has in store for you!
Look what she did!
Some words from Tracey Cuccia
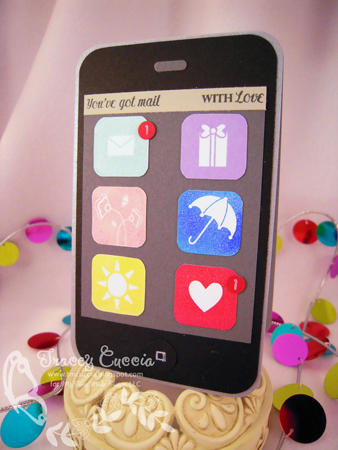
“Technology is great, isn’t it? I think back to even 10 years ago, and it’s AMAZING the things you can do from your PHONE now! I LOVE my iPhone, and would be lost without it. I don’t think I could ever go back to LBI (Life Before iPhone – lol). I can keep in touch with my friends via e-mail or facebook, get the latest news, play games, and even make my grocery list! So what on EARTH does this have to do with My Time Made Easy??? Let me show you…HERE”
Is that project not CRAZY??!!
I have some samples to share tomorrow ! I have to say creating the pdf document then all the video creating/editing wore me out! LOL! I’ve been busting my butt this release 😀 I actually need to purchase a new computer chair!! LOL!! I kid you not.
Well thanks for checking in!
I also have a very informative post all about the cost effectiveness and benefits of using our AMAZING Pretty Printables © digital paper! So be on the look out for that ( it may even be another video too! depends on the response to that)
I am spending some time with my niece Gabriella (or as we call her Gabba! LOL! OK her parents call her Gabby I call her Gabba) She turns ONE next Friday! OMG! Seems like yesterday…..I’m so looking forward to having her for the day 😀 I could just eat her up. I’ll have to get some photos! She is SO beautiful! She looks a lot like Amber. Reminds me of her too. OH! Where does the time go?
Till tomorrow.
Literally Cutting Your Costs!
Feb 4, 2010 Author: mytime | Filed under: Home decor/3-D items, My Time Made EasyI have a special post for you today all about the Personal Cutting Machine VS. Punches/Die Cuts
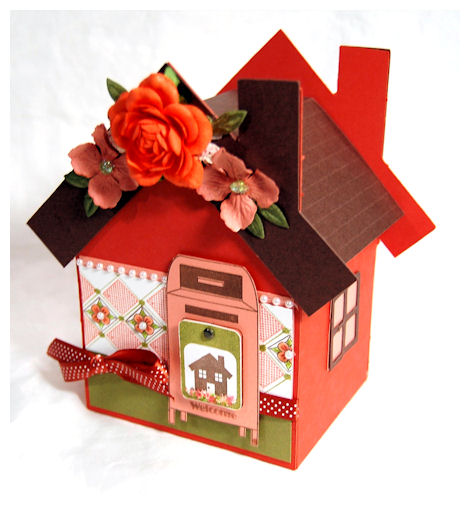
First I want you all to make sure when you are done here, you go and see what Kristin Bueter has to share today using the Pretty Packaging © templates: Welcome Home ©
From Kristin: Spring is in the air! Well, a girl can dream can’t she?
I made my own little spring dream house using the Welcome Home © template. Come see all the details —>HERE!
OK back to business 😀
Many of you are on the fence about a personal cutting machine. Many of you already have one!
Some of you may be scared to try it out. This just may be the push you need to see that it is not only easy but in the end, more cost effective. . I am SO computer challenged and I was able to work my Circut seconds after watching the video that comes with it-and figure out the SCAL all by myself! Let us not forget the TIME you save on cutting, and the SPACE you save on storing.
Today I want to talk about our Pretty Pieces© Cut Files and what an AMAZING value they really are! I don’t just mean “talk” about it, but I am going to actually show you ! Many of us are more VISUAL, so when you see it all laid out, you will be amazed!
This is a visual of the value in Pretty Pieces© Cut Files vs. the purchase of punches or dies. Don’t get me wrong, I adore my border punches and other die cut type of products, but we are talking about the difference and how you are SAVING MONEY, SPACE and getting the MAXIMUM product for the $.
As I share all this you can certainly add this chatter to the many benefits to having all my Pretty Packaging © templates in a cut file too 😀 The templates can be easily resized to suit you projects! Larger or smaller, you are maximizing your use from an already AMAZING template. Plus NO CUTTING!! A dream come true. Granted the PDF version of the templates do come together rather quickly, but when you eliminate the CUTTING, you saved even MORE time, which will enable you to make MORE and spend the minutes you DO have designing a FAB project/gift.
When you purchase a Pretty Pieces © Cut File for ONLY $2.50 you are getting a WORLD of value in that purchase!
Let me SHOW you!
Our first cut file was Flutters and Flowers.
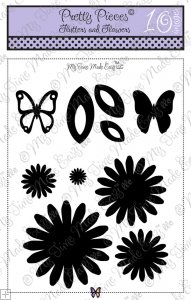
This cut file has 2 different butterflies,
some layering flowers, and leaves.
In that cut file you begin with the EXACT size butterfly that you would use for the All A Flutter © stamp set. The butterfly in the Pretty Pieces © Cut File match the stamps perfectly! Now you would use that cut file INSTEAD of a butterfly punch!
You can also get SO many different sizes from one purchase. Anywhere from the smallest of cuts, to the LARGEST!
Take a look below:
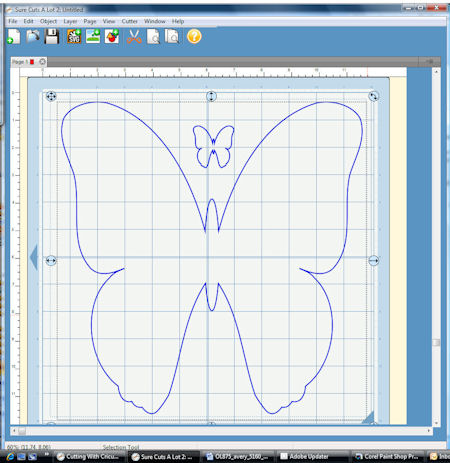
This is the 1 1/2 inch solid butterfly next to the resized version of the SAME butterfly at 11 1/2 inches. WOW! That is so cool.
Here is an example of the resizing options from ONE cut file
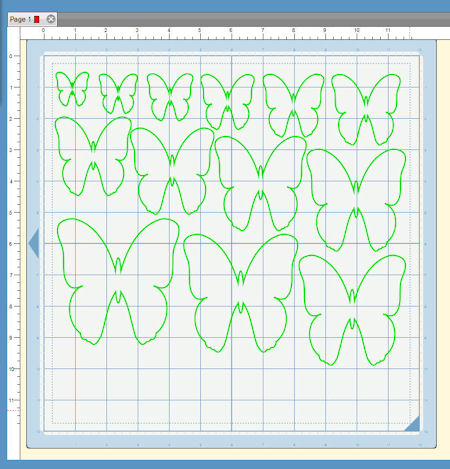
I took the solid butterflies, and started at 1 inch. I began resizing the butterflies by a 1/4 inch.
So I have 1 inch, then 1 1/4, then 1 1/2……you get the idea.
I started sizing my butterflies at 1 inch. I increased the size by 1/4 inch, up to 11 1/2 inches. That would give me a total of 42 butterflies! That is AMAZING.
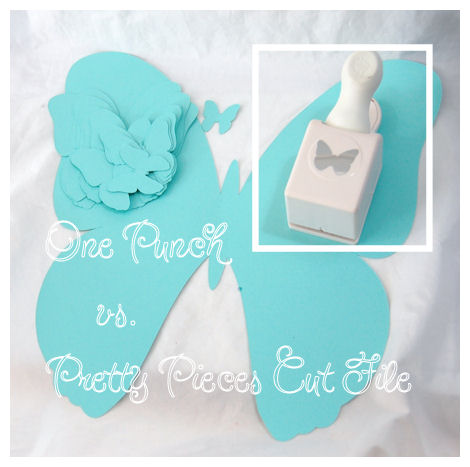
This punch is ONE size, bulky, and cost me $15.99.
By NOT purchasing only 17 punches I could have the Cricut Expression AND the Sure Cuts A Lot software!! (Show THAT to your hubby!)
Think of how much it would cost you for 42 different punches! Let alone the STORAGE!
This is my punch collection.
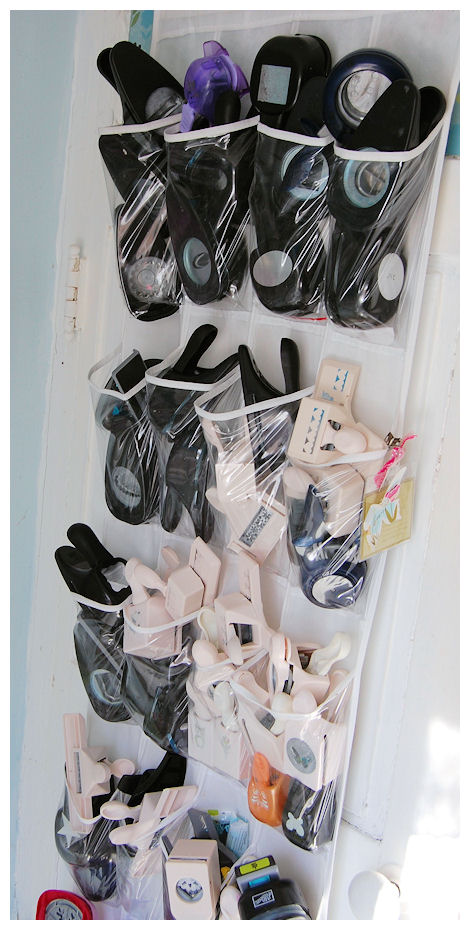
There are MORE than 42 in this photo alone.
I have more on the other side of this door, and in 3 large tupperware bins

If I purchased 42 of those punches it would cost me $672!! And I wouldn’t even have the variety of options that the Cut Files give.
A punch comes in ONE size. Costs anywhere from $5 to $22.
A die cut often comes in a pack of various sized dies, but is PRICEY, needs a machine (which limits the size of the cardstock you can use, the placement of your shape, and is often not the right size you wanted or needed.
You can resize these by ANY measurement you wish. You can also add windows or shaped cut out to your projects and templates!
Using your personal cutting machine to create with literally CUTS your costs for supplies!
You may not have ever even thought about how much you can save, and how much MORE you actually get from a cutting machine.
Hopefully this helps you see the value in the products we are offering. I love sharing things I personally love. and that make my life easier, and expand my spending $$ and TIME. This is definitely ONE of those things. My personal cutter was one of the BEST items I have ever invested my $$ in to.
Now how about some projects that utilize the NEWEST Pretty Pieces Cut Files © Cute Critters: Whooty-Love and Heart Stealer Raccoon.
I dream papercrafts. I don’t say that as a euphemism I REALLY do. I have a notebook that I keep on the counter so that I can quickly jot down an idea in the middle of the night. Jay will wake up in the morning sometime and say, I take if you didn’t really SLEEP to well since it looks like you were busy dreaming of work!
If everyone had a job they enjoyed as much as I do mine, the world would be a HAPPY place.
I am constantly thinking packaging. It doesn’t end.
Sometimes you have a dream….and it is just that! One crazy dream of something that makes NO sense once the fog of sleep disappears. Then sometimes the reality is better than what you imagined it to be!
That is exactly what happened with the Pretty Pieces Cut Files © Heart Stealer Raccoon, and Whooty Love.
When I began working with the tangible stamp form of Critters with Heart, all I could think ablout was HOW to make them into a BOX. I knew I wanted to do something, but wasn’t really sure WHAT. I’d seen some brown paper bag puppets in the store, and that was MY AH! HA!! moment.
To me, the bags were a bit cheesy. A great kids project, but I wanted cute and durable!
I KNEW at that moment that I wanted to do some sort of box body, and use the elements of the Critters with Heart © set to create these. That proved to be a whole other task! Upon reviewing the animals I have to decide WHAT would be the cutest for the boxes.
It was decided that the Raccoon and Owl would be the best for the task.
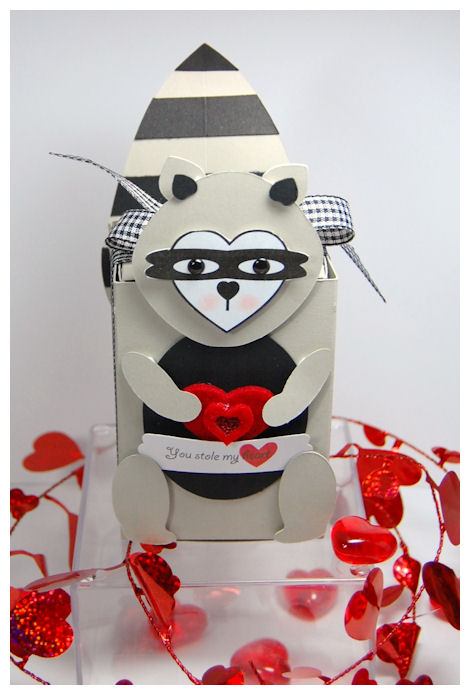
Without further delay here is Heart Stealer Raccoon

Is he not the SWEETEST creature you have ever seen? I love him to pieces.
This Cut File coordinates with our Under Cover © template (which has many uses of its own :D). I will share some uses for that box by itself another day.
I made my Under Cover © template, and the Raccoon head, ear base, arms, legs and tail from Sleuth cardstock. It is a pale grayish color. Assembled my Under Cover © Template.
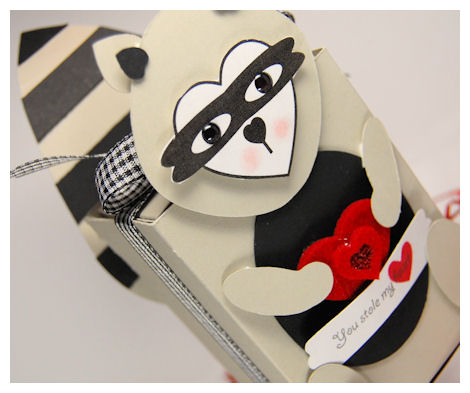
I used my Raven Cardstock and cut his tail again, inner ear, and belly.
The Cut Fileincludes the PDF printed version of the face, but there is also an ALL cut file piece for those elements should you wish to do that. I went with the PDF version of the face as it is perfectly cute and QUICK 😀 The eyes have black pebbles from Cloud 9. PERFECT fit. I used some pastels to add some color to the cheek.
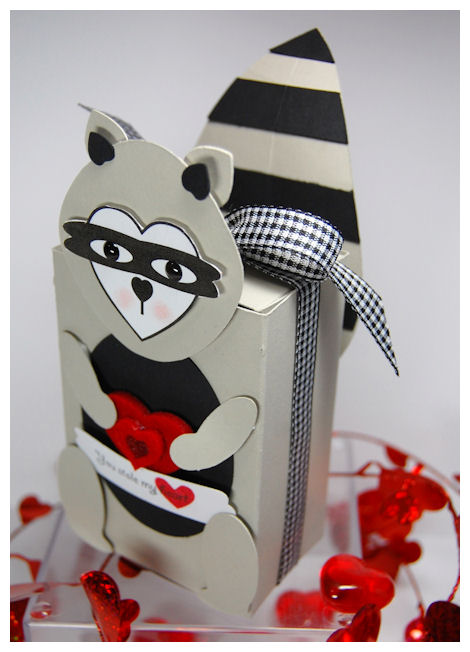
I then just added all the elements to the box. I chose to use dimensionals for a 3D effect. How cute can one box get? Imagine a class of kids making these for Father’s Day, Mother’s Day, any friends birthday! OH! ADORABLE!
Even my SON approved! Now you KNOW its good 😀
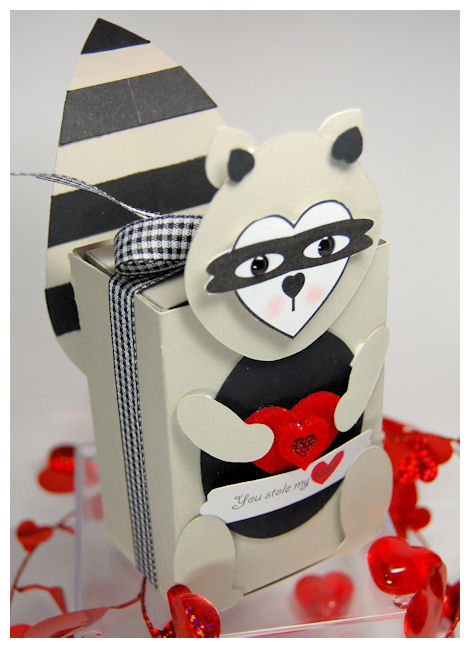
For the tail, I cut that twice (as stated above). The base of the tail was in Sleuth. I then cut the Raven colored tail into 1/2 inch strips and adhered it to the main tail! I even scored it down the center and curled the ends a bit 😀 Imagine adding Fun Flock or Flower Soft?! OH!! LOVE!
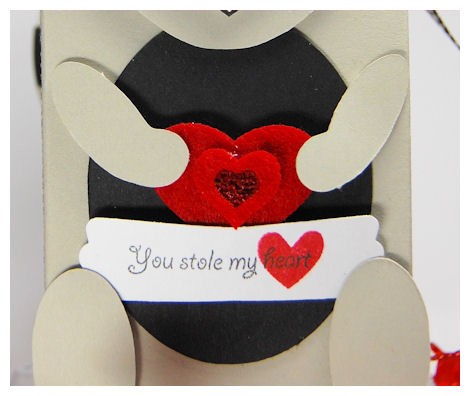
He is holding a felt heart sticker. Tag has You stole my heart from the Critters with Heart © stamp set. I stamped the heart image from the You’ve Got Mail set 😀
Would you believe this goes together in like 10 minutes, once the file is cut?
I don’t think this could get any cuter! (actually it CAN! LOL! I will share more of that another day).
Now how about some Whooty-Love?
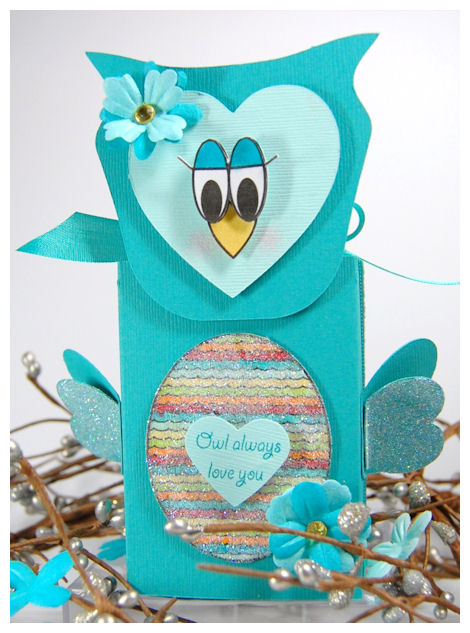
I love unexpected colors, but when you design with a bird I guess there is no color limits. I wanted something BRIGHT and CHEERY.
This project was inspired by this one….
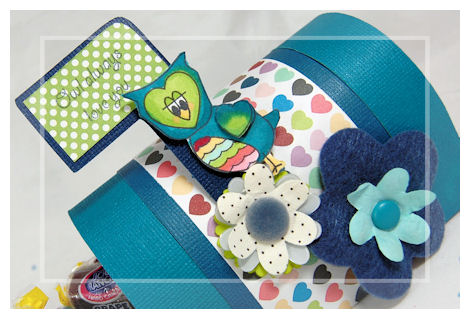
I have SO many ideas for colors of this owl!! (this was from another post the other day)
I used a teal colored cardstock for the Under Cover © base, as well as the owl head base, wings, and tail (you can’t see that in the photo). I then used the lighter aqua colored cardstock for the 2nd face layer.
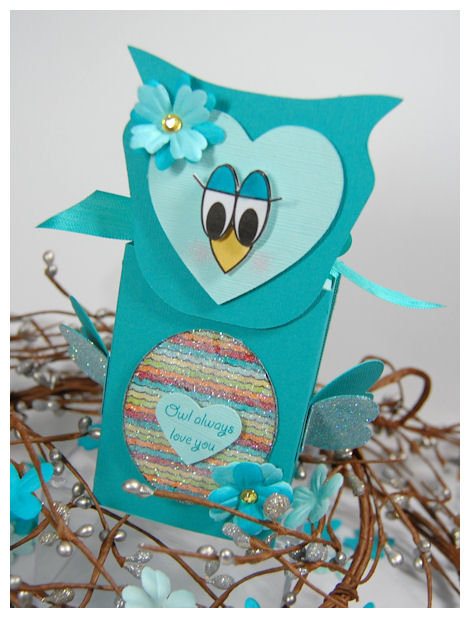
I decided to use the PDF version of the face (printed, layered, and cut twice) and the adorable printed belly 😀 I colored the eyes lids, beak and belly with my copic markers. I added glitter to the belly, and the smaller wings I decided to add.
Of course flowers make everything heavenly.
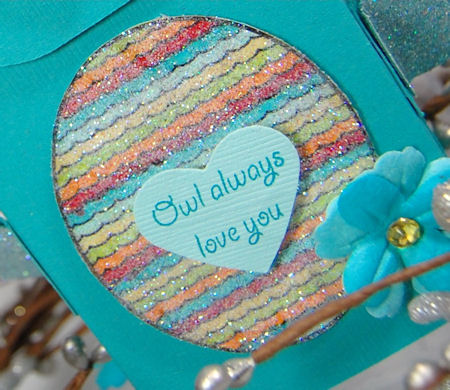
My sentiment is from Critters with Heart ©.
Supplies:
Pretty Packaging templates:Under Cover ©, Heart Stealer Raccoon ©, Whooty-Love ©
Pretty Impressions Stamps: Critters with Heart ©
Cardstock from Couture Cardstock
Copic Markers
Gingham ribbon, Craft Seam binding ribbon from Martha Stewart
Prima Flowers, Glitter, Felt heart sticker
Epoxy sticker by Could 9, adhesive rhinestone
Well that is it for today. Believe it or not I have much more yet to share 😀 So stop by tomorrow.
I hope you enjoyed everything I had to share today.
Critters with Heart
Feb 3, 2010 Author: mytime | Filed under: Cards, Home decor/3-D items, My Time Made Easy, Product Opinions and Must havesI really hope you are getting inspired by all the projects that we are all sharing with you! Many of you will have the NEW! images delivered to your mailbox any time now.
Today Mona has an adorable project using the Pretty Packaging template Welcome Home © So go check it out—>HERE!
“MTME from My Home To Yours – planting seeds of friendship”
Today I am going to share some of my most favorite projects with you! They should definitely inspire so many various ideas.
I will be focusing on Critters with Heart © You can definitely check out the last few posts as I have randomly shared some other projects ideas with you.
This is an adorable set that is perfect for ANY time of year, when you want to say something sweet to the one you love. These CUTE little critters all have something in common-each was designed based on a heart! Add a punny sentiment and you are sure to warm the heart of anyone who receives something created with this set.
42 hearts were used in this set!
Can you see the hearts?
- Porcupine – has a heart shaped face, and nose
- Owls – heart shaped face, beak and wings
- Raccoon – heart shaped face, nose, ears, and tail! He/she is also holding a heart in his/her hands
- Little Chick – wings started as a heart, but got separated to make is adorable bird, and the nose was a heart too!
- Chickens – they have heart shaped wings, and the body was a upside-down heart, that was altered. Also the feathers atop their head…..two hearts!
- Piggy – the body was also an upside-down heart, as was the face. Also has heart shaped ears, nose and little heart prints on its bottom!
- Mouse – an obvious heart shared face and nose. Who would have thought that a mouse could be SO CUTE?
Sentiments Include:
- I’m stuck on you
- Owl always love you
- Whoo’s having a birthday?
- You stole my heart
- A little birdie told me…
- What’s up chick?
- You’re a hoot!
- You crack me up
- I love you “sow” much
- You make my heart squeal
- Happy Bird-day!
- Just chicken in
This set is also available in the Digital Format!!
Now you can download these images immediately and get started on making some of the cutest projects. Digital images are wonderful because they can be resized, cropped, layered, colored, flipped…..endless possibilities! Step by Step photo directions are included with every digital stamp download file. They teach you how to crop, color and resize! In just a few clicks you will be making wonderful gifts, cards, treats and tags!
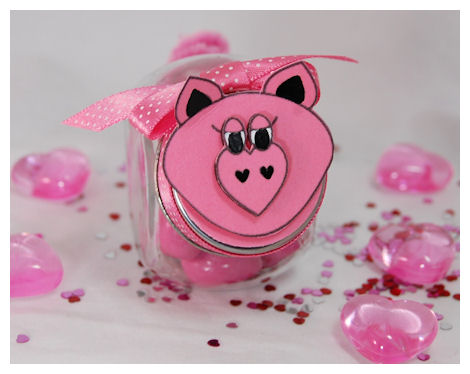
I used the Digital stamp image here to create a little piggy jar!
This little piggy
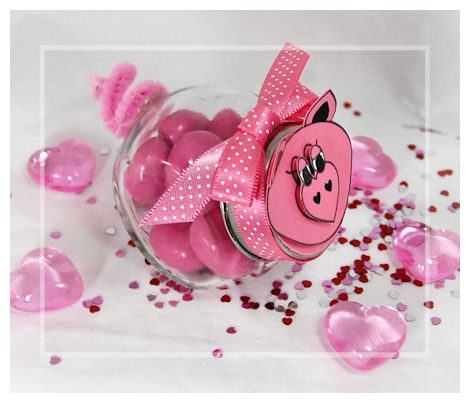
This little jar was purchased in the Bridal section at Michael’s. You can buy a large pack of these cute candy jars for only $9.99 (after 50%off coupon)
This is a super sweet and simple treat idea!
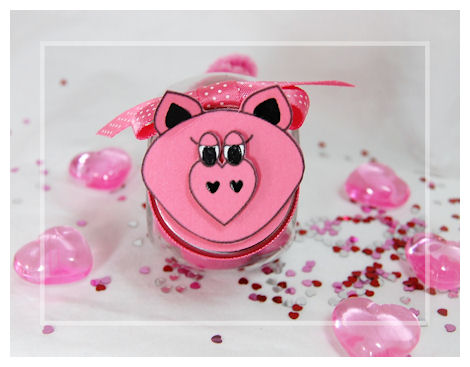
I simply resized my digital stamp image of the pig’s head to be about 2 inches big! I printed it twice onto pink cardstock, then cut it out!
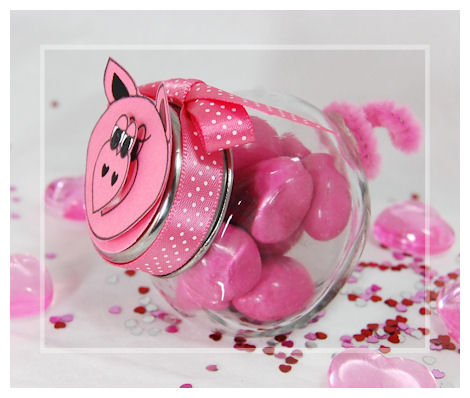
I layered the eyes and snout on dimensionals for a more realistic look, then Layered it on my jar lid (which I already covered with a punched pink circle). Tied a bow around the “neck”.

Then I took a pink pipe cleaner-which was cut down, wrapped it around a pencil, added a clear glue dot the the back of the jar, and adhered the curly tail I made……and BAM! ADORABLE pig jar. This took only a couple of minutes to make.

This is filled with only PINK peanut M&M’s. Does it get ANY cuter?
I think so!
I squealed with delight after this project came together in about a minute!
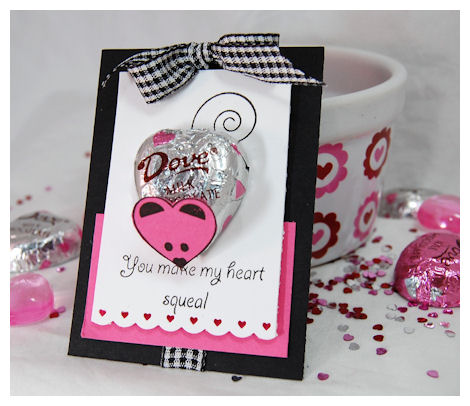
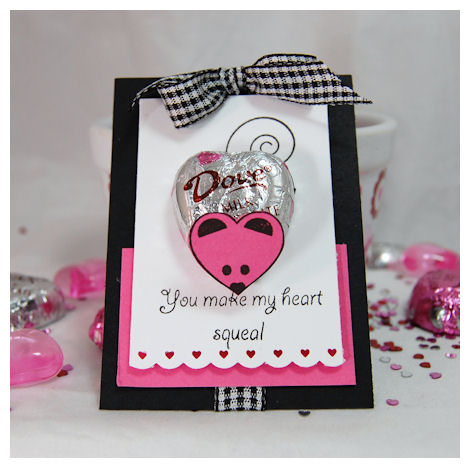
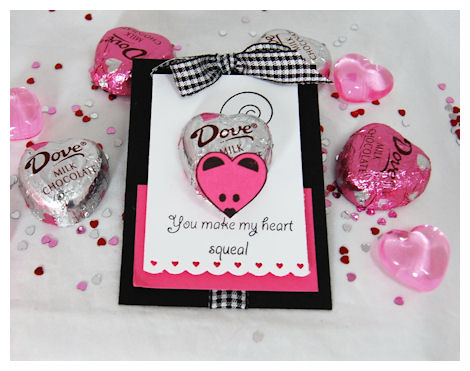
I stamped the mouse tail onto my cardstock base. Added a SWEET Dove Chocolate candy with a glue dot. They also have other heart shaped candies for sale like store brand or REESE Peanut Butter cups in hearts this year (they didn’t last till I actually made this projects! OOPS! ). YOu could even use this concept for Lollipops!!! Now that would be CUTE! I then stamped my mouse head on pink cardstock, cut out, ad added with a glue dot. Easy Peasy! The kids could definitely make these!
Well this set is certainly geared towards sending love ALL year long, but me being a mom, and having THREE kids in school, each with about 20 kids per class, I like to try to be economical and have my kids MAKE their own valentines.
It can’t get much easier, and certainly not any cuter!
Then I came up with this idea the other day that I think is SOOOOO cute.
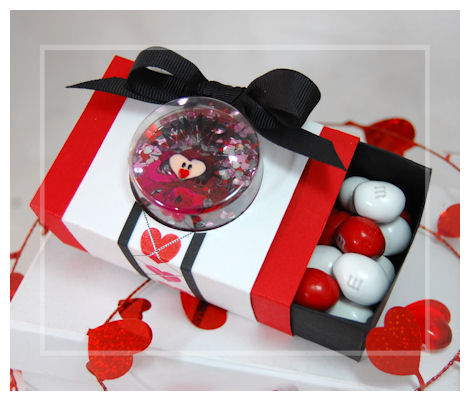
Stuck on you
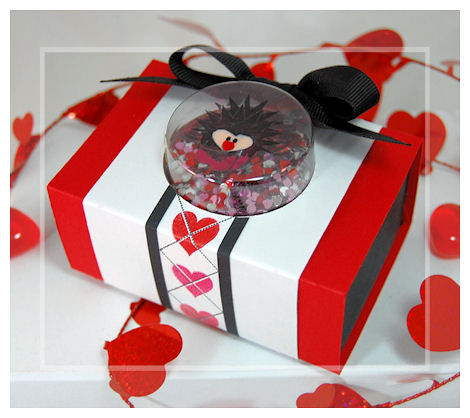
This uses the adorable Under Cover © Pretty Packaging template. I used my Cricut to cut the circle when I cut my template sliding cover. This made it ULTRA quick! I was also able to cut my white layer too.
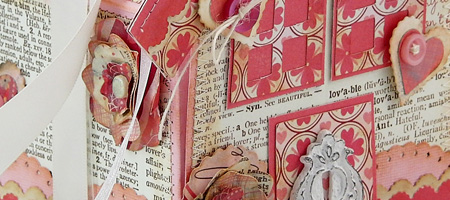
I stamped the heart argyle from Argyle Amazement on the decorative band I made. I LOVE that set. I LOVE the heart argyle. It was inspired by a sweater my daughters have. The argyle is so versatile.
I then made the top a shaker box, using the Stampin Up! treat cups! I often use Crystal Light cups but they are frosted so you wouldn’t be able to see the heart confetti/glitter.
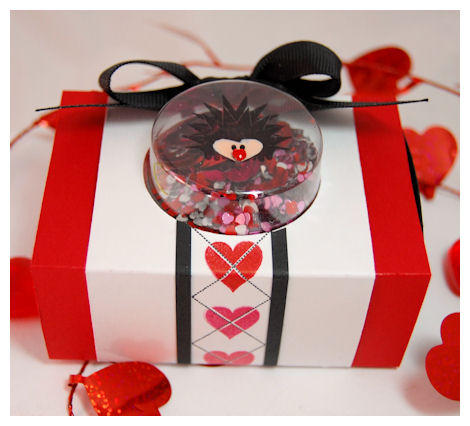
I stamped my porcupine in black StazOn, onto the cup bottom.
I filled the cup with some heart glitter. Adhered a piece of acetate to the cup bottom to keep the glitter in, and still allow you to get a PEEK in the box!
For my porcupine I took my singlo gel pen in a peachy color and colored the inside of the cup, so you can see the ADORABLE porcupine face. Put a adhesive heart shaped rhinestone on the nose 😀
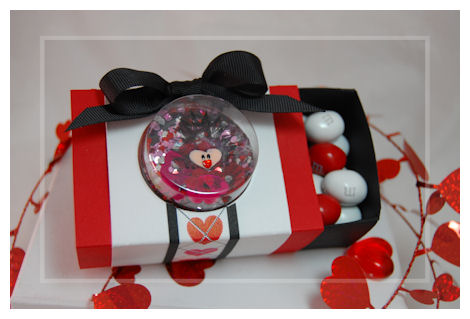
Filled this up with some M&M’s and it was done!
Supplies:
This little piggy
Pretty Impressions Stamps: Critters with Heart Digital image
Cardstock: Couture Cardstock: Sweetheart
White singlo gel pen
Glass jar from Michael’s
May Arts ribbon
M&M’s
You make my heart squeal
Pretty Impressions Stamps: Critters with Heart
Cardstock: Couture Cardstock: Sweet Heart, OSW white, raven
Scallop heart border punch by Martha Stewart
Dove Chocolate
Gingham Ribbon
Stuck on you
Pretty Impressions Stamps: Critters with Heart , Argyle Amazement
Pretty Packaging template: Under Cover ©
Cardstock: Couture Cardstock: Candied Apple, OSW white, raven
acetate
Ink: Black StazOn, singlo gel pen, red, pink and berry
Shaker cup by SU!
Heart glitter/confetti
Adhesive heart rhinestone
Grosgrain ribbon in black
So that is all for today! I have MUCH more to share with you for tomorrow, so stay tuned!!
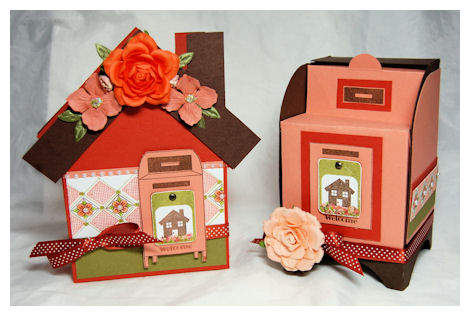
Welcome Home!
Feb 2, 2010 Author: mytime | Filed under: Cards, Home decor/3-D items, My Time Made EasyHope you are enjoying all the projects the team and I have had to share 😀
Today Katie Cotton has an amazing sample for you. So be sure to check her out!
Here is a peek:

As soon as Lauren sent us the template for Welcome Home I instantly fell in love and knew just what I wanted to do with it! I wanted to fashion it into a bank and use it to accept donations for the Thornwell Children’s Home, a cause my church regularly supports. I wanted the little home to have the feel of being surrounded and filled with Love! Using the super cute heart from You’ve Got Mail and digi paper from Cute Critters, I feel like I’ve accomplished my mission! This little box will sit next to a box of cards that church members may “purchase” with all the proceeds going to the Children’s Home.It is so funny to me how one simple idea, can spark another, then that idea turns into yet another…..with a totally different outcome.
That is basically how my brain works. I generally am working on a project, and “something” within that project spurs and idea, that causes me to stop dead in my tracks, and implement my “vision”. If only I had more crafting hours in a day (sigh).
So this is the story of how Welcome Home © was created!
It began with a card…..
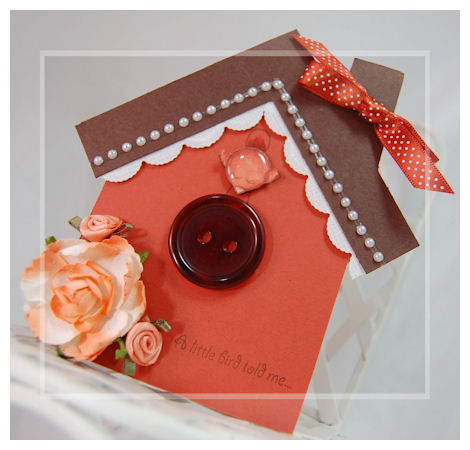
A little bird told me…
Inside it says “that you are adding an egg to the nest”
One of our friends is expecting their second baby! People usually don’t acknowledge a blessing like that, if it isn’t your first. I always try to make as big of a deal as I can no matter HOW many kids they have.
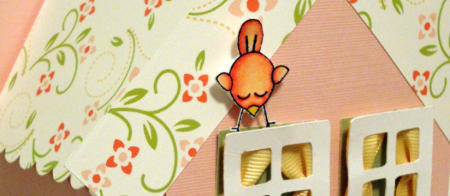
I had my adorable little bird from Critters with Heart ©, all stamped, colored and cut out. I even added a page pebble to the body (SO CUTE!). I had bought this really sweet mini birdhouse, on a stand (at Target) that I was going to dress up and put my little bird on. Once I got to stamping I felt the NEED to be more creative! I just couldn’t put it on that house!
So I thought…. how cute it would be to create my own little house shaped card. I could use a LARGE button has the “bird hole”!
I thought…..and thought. I was looking at another project I had done using the house image from You’ve Got Mail. That is when the lights in my head came on. Truth be told I think that SIMPLE house it that set is just the cutest house ever! So small and simple. I just love it. So…..I decided to use that as my inspiration for the “birdhouse” card.
I got to creating by using my house stamp from You’ve Got Mail © as my “template”. Before I knew it this card was created.
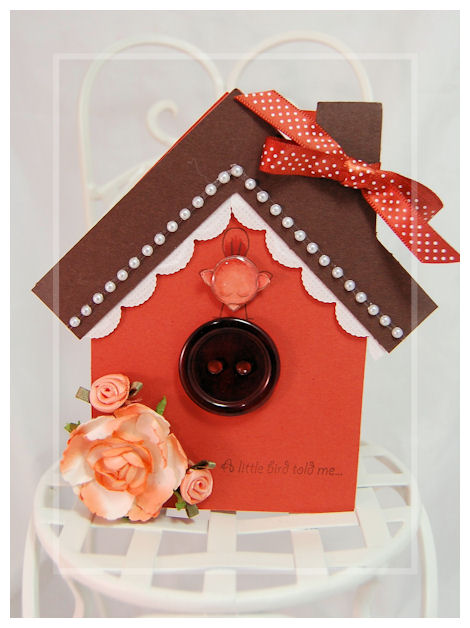
I just layered 2 house pieces together. I scored the pack piece a 1/4 inch, and adhered to my card front with Scor-Tape. CUTE! CUTE! I kept it simple since I wanted the focus to be that cute lil bird!
Once it was ALL done I thought it would be the cutest cut file! I knew if I posted the card people would ask for it. So it became a cut file.
Then I moved on to make another sample with it.
Another reason I wanted a simple house shaped card….

You’ve Got Mail © is an ADORABLE mail set for ALL occasions! I’ve already received MANY suggestions of add-ons too :DI thought it would be perfect ON the house shaped card!
This was the TINY peek you saw the other day.

I love this set to pieces. SO versatile.
Once I made the mailbox, and added some flower soft I was in love. I used the Argyle Amazement © set for some detail, and was about done with my would be “card”.
As I completed it I thought “Wow! This would make a cute basket/box to give a gift in!” I planned on making a VERY simple connecting piece. As I got started I decided that I want it enclosed!
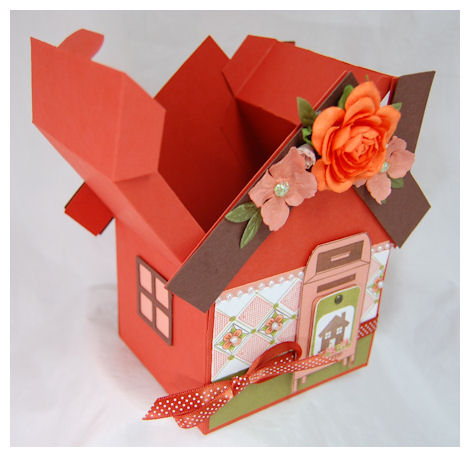
So one thing lead to another……

and the tab tuck in method was complete!

I was bouncing at the possibilities!
Now it is really cute like this, but sometimes you *may* want to add a roof. This is an option that is included with the instructions.
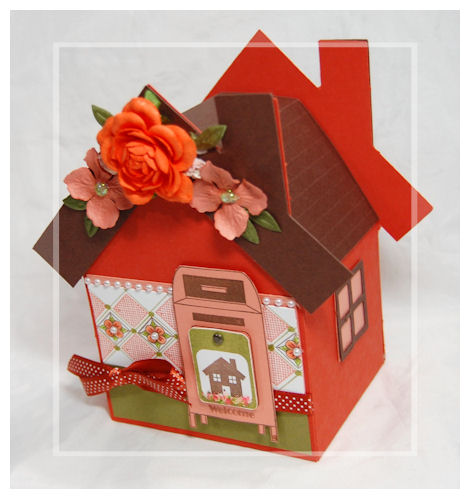
So there you have it! HOW this particular project turned from almost never being, to a cut file, grown template! Sometimes my brain is much faster than my hands!! Thankfully I was able to keep up. Often I end up just sketching stuff because I can’t get to it yet.
This is an adorable house shaped template that can be used over and over again!!
Be it for holidays, or every day. Welcome Home © is an ADORABLE house shaped box, with a fun tabbed tuck in closure. Those of you with personal cutters, this can really extend the possibilities of this template for sure!
Use the front and back panels as a shaped card, tag or scrapbook embellishment. I used it on a tag in a previous post.
Use it as a gift box for any occasion such as Welcome Home, Welcome to the Neighborhood, from our house to your house, get well, cheer up, thinking of you……you get the idea.
Fill it with a small house planter, flower seeds, coffee, tea, candles, bath products, a stuffed animal or doll, maybe some art supplies for a child to “decorate” it (perfect for a little party too!! VERY inexpensive party favor-turned party project). Endless uses and EASY to assemble.
Sometimes we just need a quick and cute shaped box! Nothing that takes too long to assemble, but still says “I care” so I made this for you. This one certainly fits that description.
All there is to decide is what project idea using this template will you “welcome”?
Now another idea I have is to show how you can MAXIMIZE your supplies! If you see a style or design it can be adapted to just about any type of project!
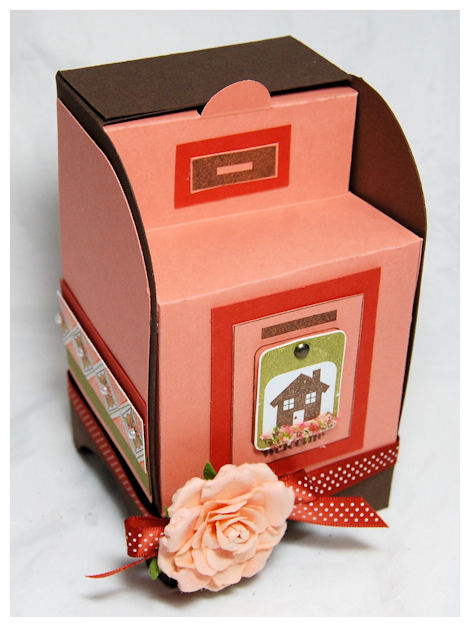
I took all the same elements in the 2 Welcome Home © samples, and created a third. How about a You’ve Got Mail © template to match?
Our friends just moved in together so we wanted to bring them a little something for their scantly decorated apartment 😀
So I used this set for presenting our gift.
Inside this Welcome Home © gift box I have THIS scented oil warmer.
I didn’t get a photo because I just filled it today.
In here I have a gift card to Yankee Candle so they can pick out their own scent for the Oil Warmer. I also added a fee Peanut-butter Lindt Chocolates, to “fill” it.
Not really a GUY gift…..but it may mask the odor from his dirty socks that he leaves all over the house! LOL! AH! NEW love!!
Supplies:
A little birdie…
Pretty Impressions © stamps: Critters with Heart
Pretty Packaging © templates: Welcome Home ©
Cardstock: Couture Cardstock:Rusty Hinge, Ganache
Ink: Copic markers, Pallette brown
Prima Flowers, Satin mini flowers by M’s,Adhesive Pearls,
Making Memories Page Pebble, Button by Foo Fa La
—————————————————————
Welcome Home
Pretty Impressions © stamps: You;ve Got Mail, Argyle Amazement
Pretty Packaging © templates: Welcome Home
Cardstock: Couture Cardstock: Rusty Hinge, Ganache, OSW white
Prima Flowers and Adhesive Pearls, brad
Scor-Pal to create lines in house.
—————————————————————-
You’ve Got Mail : Welcome Home
Pretty Impressions © stamps: You’ve Got Mail, Argyle Amazement
Cardstock: Couture Cardstock: Rusty Hinge, OSW White SU!: Cameo Coral
Flower soft, Prima Flower, adhesive pearls and brad.
—————————————————————–
Well that is all for today.
I hope you enjoyed the samples today.
So much more to share tomorrow! Until then.
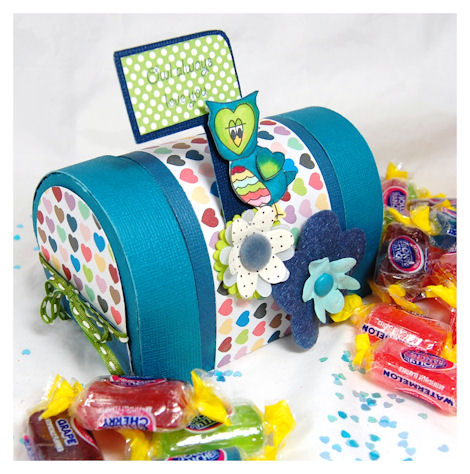
Happy Mail and some Cute Critters!
Feb 1, 2010 Author: mytime | Filed under: Cards, Home decor/3-D items, My Time Made EasyWell I hope you are ready to see some more great projects! I’m long winded again, so be prepared!
I apologize for that. I just can’t help myself. When I get excited I RAMBLE and spew every thought imaginable.
So when you are done here…….Be sure to check out the Design Team: )
All projects shared are from the February Release at My Time Made Easy © LLC
Each design team member is sharing a various template/stamp project combo for you! You are sure to be inspired. One of the best things about our collection is the INSTANT availability.
Today I am sharing some samples using the Pretty Packaging called Happy Mail ©, and our stamp set Critters with Heart ©!
Critters with Heart © is so super cute! Read the details on this set HERE. It is available in digital format, and our acrylic images! It wasn’t created to coordinate with the Happy Mail © template, but it does go so well together.
Owl always love you-
CUTE! CUTE! CUTE!
Did I say cute? I LOVE the owl. Owls actually have a heart shaped face if you look closely enough. I love the 2 owls in this set. I made them because my girls LOVE owls. They actually have owl bedding in their bedroom. I had to make 2-one for Alexa and one for Amber (at least that is what I was told to do! LOL!)
I make LOTS of girly stuff. It just comes EASY.This was my attempt at a BOY themed mailbox. Sadly I could NOT resist the urge to add the flowers :C It just felt perfect. I quickly saw the BOY themed mailbox idea slide away as I added the 5 flowers. Still, it is perfect. Noah “carefully” ripped the flowers off before putting it in his room. He was nice enough to hand them back to me so I could “re-use” them on a project that wasn’t for him (that was rather funny).
I’m in love with the heart pattern in the Cute Critters © Digital Paper. On the flag I used the Darling Dots © pattern. Did you realize you can print s amall swatch for projects like that? So cool
I thought this was a great mix of colors boy or girl!
I wanted to play up on the 2 blues in the pattern, to make it boyish. A collection of colors I’ve never used together, but work (I think! LOL!). I know I am guilty of not doing enough boyish/masculine projects. When I showed this one to my hubby he was NOT liking it AT ALL! I almost ditched it all together. The more I looked at it, it grew on me 😀 So no matter what he thinks, I think I like it.

I thought that the Jolly Rancher candies were a PERFECT match. Noah LOVES candy, and the dentist LOVES Noah. He was in heaven over this treat.
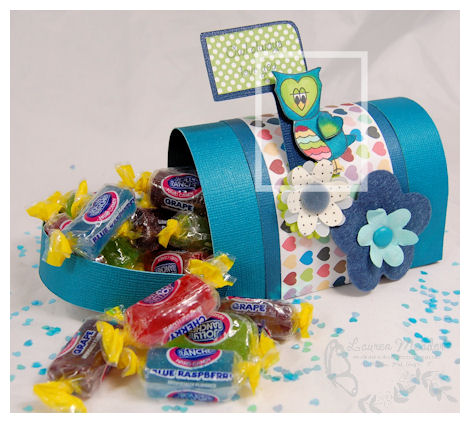
My own children have loved using this template, and I will share some photos of their works of he”art” later this week. Every afternoon we have a craft hour. The kids and I do a “project”. This is where the templates come in handy!!
This is how I balance “family” and “mommy time”. They get my time first (and are usually sick of me by the end of the hour) and then I can do what I want/need for craft time, and NOT feel so guilty! They are ready to take some time to spend on their own. It is good for mommy and good for the kids to learn to occupy themselves as well. They are old enough to do that too, so that helps too.
Often my girls will move on to a solo craft project, and Noah, well he’d rather ditch craft/mommy time for video games ANY day!
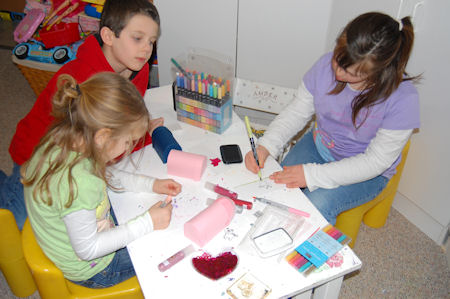
See. Here are the girls during craft time. Hard at work. Amber is stamping, Alexa is coloring….and Noah looks BORED TO DEATH!
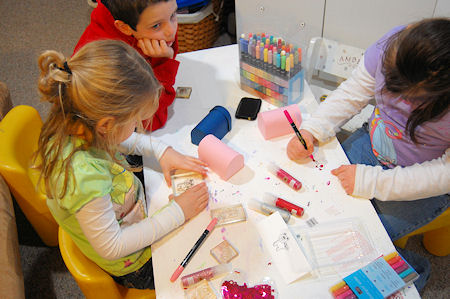
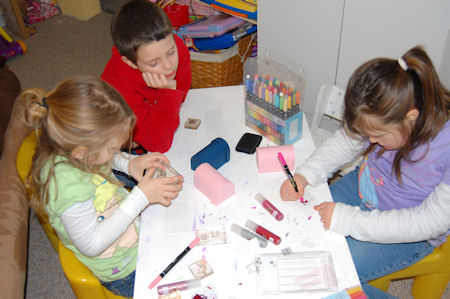
and another one….BORED! BORED! BORED! I don’t think he touched the mailbox at all.
I did manage to get a smile out of him.
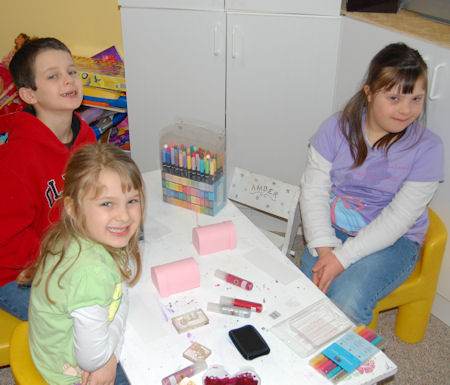
See they have their own space with their own supplies, so I don’t have to fret over my things getting ruined. Kids LOVE having their own craft supplies, and being able to use them as they see fit. This is where we do all our art projects. The playroom is right off my craft room so I can easily help out when needed too.
We are still completing the details on our mailboxes, that is why we are delayed. We had to take a “creative break” to attend some birthday parties, and go and see Disney Princesses On Ice! THAT was amazing. Poor Alexa was TRAUMATIZED by the fact that Snow White dies after eating the apple! They even put her in a “coffin”, to only wheel her off and complete her happy ending later in the show. BOY did that make some of the show unbearable. We tried to tell her it wasn’t “real”, but she is very literal, and couldn’t get past what she SAW. Anyway….thankfully the Prince kissed her awake before intermission! LOL! I’m excited to get to sharing some more photos of my kids and their artsy stuff. Seems like forever since I’ve posted anything here with them :C BAD MOMMY.
OK now I have another sample using Happy Mail ©
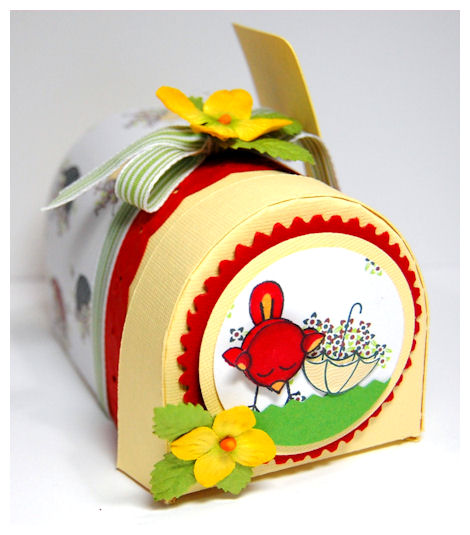
Sending you Sunshine
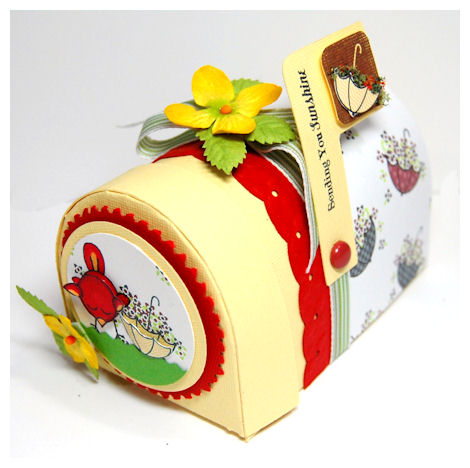
For this sample I chose to use the ADORABLE little chickie in the set, and combined it with the sentiments and images from You’ve Got Mail ©!
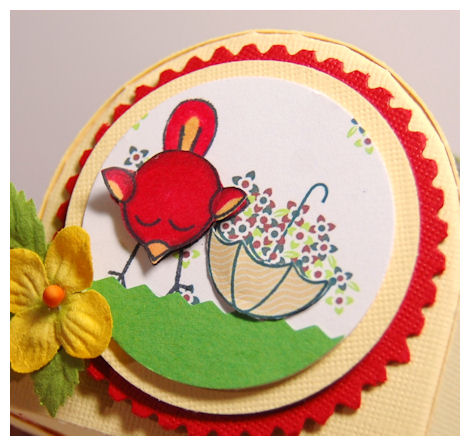
How cute is that lil chickie? Love him in red & yellow. I also love lots of dimension. It is just one of those things that is quick and easy, but makes a huge impact on a project! On this the bird is popped up as is the umbrella.
This is SO spring to me.
I have to say this umbrella patterned paper from the A Loving Heart © collection is my FAVORITE! Kristin did an amazing job on all the paper! No surprise there.
I was SO inspired by the umbrellas in the pattern that I mimicked the design on my mail flag.
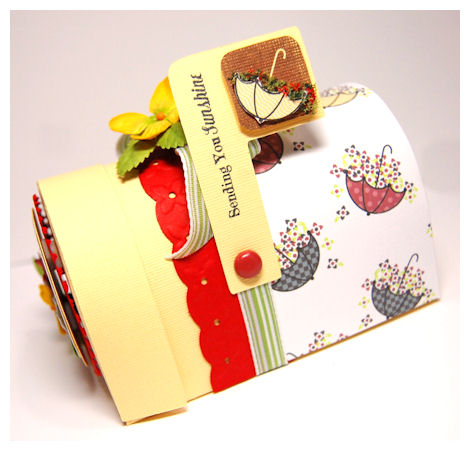
I stamped the umbrella on my flag in brown ink. I stamped it again on some scrap paper, and cut it out. I added Flower Soft to it, so like the paper, flowers appeared to overflow from it. LOVE THAT!!
Now my idea of sending someone a CHEER UP sort of gift, is something along the lines of pampering
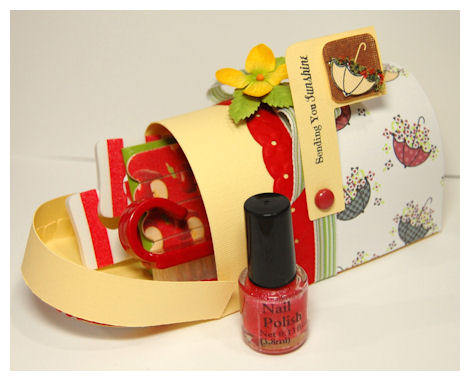
Inside the mailbox I put a pedicure set from the Target $1 spot, and some nail polish. Nothing overly fancy, but it sure makes a super cute gift, don’t you think?
This template truly goes together in a snap.
Now obviously this template is your “traditional” mailbox! If you are like me, you have scoured store isles in search of the tin version of this, year after year. The FUNNY thing about the tin version is we buy it to ALTER/COVER! LOL! Why not make your own from cardstock?
This makes it customizable, easy and AFFORDABLE! Now you can make one for everyone, and afford to fill’er up! Cardstock usually costa a MAX of 0.20 cents a sheet, and this can use ONE 12 X 12 piece!
Don’t forget you can easily resize the template if you have a personal cutting machine, to suit larger or smaller projects. Even better.
You know I love matchy matchy stuff. Every good gift needs a card right?
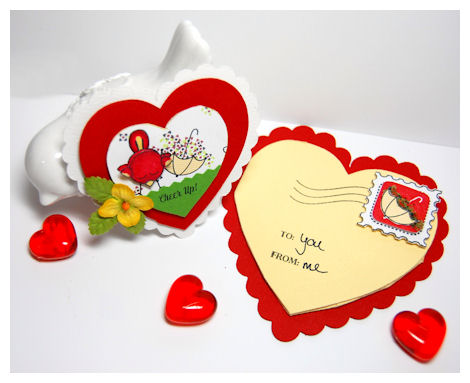
Speaking of smaller projects…..did you see our Love Notes © Cut Files?

I wanted to whip up a simple card to tuck inside my template.
Here I used the cut files to create my card. Same design as the mailbox. Scallop layer in white. Main card layer in red. You don’t have to add the scallop layer, but it sure is PRETTY! The patterned paper being my main layer. Quick and cute.
Then I made my envelope pocket. It is just a cute pocket that your heart shaped card can slip in to.
Now how cute would these be for Valentines day? You’d pay MORE for ONE box of valentines that this cut file! Your children can have the fun and pride of making their own too!
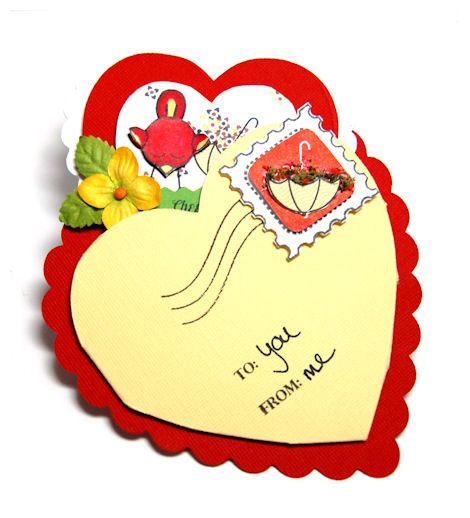
On this I made the scallop layer meant for the heart notecard, larger, so it layered on to my heart pocket. I used the You’ve Got Mail set to decorate it too. Cute eh?
Another FAB project for the kids to do of ALL ages! My kids LOVE the Critters with Heart set!
Noah’s favorite is the porcupine. Amber loves the owls and Alexa, she loves the pig! LOL!
What is YOUR favorite Critter in the set? I’d love to hear it!
Thank you for stopping by! Lots more to come tomorrow, so I hope to see you back here.
My Etsy

Who I Designed For
Blogroll
- Alicia
- Alli Miles
- Ally Blankenship
- Amber
- Andi @ crafts on a whim
- Angel R
- Angie Z
- Anne Kranitz
- Becky O
- Bee
- Beth Silaka
- Bethany Paull
- Beverly Nash
- Bobbie
- Cambria
- Cammie
- Card of the Week
- Card Positioning System (CPS)
- Cards for Cancer
- Catherine Doucette
- Charmaine
- Cheryl Sims
- Chriss Rollins
- Christina
- Christine Ewing
- Christine Wooden
- Colleen Schaan
- Craft Critique
- Craft Gossip
- Crystal
- Dawn Easton
- Emily Giovanni
- Geny
- Holly
- Igne Groot
- Inspirational Craft Blogs
- Irene
- Jami Sibley
- Jeanne Streiff
- Jen del Muro
- Jeni Bond
- JenMarie
- Jenn Balcer
- Jenn Diercks
- Jenn O
- Jennifer E
- Jennifer Mick
- Jennifer Pereda
- Jennifer-Sweet Treat
- Joanne Basile
- Jodi Collins
- Julia Stainton
- Julie Masse
- Karen
- Kathryn Berthiaume
- Katie Cotton
- Kelley Holland
- Kendra
- Kim Scholfield
- Kris’s Color Stripes! Get inspired here
- Kristen Dubosque
- Kristin Eberline
- Kristine
- Laura @ Sunshine Stamper
- Laura Turnmire
- Laurie Schmidlin
- Lesa Rapp
- Linda Duke
- Linda-LSN
- Lindsey Botkin
- Lisa (lakind scs)
- Lisa Kind
- Lori Craig
- Maggie
- Mara Campbell
- Maria
- Maria Levine
- Mary
- MaryJo
- Melanie M
- Monique Hansen
- Moxie Fab World
- Pam Imholz
- PaperCrafts Connection
- Peppers and Pollywogs Kids party site
- Rebecca Grohall
- Rita
- Robyn
- Rose Ann
- Sarah Vrolyk
- Sharon Harnist
- Sharon Johnson
- Sharon Rivera (a chemisrty with paper)
- Sherrie
- Sophia Landry
- Storage Units, Ink, & More Blog
- Sue Berker
- Susan (Rainy)
- Tangii Crane
- Tracy
- Tricia Traxler
- Trudee
- Velta
- VivLyn
- Zena
MTME Pretty Palette Color Team
MTME Pretty Patterns Sketch Team
My Time Made Easy TM LLC
Shop till you drop!
Lauren Meader
About Me
Copyrighted material
Subscribe To My Blog
Pages
- About me
- Alexa’s Story!
- My Crafty Corner!
- My Time Made Easy™ LLC
- Our Make A Wish Trip to Disney!
- Resume/Publication List
Calendar
Archives
- August 2013
- July 2013
- June 2013
- May 2013
- April 2013
- March 2013
- February 2013
- January 2013
- December 2012
- November 2012
- October 2012
- September 2012
- August 2012
- July 2012
- June 2012
- May 2012
- April 2012
- March 2012
- February 2012
- January 2012
- December 2011
- November 2011
- October 2011
- September 2011
- August 2011
- July 2011
- June 2011
- May 2011
- April 2011
- March 2011
- February 2011
- January 2011
- December 2010
- November 2010
- October 2010
- September 2010
- August 2010
- July 2010
- June 2010
- May 2010
- April 2010
- March 2010
- February 2010
- January 2010
- December 2009
- November 2009
- October 2009
- September 2009
- August 2009
- July 2009
- June 2009
- May 2009
- April 2009
- March 2009
- February 2009
- January 2009
- December 2008
- November 2008
- October 2008
- September 2008
- August 2008
- July 2008
- June 2008
- May 2008
- April 2008
- March 2008
- February 2008
- January 2008
- December 2007
- November 2007
- October 2007
- September 2007
- August 2007
- July 2007
- June 2007
- May 2007
- April 2007
- March 2007
- January 2007
Categories
- About Me
- All That Scraps
- blogger challenge
- camera/photo play
- Cards
- Contests
- family stuff
- FOR SALE
- Home decor/3-D items
- How to FAKE it!
- Introduction
- JUGS Challenge
- JustRite Stampers
- Lizzie Anne Designs
- My family stuff
- My Stamping Space
- My Time Made Easy
- My Time To Color Challenge
- My Time to Create Challenge
- My Timeless Template Challenge
- My Timeless Templates
- Mytime Mail
- MYTIME MOVIE/VIDEOs
- Papertrey Newsletter
- Pink Cat Studio
- Pretty Palette Challenge
- Pretty Patterns Sketch
- Product Opinions and Must haves
- Recipe's
- Saturday Sketch
- Smilebox Creations
- Stampavie
- Tutorials
- Uncategorized
- videos
Most Popular
- Create your own Onesie Card Tutorial-and important NOTE! PLEASE READ (2529)
- Saturday Sketch-Boxed bag holder (2333)
- Going GREEN! Fancy Flower Flourish-Closure Video (1478)
- Fabulous Favorite - Giveaway! (1336)
- a Prayer Request (1231)
- QUICK-Easter Baskets from Nestabilities-PTI style-and blog challenge (1063)
- Teaser Sketch (999)
- February Release Giveway! (and a little peek) (996)
- Group Post and Rambling Rose Video Tutorial (985)
- GIVEAWAY! Who wants it all?! (895)
Recent Comments (RSS)
- 바카라사이트: 여기 처음 왔어요. 나는이 게시판을
- 야동티비: I was surfing the Internet
- 바카라사이트: 비슷한 주제에 대한 흥미로운 정보를
- 바카라사이트: "여기에 제공해 주신 귀중한 정보와
- 온라인홀덤: 유익한 웹 사이트를 게시하는 데
- 홀덤나라: 나는 당신의 블로그를 정말 좋아합니다.
- lisa: Technology, too, has left an
- 주소모음: 흠 !! 이 블로그는 정말
- FutureGen Apps: Thank You For Sharing fantastic
- 웹툰사이트: 터키에서 온라인 스포츠 베팅을 할
Copyright © 2007 - My Time, My Creations, My Stampendence - is proudly powered by WordPress
This blog has been Tweaked and Designed by Sara Williams